
Flowers
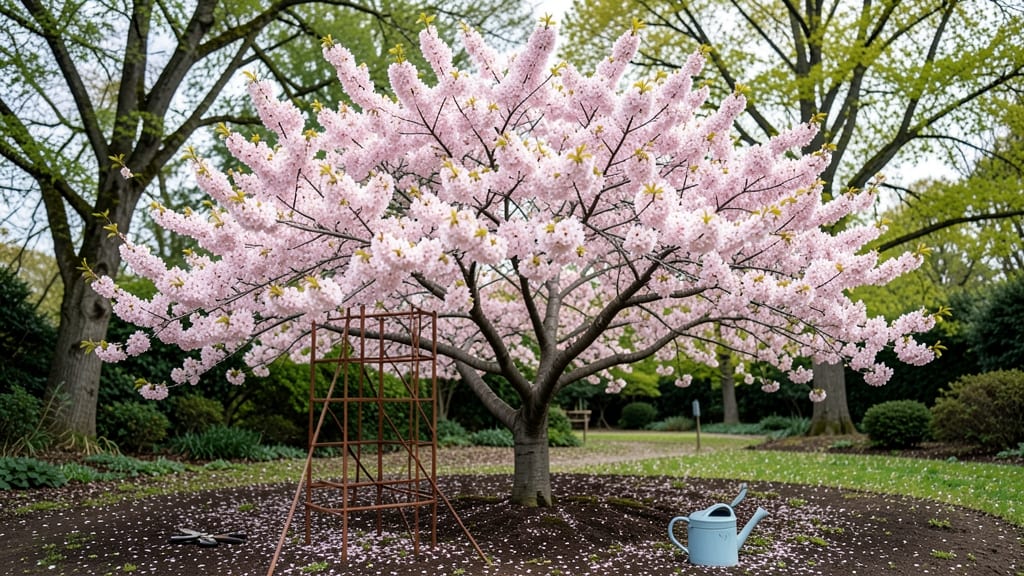
Growing Yoshino flowering cherries in containers lets you enjoy their iconic pink clouds of bloom without needing a yard. 🌸 The secret to container success lies in matching their needs—well-draining soil, bright light, and just the right amount of space to thrive.
My first attempt nearly failed when I crammed the roots into a too-small pot, but once I upgraded to a 24-inch diameter container, the difference was night and day.
These cherries aren’t just about spring—leaves turn golden in fall, and even the winter branches hold delicate beauty. They’re hardy down to zone 5, so they’ll survive winters in most climates.
The key is choosing a container with drainage holes and a soil mix that mimics their native woodland roots: 60% potting soil, 30% perlite, and 10% compost. Too-heavy soil leads to root rot, while proper drainage keeps them healthy.
You’ll be rewarded with weeks of fragrant blooms that attract pollinators and fill the air with sweetness. Prune lightly after flowering to shape the tree, and fertilize monthly during growing season.
Even in containers, they’ll grow 8-12 feet tall, so plan for a sturdy pot or consider dwarf varieties if space is tight. The payoff? A showstopper that outperforms most small-space trees.
Works for patios, balconies, or even large windowsills with enough light. Here’s how to keep them thriving year after year—no yard required.
📚 In This Guide
- What you need
- Instructions
- Tips and common mistakes
- Wrapping up and next steps
What you need
- ● Container: 1 large, well-draining pot (18–24 inches in diameter) with drainage holes
- ● Pro tip: 💡 Opt for glazed ceramic or heavy plastic to retain moisture without cracking.
- ● Yoshino flowering cherry tree: 1 dwarf or container-adapted cultivar (e.g., Prunus × yedoensis ‘Akebono’ or ‘Shidare Yoshino’)
- ● Size: 3–5 gallons (1–2 feet tall) for immediate blooms.
- ● Soil: 5–10 gallons of well-draining potting mix (e.g., 60% premium potting soil, 30% perlite, 10% compost)
- ○ Optional: Add 1 cup of slow-release fertilizer (10-10-10 or cherry-tree specific) for nutrients.
- ● Tools: 1 pair of pruning shears (sterilized)
- ● 1 trowel or small shovel
- ● 1 watering can with a fine rose nozzle
- ● Decorative elements: Moss or mulch (e.g., Thymus serpyllum) for a natural look
- ● Miniature rocks or pebbles for drainage aesthetics
- ● Support: 1 small bamboo stake (if training a weeping variety like ‘Shidare Yoshino’)
- ● Seasonal care: 1 lightweight frost cloth (for winter protection in cold climates)
- ● 1 pH test kit (to monitor soil acidity, ideal: 6.0–7.0)
How to cultivate a Yoshino cherry tree in containers
This delicate beauty thrives with the right container setup and seasonal care.
🪴 Step 1: Select the Right Container and Drainage System
Choose a 5-gallon or larger container with drainage holes—Yoshino cherries hate soggy roots. I prefer unglazed ceramic or fabric grow bags because they allow excess moisture to evaporate while maintaining root aeration. If your container lacks drainage, drill ¼-inch holes along the bottom and add a 2-inch layer of gravel to prevent soil from clogging them.
Here's the thing—Yoshino cherries grow 15-25 feet tall in nature, so even in containers, they need deep roots. A 24-inch deep pot gives roots room to establish before they hit the bottom. If you're using a shallower container, opt for a dwarf cultivar like 'Cloud Nine' to prevent root-binding stress.
🌱 Step 2: Prepare a Well-Draining, Nutrient-Rich Soil Mix
Fill the container with a custom blend of 60% high-quality potting mix, 20% perlite, and 20% compost. The potting mix provides structure, perlite prevents compaction, and compost feeds roots gradually. I avoid garden soil—it compacts in containers and suffocates roots.
Before planting, moisten the mix until it's evenly damp but not soggy. Press it down lightly to remove air pockets, then tap the container gently on the table to settle the soil. The goal is a loose, fluffy texture that allows roots to spread easily. If the mix feels dry after a week, add a slow-release fertilizer like 10-10-10 at ½ the recommended rate to avoid burning tender roots.
☀️ Step 3: Plant and Position for Optimal Light and Airflow
Dig a hole twice as wide as the root ball and place the Yoshino cherry at the same depth it was growing before. Gently firm the soil around the roots, then water deeply until it drains from the bottom. This ensures the root ball settles without air gaps.
Position your container in full sun (6+ hours daily)—Yoshino cherries need bright light to produce their iconic pale pink, fragrant blooms. A south-facing spot works best, but if you're in a hot climate, provide afternoon shade to prevent leaf scorch. Watch for yellowing leaves—this signals either overwatering or insufficient light. Adjust accordingly.
💧 Step 4: Water and Fertilize for Three-Season Bloom Success
Water when the top 2 inches of soil feel dry—Yoshino cherries prefer consistent moisture but hate soggy roots. In summer, I water every 2-3 days, while winter watering drops to once a week. Always water at the base, not overhead, to prevent fungal diseases like powdery mildew.
Fertilize twice a year: once in early spring (when buds swell) and again in mid-summer (after blooming). Use a balanced, slow-release fertilizer at half strength—Yoshino cherries are sensitive to excess salts. If leaves yellow between veins, it’s a sign of over-fertilization. Flush the soil with water to cleanse it.
✂️ Step 5: Prune and Protect for Longevity
Prune immediately after blooming to shape the tree and encourage next year’s flowers. Remove dead, crossing, or weak branches first, then thin out 10-15% of the canopy to improve airflow. I avoid heavy pruning—Yoshino cherries bloom on old wood, so aggressive cuts reduce future flowers.
Watch for aphids or spider mites—these pests love Yoshino cherries. Spray with neem oil at the first sign of sticky leaves or fine webbing. In winter, move containers to a protected spot (like a garage or under eaves) to shield roots from freezing. Mulch with 2-3 inches of shredded bark to insulate roots and retain moisture.
Tips & tricks for perfect Yoshino flowering cherry cultivation
Here's what nobody tells you about keeping these delicate beauties thriving in containers.
Container Depth Matters: The 24-inch depth recommendation isn't arbitrary—Yoshino cherries develop deep taproots that need space to grow downward. If you're working with shallower containers, consider the 'Cloud Nine' dwarf cultivar specifically bred for container life. I've seen standard Yoshino cherries in 18-inch pots struggle with root-binding after just two years, while the dwarf variety thrives. For extra insurance, add a 4-inch layer of expanded shale at the bottom before your soil mix to create additional rooting space.
Soil Texture Secrets: That 60-20-20 soil blend (potting mix/perlite/compost) creates the perfect balance, but here's the thing about perlite—it breaks down over time. After about 18 months, replace 10% of your soil mix with fresh perlite to maintain that crucial air-to-moisture ratio. I also add ½ cup of worm castings to the compost portion for extra microbial activity that helps roots absorb nutrients more efficiently. This small upgrade makes a noticeable difference in bloom quality.
Light Positioning Tricks: The 6+ hours of full sun requirement is non-negotiable, but here's how to maximize those blooms: rotate your container quarter-turn every 2 weeks so all sides get equal light exposure. This prevents one-sided growth and ensures those iconic pink blossoms develop uniformly. In urban settings with limited space, I've had success using reflective surfaces (like white walls or aluminum foil wrapped around nearby surfaces) to bounce extra light onto the tree during peak afternoon hours.
Winter Protection Strategy: That 2-3 inches of shredded bark mulch recommendation works, but here's the pro move: wrap the container itself in bubble wrap during freezing nights, especially if your winters dip below 20°F. The insulation prevents temperature fluctuations that can stress the roots. I also move my containers onto wooden pallets rather than cold concrete, which adds an extra 5°F of protection to the root zone. This simple layering system has kept my Yoshino cherries blooming reliably for five consecutive winters.
Pro Tips for Yoshino Flowering Cherry
- Here's what nobody tells you about keeping these delicate beauties thriving in containers.
- Container Depth Matters: The 24-inch depth recommendation isn't arbitrary—Yoshino cherries develop deep taproots that need space to grow downward.
- Soil Texture Secrets: That 60-20-20 soil blend (potting mix/perlite/compost) creates the perfect balance, but here's the thing about perlite—it breaks down over time.
Frequently asked questions
Got questions about growing and enjoying Yoshino flowering cherries in containers? Here are some of the most common ones—and their answers!
When is the best time to plant Yoshino flowering cherries in containers?
The ideal time to plant is early spring (after the last frost) or early fall (6-8 weeks before the first frost). This gives roots time to establish before extreme temperatures. If planting in containers, ensure they have drainage holes to prevent root rot.
How long do Yoshino flowering cherries bloom, and when should I expect flowers?
These cherries bloom spectacularly for 1-2 weeks in early spring (typically March-April, depending on your climate zone). For container-grown trees, expect slightly later blooms—usually 1-2 weeks after outdoor trees—since pots can retain cooler soil.
Can Yoshino flowering cherries thrive in containers long-term, or do they need to be planted in the ground eventually?
Yes! With the right care, Yoshino cherries can live 10+ years in containers. Use large pots (20+ gallons), well-draining soil, and prune annually to manage size. However, they’ll eventually outgrow containers—so plan for repotting or ground planting if you want them to reach full maturity.
What pests or diseases should I watch for in container-grown Yoshino cherries?
Common issues include aphids, spider mites, and powdery mildew. To prevent pests, spray leaves with water weekly to deter aphids. For mildew, ensure good airflow and avoid overhead watering. If problems arise, use neem oil or insecticidal soap—always test on a small area first!
Do Yoshino flowering cherries need winter protection in containers?
Containers freeze faster than ground soil, so move pots to a sheltered, unheated garage or wrap them in burlap once temps drop below 20°F (-7°C). Mulch the root ball with straw or leaves for extra insulation. In mild climates, a lightweight frost cloth works too!
Wrapping up and next steps
The Yoshino flowering cherry isn’t just a stunning addition to your garden—it’s a three-season spectacle that brings joy, color, and even a touch of nostalgia with its delicate blooms.
Whether you’re a seasoned gardener or a curious beginner, growing this beauty in containers makes it accessible, adaptable, and utterly rewarding. 🌸
Now that you’re armed with the right tools, tips, and answers, it’s time to roll up your sleeves and create your own little cherry blossom oasis. Start small—pick your container, gather your supplies, and let the magic unfold.
Before you know it, you’ll be sharing your blooming masterpiece with neighbors (and maybe even a few Instagram followers!). Happy planting! 🌱✨