
Pruning
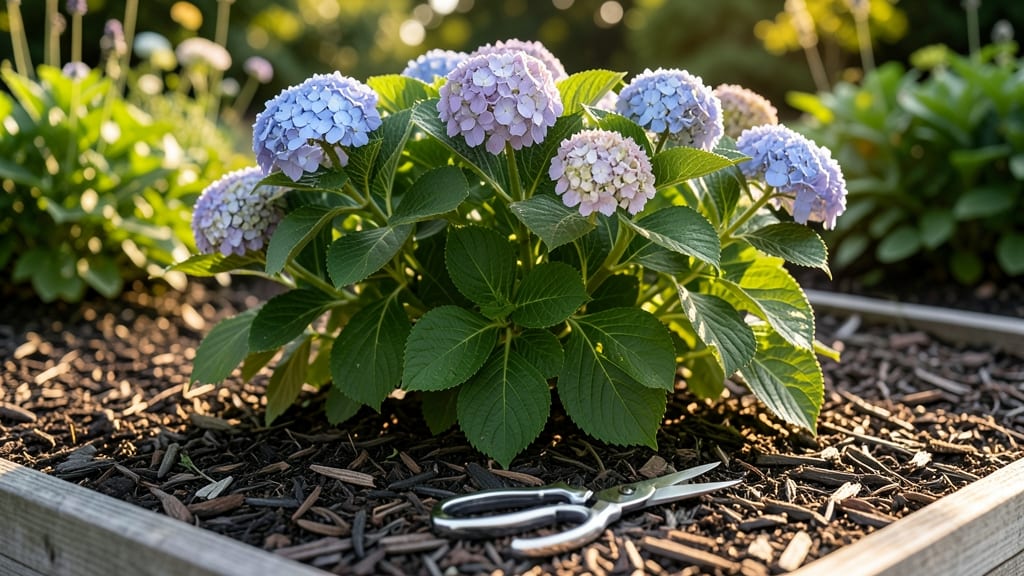
Pruning flowering shrubs isn't just about shaping—it's the secret to year-round blooms that keep your garden vibrant from spring to frost. 🌸 I learned this the hard way after my hydrangeas produced half the flowers they should have, all because I pruned at the wrong time.
The difference between a shrub that looks tired and one that bursts with color comes down to understanding when to cut, how much to remove, and which tools to use.
You don’t need fancy equipment—just a pair of sharp bypass pruners, hand pruners for smaller cuts, and maybe a loppers for thicker branches. The real work happens in the timing: spring-bloomers like lilacs get their haircut right after flowering, while summer-bloomers like roses thrive when pruned in late winter.
And yes, I know that sounds counterintuitive, but trust me, the results speak for themselves.
What you’ll end up with is shrubs that bloom longer, stronger, and more abundantly than ever before. No more sparse stems or weak growth—just lush, healthy plants that become the showstoppers of your garden.
The best part? You’ll also cut back on disease and pests by improving airflow, so your shrubs stay healthier all season long.
This works for everything from hydrangeas to roses, lilacs to abelias—just adjust the timing and technique based on when your shrubs flower. Let’s get those shears out and turn your garden into a nonstop bloom machine!
📚 In This Guide
- What you need
- Instructions
- Tips and common mistakes
- Wrapping up and next steps
What you need
- ● Bypass pruners: Sharp, high-quality pruners (e.g., Felco or Fiskars) for clean cuts on small to medium stems (1/4" to 3/4" diameter). Pro tip: 💡 Always keep them sterilized with rubbing alcohol to prevent disease spread!
- ● Loppers: For thicker branches (3/4" to 2" diameter). Look for bypass or anvil-style with a long handle (24-36") for leverage.
- ○ Pruning saw: A curved-tooth saw (e.g., Corona or Bahco) for branches over 2" in diameter. Optional: A foldable saw for portability.
- ● Garden gloves: Heavy-duty, cut-resistant gloves (e.g., Mechanix or Dr. McGill’s) to protect against thorns and sharp edges.
- ● Ladder or step stool: A stable, extendable ladder (e.g., aluminum or fiberglass) or a 3-step stool for reaching higher branches. Safety first! 🌡️ Use a spotter if working alone.
- ● Disinfectant spray: 70% isopropyl alcohol or a pruning sealant (e.g., Tanglefoot Pruning Sealer) to coat cuts and prevent disease.
- ● Marking twine or flags: For labeling branches to remove (e.g., brightly colored twine or plastic flags).
- ● Sharpie or paint: To mark branches for future reference (e.g., white or silver paint for visibility).
- ● Wheelbarrow or trash bags: For hauling clippings. Compostable bags work great if you’re recycling!
- ● Pruning shears with extension pole: For overhead or hard-to-reach branches (e.g., 3-6 ft. reach).
- ● Research your shrub: Know your plant’s type, growth habit, and blooming season (e.g., spring-bloomers like lilacs vs. summer-bloomers like hydrangeas). ✨ Quick tip: Snap a photo of your shrub before pruning for reference!
- ● Check the weather: Prune on a dry, overcast day to reduce stress on the plant. Avoid pruning in extreme heat or frost.
- ● Gather safety gear: Safety goggles (if sawing) and closed-toe shoes to protect from falling debris.
Step-by-step guide for pruning flowering shrubs
Here's how I keep my flowering shrubs thriving with clean, strategic cuts.
✂️ Step 1: Time Your Cuts for Peak Health
Most flowering shrubs bloom on old wood, so prune immediately after they finish flowering. This gives the plant time to develop new buds for next season. For spring-bloomers like lilacs, wait until late spring or early summer—never cut back in fall or winter when buds are already set.
If you have summer-bloomers like butterfly bush, prune lightly in early spring to shape, then again after flowering to remove dead stems. Always prune when the plant is actively growing—never in dormancy. You'll know it's the right time when you see fresh, vibrant leaves emerging.
🌿 Step 2: Clean and Sharpen Your Tools
Use clean, sharp pruning shears to make precise cuts without crushing stems. I dip my shears in rubbing alcohol between cuts to prevent spreading disease. Dull blades tear stems, creating jagged wounds that take longer to heal and invite infection.
For thicker branches over ½ inch, switch to loppers or a pruning saw. Always cut at a 45-degree angle just above a bud or lateral branch. This encourages new growth in the right direction. If you're working with multiple shrubs, keep a small bucket nearby to collect clippings—it makes cleanup easier.
☀️ Step 3: Remove Dead or Diseased Wood First
Scan the shrub for any dead, damaged, or crossing branches—these take priority. Dead wood is easy to spot: it's brittle, snaps when bent, and has no green underneath the bark. Cut these out completely at the base. Diseased branches often have discolored spots, mold, or oozing sap—remove them immediately and dispose of them in the trash, not your compost.
Next, look for branches that rub against each other. These create wounds that weaken the plant over time. Thin out the smaller of the two branches at its point of origin. You'll notice the shrub's structure opens up, allowing better airflow and sunlight to reach the center—this prevents fungal issues and encourages more blooms.
✂️ Step 4: Shape and Thin for Airflow
Step back and visualize the shrub's natural shape. Use your shears to trim back overgrown branches to maintain a balanced silhouette. For most flowering shrubs, I aim to keep the center open—this prevents dense growth that blocks light and air. Cut back branches that grow inward or downward to create an airy, inviting structure.
When thinning, never remove more than ⅓ of the shrub's foliage in one season. This ensures the plant has enough leaves to photosynthesize and fuel next year's blooms. Focus on removing older stems at the base to encourage younger, more vigorous growth from the bottom up. You'll see new shoots emerge within a few weeks if you've pruned correctly.
💧 Step 5: Finish with a Light Cleanup
After pruning, rake up and dispose of all clippings—especially if they show signs of disease. This prevents reinfection. For healthy shrubs, you can compost the trimmings, but avoid using them on vegetable gardens if disease was present. I also like to give the base of the shrub a light mulch to retain moisture and protect new growth.
Water the shrub thoroughly after pruning to help it recover. The roots need moisture to support new growth, especially if you've made significant cuts. Avoid heavy watering immediately after pruning large branches, though—let the wounds dry and callus over for 1-2 days first. This reduces the risk of infection. You'll know you've done well when the shrub looks balanced, open, and ready for its next burst of blooms.
Tips & tricks for perfect pruning of flowering shrubs
These simple strategies will help you avoid common mistakes and keep your flowering shrubs looking their best for years to come.
Timing is Everything: The instructions mention pruning spring-bloomers like lilacs immediately after flowering, but here's what nobody tells you—this window is actually quite short! For lilacs, that means right after the last bloom falls, typically around late May to early June. If you wait too long, you risk cutting off next year's flower buds that are already forming. I mark my calendar with reminders because I've learned this lesson the hard way after accidentally pruning too late.
Tool Technique: When using pruning shears, make your cuts just above a bud or lateral branch at a 45-degree angle as mentioned in Step 2. Here's the thing: the angle matters more than you think. A proper slanted cut prevents water from pooling on the wound, which reduces the risk of disease. I like to practice this angle on small twigs first to get the feel before tackling thicker branches. For branches over ½ inch, switch to loppers—don't try to force your shears through thicker stems, or you'll end up with ragged cuts.
Visual Cues for Healthy Pruning: In Step 3, when identifying dead wood, look for three key signs: no green underneath the bark, a brittle texture that snaps easily, and a hollow sound when tapped. Healthy wood should be firm and solid. For crossing branches, imagine the shrub's natural shape—remove branches that disrupt this flow. This isn't just about looks; proper thinning improves air circulation, which is crucial for preventing fungal diseases that can ruin your blooms.
Post-Pruning Care: The instructions mention watering thoroughly after pruning, but here's what I do differently: I wait until the next morning to water, especially after significant pruning. This gives the wounds a chance to dry and callus over slightly during that 1-2 day period mentioned in Step 5. I've found this small delay dramatically reduces the risk of infection. Also, I always apply a 2-3 inch layer of mulch around the base after watering—this helps retain moisture and protects new growth from temperature fluctuations.
Pro Tips for Prune Flowering Shrubs
- These simple strategies will help you avoid common mistakes and keep your flowering shrubs looking their best for yea...
- Timing is Everything: The instructions mention pruning spring-bloomers like lilacs immediately after flowering, but h...
- Tool Technique: When using pruning shears, make your cuts just above a bud or lateral branch at a 45-degree angle as ...
Frequently asked questions
Got questions about pruning flowering shrubs? You’re not alone! Here are answers to the most common concerns to help you prune like a pro and keep your shrubs blooming beautifully.
When is the best time to prune flowering shrubs?
The timing depends on your shrub’s bloom cycle. For spring-blooming varieties (like lilacs or forsythia), prune right after flowering to avoid cutting off next year’s buds. For summer- or fall-bloomers (like hydrangeas or abelia), prune in early spring before new growth starts.
Can I prune flowering shrubs in winter?
Winter pruning is tricky—it’s best to avoid it unless you’re dealing with dormant, overgrown shrubs (like boxwoods). Cold weather stresses plants, and pruning too late in winter can expose them to frost damage. If you must prune, do it on a mild day and avoid heavy cuts.
What if I cut off all the flowers before they bloom?
Don’t panic! Most flowering shrubs are resilient. If you accidentally prune too early, focus on light shaping cuts next year and adjust your timing. For spring bloomers, you may see fewer flowers that season, but they’ll rebound. For repeat bloomers, they’ll often compensate with more flowers later.
How do I prune a flowering shrub that’s overgrown?
Tackle overgrowth gradually to avoid shocking the plant. Start by removing 1/3 of the oldest, thickest stems at the base. Thin out crowded branches to improve airflow. For layered shrubs (like hydrangeas), cut back last year’s growth by 1/3 to encourage new, vibrant blooms.
What should I avoid when pruning flowering shrubs?
- Don’t prune in the heat of summer—it stresses plants and attracts pests.
- Avoid “topping” (cutting flat across the top), which creates ugly stubs and weak growth.
- Never prune more than 1/3 of the shrub at once—this can stunt flowering.
- Skip pruning during wet or rainy weather—it spreads disease.
Wrapping up and next steps
Pruning flowering shrubs doesn’t have to be intimidating—with the right timing, tools, and techniques, you can revitalize their growth and enhance their blooms for seasons to come. 🌸 Whether you’re trimming dead wood, shaping for aesthetics, or encouraging fuller foliage, each strategic cut brings your shrubs one step closer to thriving.
Now that you’re armed with expert tips, grab your pruners and give your garden the care it deserves—your future blooms will thank you!
Next step: Start small! Pick one shrub this weekend, apply what you’ve learned, and observe the transformation. Happy pruning! ✂️🌿