
Tools
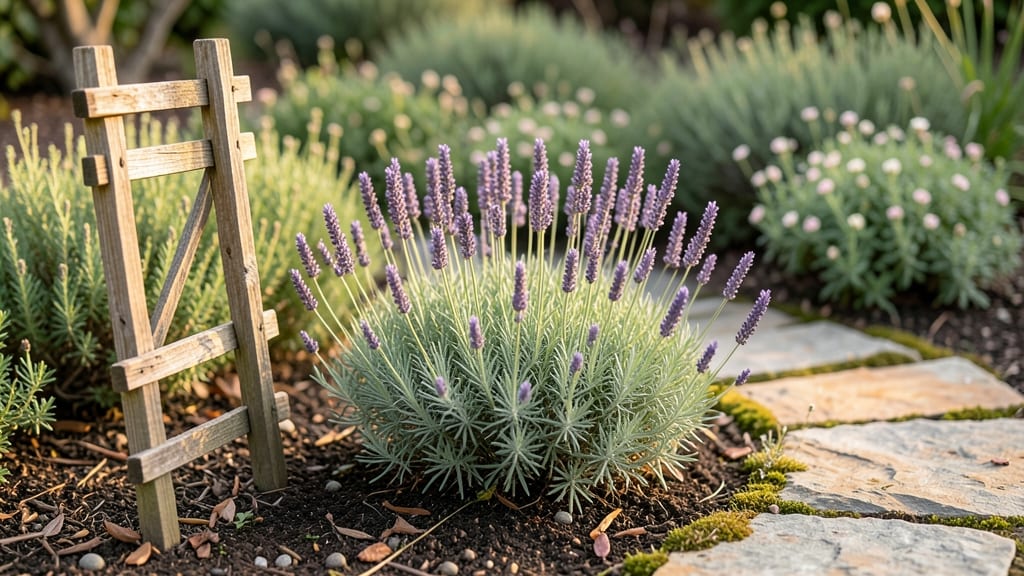
Creating an herb and flower garden layout that hums with life from spring through fall starts with smart zoning—where fragrant herbs and pollinator magnets coexist without competing for space. 🌿 I learned the hard way that cramming everything together leads to shade-loving herbs wilting under towering flowers, while delicate blooms get trampled by basil's aggressive spread.
The secret lies in grouping plants by their sun and water needs while weaving in "pollinator highways" that keep bees and butterflies visiting all season.
Begin with a sun exposure map of your space: full sun for rosemary and lavender, partial shade for cilantro and violets, and dappled light for chives and marigolds.
Use raised beds or containers to separate thirsty flowers (like zinnias) from drought-tolerant herbs (like thyme), and add 3-4 inches of compost at planting to keep roots happy without overwatering. The payoff? A garden that looks intentional, not like a chaotic experiment.
You'll end up with a space that's not just pretty but functional—herbs within arm's reach of the kitchen, flowers arranged to draw in beneficial insects, and every inch working together.
Imagine snipping fresh basil while hummingbirds dart between coneflowers, or harvesting mint without worrying about it taking over the yard. The best part? This layout adapts to any size garden, from a 4x8-foot raised bed to a city balcony with window boxes.
Once the plants are in, maintenance becomes effortless: water once a week (or less), deadhead spent blooms to encourage more flowers, and prune herbs regularly to keep them compact. The key is seasonal swaps—replacing spring bulbs with fall mums or swapping out frost-sensitive herbs for hardy rosemary in winter.
This isn't just a garden; it's a living, breathing ecosystem that keeps giving back.
📚 In This Guide
- What you need
- Instructions
- Tips and common mistakes
- Wrapping up and next steps
What you need
- ● Soil: 1–2 cubic yards of well-draining garden soil (mix with compost for richer nutrients).
- ○ Optional: 5–10 lbs of organic compost or worm castings for extra fertility.
- ● Plants: Pollinator-friendly flowers: 3–5 plants each of lavender, coneflowers, bee balm, or sunflowers.
- ● Herbs: 1–2 plants each of basil, thyme, rosemary, or mint (choose compact varieties for small spaces).
- ○ Optional: Native wildflowers (e.g., milkweed, goldenrod) to boost biodiversity.
- ● Tools: 1 garden trowel (for transplanting).
- ● 1 pruning shears (for shaping and maintenance).
- ● 1 garden fork (to loosen soil).
- ● 1 watering can or hose with a gentle nozzle.
- ○ Optional: Garden gloves and a kneeling pad for comfort.
- ● A sunny spot with at least 6 hours of direct sunlight daily (herbs and flowers thrive here!).
- ● Access to a water source (garden hoses or drip irrigation work best).
- ○ Optional but helpful: A raised bed kit or container garden if your soil is poor or space is limited.
- ● Mulch (straw or shredded bark) to retain moisture and suppress weeds.
How to design a pollinator-friendly herb and flower garden layout
This layout system maximizes beauty, biodiversity, and year-round interest with strategic plant pairings.
🌱 Step 1: Divide Space Into Four Functional Zones
Start by sketching your garden area and dividing it into four distinct zones: sun-loving annuals, partial-shade perennials, herb clusters, and pollinator highways. The sun-loving zone (6+ hours of direct light) should occupy the southernmost area, while the partial-shade zone gets morning sun and afternoon relief. Herb clusters thrive in either zone but need consistent moisture.
I like to allocate about one-third of the space to pollinator highways—these are narrow strips (2-3 feet wide) that connect all zones. Fill them with native milkweed, coneflowers, and bee balm to create safe migration routes. Mark these zones on your sketch with colored pencils so you can visualize the flow before digging.
☀️ Step 2: Layer Plants by Height and Bloom Time
Begin with tallest plants (like sunflowers or hollyhocks) at the northern edge of sun zones to avoid shading shorter herbs. Next, add mid-height pollinators (black-eyed Susans, lavender) in the middle layer, then low-growing herbs (thyme, oregano) at the front. This creates visual depth while ensuring shorter plants get adequate light.
For seasonal interest, stagger bloom times: plant early spring bloomers (like crocus) near the edges, summer performers (like zinnias) in the center, and late-season favorites (like asters) toward the back. Herbs like chives and parsley provide year-round foliage interest, while flowers ensure constant nectar sources. I always include at least three blooming seasons in my designs.
💧 Step 3: Group Plants by Water Needs
Cluster moisture-loving plants (like mint, lobelia, and impatiens) together in one corner where they can share irrigation. These groups should get daily watering during dry spells. Then, create a drought-tolerant zone with lavender, rosemary, and sedum that only needs watering every 7-10 days once established.
Herbs like basil and cilantro prefer consistent moisture, so place them near the water-loving cluster but with good air circulation to prevent fungal issues. Use drip irrigation lines buried 1 inch below the soil surface to deliver water directly to roots without wetting foliage. This setup saves time and prevents common diseases that plague crowded, overwatered gardens.
🪴 Step 4: Add Structural Elements for Pollinators
Install three small water sources (like shallow birdbaths or saucers with pebbles) spaced evenly throughout the garden. Fill them with 1-2 inches of water and add a few floating plants (like water hyacinth) to prevent mosquitoes. Bees and butterflies need these stops during hot days, and they'll become regular visitors if you keep the water fresh.
Include one or two "wild corners" with loose soil and scattered seeds (like poppies or bachelor's buttons). These areas provide foraging opportunities for ground-nesting bees. I also add small logs or rock piles in shady spots—these become overwintering sites for beneficial insects. The more textural variety you include, the more pollinator species your garden will attract.
✂️ Step 5: Maintain with Seasonal Adjustments
Start the season by deadheading spent blooms weekly to encourage continuous flowering. For herbs, trim back leggy growth in early summer to promote bushier, more flavorful foliage. I always leave 10-20% of seed heads on a few plants (like dill or fennel) to provide food for birds and overwintering insects.
In late fall, cut back all dead foliage but leave seed heads standing until spring. This provides winter shelter for pollinators and early-season food. Mulch herb beds with 2-3 inches of organic mulch to retain moisture and suppress weeds. The key is minimal intervention—once established, this layout requires only occasional pruning and seasonal cleanup to thrive.
Tips & tricks for perfect pollinator-friendly herb and flower gardens
Creating a thriving pollinator garden isn't just about planting—it's about strategic design that keeps beneficial insects visiting all season long.
Zone Placement Matters: When sketching your four zones in Step 1, consider adding a small "transition zone" between sun-loving annuals and partial-shade perennials. This 1-foot buffer area can accommodate plants like catmint or Russian sage that tolerate both light conditions. I've found this prevents sharp light transitions that can stress plants at the zone edges.
Seasonal Layering Secret: In Step 2, don't overlook the understory layer! Add creeping thyme or clover between taller plants—their low-growing habit provides early spring nectar while allowing sunlight to reach lower herbs. This creates a "living mulch" that suppresses weeds while supporting pollinators from day one.
Water Feature Placement: For Step 4's water sources, position them near—but not directly in—the pollinator highways. This creates natural "rest stops" for migrating insects while keeping water sources visible to garden visitors. I've noticed hummingbirds use these spots as refueling stations during their long flights.
Mulching Strategy: When applying your 2-3 inches of organic mulch in Step 5, leave a 2-inch border around plant stems uncovered. This prevents moisture buildup that can cause rot while still suppressing weeds. The exposed stems also create microhabitats for beneficial ground insects.
Pro Tips for Herb And Flower Garden Layout
- Creating a thriving pollinator garden isn't just about planting—it's about strategic design that keeps beneficial insects visiting all season long.
- Zone Placement Matters: When sketching your four zones in Step 1, consider adding a small "transition zone" between sun-loving annuals and partial-shade perennials.
- Seasonal Layering Secret: In Step 2, don't overlook the understory layer!
Frequently asked questions
Got questions about designing a pollinator-friendly herb and flower garden layout?
You’re not alone! Here are answers to some of the most common queries to help you create a thriving, low-maintenance space that blooms all season.
What’s the best way to arrange herbs and flowers together in one garden?
Group herbs by their sunlight and water needs—sun-lovers like rosemary and lavender should pair with drought-tolerant flowers (e.g., salvia or coneflowers), while shade-tolerant herbs (basil, cilantro) can mingle with impatiens or ferns. Use companion planting to deter pests: basil near tomatoes, marigolds near herbs to repel bugs.
When is the ideal time to plant herbs and flowers for year-round blooms?
For perennial flowers and hardy herbs (thyme, oregano), plant in early spring after the last frost. Annuals (basil, zinnias) and tender herbs (mint, cilantro) go in late spring after soil warms. Extend the season by adding cool-season bloomers (pansies, snapdragons) in fall for winter interest.
How do I attract pollinators without sacrificing my herb harvest?
Choose native, nectar-rich flowers like bee balm, echinacea, or alyssum—they thrive alongside herbs and provide pollen. Avoid pesticides! Plant herbs like dill, fennel, and borage (which doubles as a flower) to lure bees. Cluster plants in 3–5 foot “pollinator zones” for easy access.
What if my garden gets too much shade? Can I still grow herbs and flowers?
Yes! Opt for shade-tolerant herbs like mint, parsley, or chives and pair them with flowers such as astilbe, hostas, or impatiens. Boost light with reflective surfaces (mirrors, white gravel) or grow vertical gardens on trellises to maximize sun exposure for herbs like basil.
My herbs keep dying—what’s the most common mistake in garden layout?
Overcrowding or poor airflow! Herbs need 6–12 inches of space to avoid fungal diseases. Space taller plants (dill, rosemary) behind shorter ones (thyme, chives) and prune regularly. Mulch with straw or wood chips to retain moisture and deter weeds—just keep mulch 2–3 inches away from herb stems.
Still stumped? Start small with a “pollinator starter kit”—combine lavender, thyme, and coneflowers in a 3x3-foot bed and expand as you learn!
Wrapping up and next steps
Creating a pollinator-friendly herb and flower garden layout isn’t just rewarding—it’s a gift to your local ecosystem! By blending functional herbs with seasonal blooms, you’ve designed a space that thrives year-round while supporting bees, butterflies, and hummingbirds. 🌿🐝
Now that you’re armed with the right materials, design tips, and answers to common questions, it’s time to roll up your sleeves! Start small—even a 6x6-foot patch can make a difference. Grab your tools, sketch your first bed, and watch your garden (and pollinators) flourish! Happy planting! 🌸