
Size
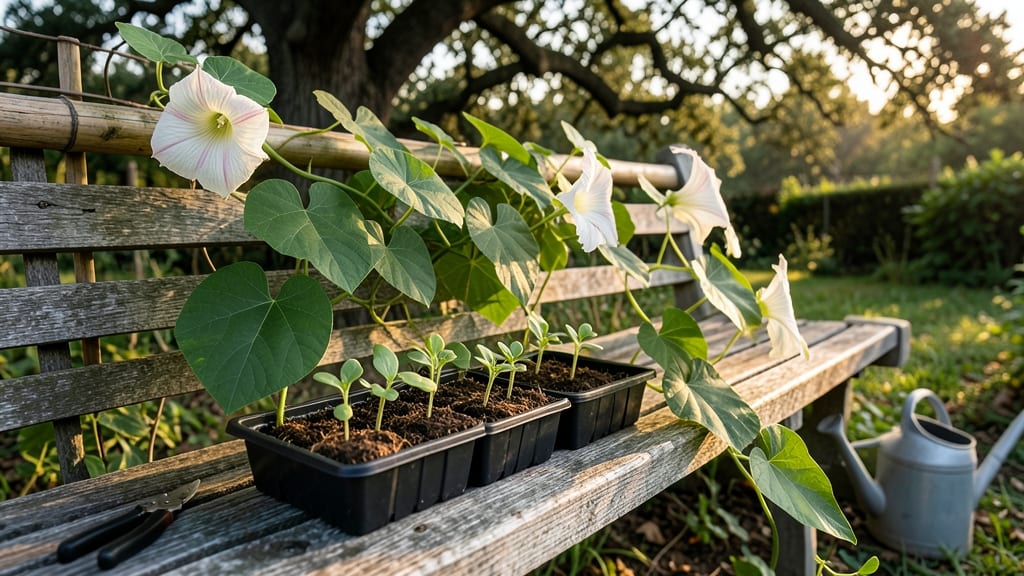
Growing moonflowers from seed unlocks a garden that transforms at dusk into a dreamy, fragrant wonderland. 🌙 These fast-sprouting vines climb trellises in weeks, unfurling giant white blooms that open only after sunset—perfect for creating a magical evening retreat.
My first batch emerged within 5 days, and by midsummer, they were heavy with blossoms that smelled like vanilla and honey.
The secret to success starts with well-draining soil and a sturdy trellis—moonflowers need something to grip as they grow 10-15 feet tall in a single season. Plant seeds ½ inch deep in spring after the last frost, and keep the soil consistently moist but never soggy.
Overwatering is the #1 beginner mistake—these vines hate wet feet, and poor drainage leads to rot.
By mid-July, you’ll be rewarded with 3-4 inch blooms that stay open until dawn, attracting moths and hummingbirds. The vines are vigorous but not invasive, making them ideal for fences, arbors, or even container trellises on patios.
Just be ready for the show—they’ll steal the spotlight from everything else in the garden.
Pair them with evening-scented plants like jasmine or evening primrose for a sensory experience that turns your garden into a nighttime escape. The best part? Seeds are inexpensive, and once established, moonflowers reseed themselves—meaning more magic next year with almost no effort.
📚 In This Guide
- What you need
- Instructions
- Tips and common mistakes
- Wrapping up and next steps
What you need
- ● Moonflower seeds – 5–10 seeds (or more for a lush display). Choose Ipomoea alba for classic white blooms or Ipomoea violacea for lavender-purple varieties.
- ● Biodegradable seed-starting pots or seed trays – 3–5 small pots (2–3 inches deep) with drainage holes.
- ● Potting soil – 1–2 gallons of well-draining, seed-starting mix (or regular potting soil amended with perlite).
- ● Garden twine or trellis – A 4–6 ft tall trellis, fence, or sturdy stake for climbing support (moonflowers can grow up to 10–15 ft!).
- ● Watering can or spray bottle – For gentle hydration (avoid oversaturating seeds!).
- ○ Garden gloves (optional but recommended) – To protect your hands while handling soil or seeds.
- ● Plant labels – To track varieties if growing multiple types.
- ● Mulch – Straw or shredded leaves to retain moisture and suppress weeds.
- ● Fertilizer – A balanced, slow-release granular fertilizer (5-10-5 ratio) to boost growth after sprouting.
- ● Shade cloth – Lightweight fabric to protect young seedlings from harsh afternoon sun (if in a hot climate).
- ● Moonflower companion plants – Fast-growing companions like nasturtiums or marigolds to deter pests.
Step-by-step guide to growing moonflowers from seed
Fast-growing vines with enchanting nighttime blooms await—here’s how to coax them from seed.
🌱 Step 1: Prep Seeds and Planting Medium
Moonflower seeds (Ipomoea alba) germinate quickly but need warmth to kickstart growth. Soak the seeds in lukewarm water for 12 hours—this softens the hard outer shell and speeds up sprouting. I use a shallow bowl and let them sit overnight, checking occasionally to ensure they stay submerged.
While the seeds soak, fill 4-inch pots with a light, airy seed-starting mix (moistened until damp but not soggy). Press the mix down gently—just enough to create a firm surface for the seeds. Moonflowers despise soggy soil, so drainage is key. If your mix doesn’t have perlite, add 1 part perlite to 3 parts mix to improve airflow.
🌱 Step 2: Sow Seeds and Provide Warmth
After soaking, plant 2-3 seeds per pot at a depth of ¼ inch—just enough to cover them lightly. I use my finger to make small divots and drop the seeds in, then sprinkle a thin layer of mix over them. Press down very gently to ensure contact with the soil.
Place the pots in a warm spot (ideally 75–85°F). A seedling heat mat works wonders if your home runs cooler. Keep the soil consistently moist by misting with a spray bottle—never let it dry out, but avoid puddles. Germination happens in 5–10 days, so patience is key. Watch for the first tiny green hooks breaking through the soil; that’s your signal to start adjusting care.
☀️ Step 3: Transplant and Train for Climbing
Once seedlings show 2–3 true leaves (not just the initial cotyledons), it’s time to transplant. Choose a sunny location with 6+ hours of direct sunlight daily—moonflowers thrive in full sun but tolerate partial shade in hot climates. Bury the seedlings deeper than their original pots; this encourages stronger root development.
Install a trellis, fence, or sturdy stake near the planting site immediately. Moonflowers grow 8–15 feet in a single season, so their support should be at least 6 feet tall. Gently guide the vines upward as they grow—twisting them around the trellis helps them cling naturally. Avoid overwatering now; let the soil dry slightly between waterings to prevent fungal issues.
🌿 Step 4: Maintain and Encourage Blooms
Feed the plants with a balanced liquid fertilizer (10-10-10) every 4 weeks once they’re established. I dilute it to half-strength to avoid burning the fast-growing vines. Moonflowers reward consistent care with large, fragrant white blooms that open at dusk—perfect for evening garden magic.
Deadhead spent flowers to encourage more blooms, but leave some seed pods if you want to collect seeds for next season. Watch for Japanese beetles or aphids; a strong spray of water usually dislodges them. If vines outpace your trellis, trim them back by ⅓ to redirect energy into flowering rather than leafy growth.
⏰ Step 5: Overwintering (If in Mild Climates)
In USDA Zones 9–11, moonflowers often reseed themselves or return the following year. Cut back vines to 6 inches after the first frost and mulch heavily with 2 inches of straw to protect roots. In colder zones, dig up tubers in fall and store them in dry peat moss at 40–50°F until spring.
Real talk: Moonflowers are annuals in most climates, but their fast growth and dramatic blooms make them worth replanting yearly. The seeds are easy to save—just let a few flowers go to seed, collect the dried pods, and store them in a cool, dark place until next spring.
Tips & tricks for perfect moonflower growth
Here's what nobody tells you about growing these magical climbers from scratch.
Soaking Secret: That 12-hour soak in lukewarm water isn't just about softening the seed shell—it's also a hydration test. If your seeds sink immediately, they're ready to plant. If they float, they're likely dormant and may need an extra 4-6 hours. I've found that adding a drop of dish soap to the soaking water prevents mold growth while keeping the water surface clean for better oxygen circulation.
Temperature Matters: The 75-85°F range for germination is non-negotiable, but here's the thing: most homes don't maintain consistent warmth. If your seedling area drops below 70°F, germination can stall for days. I keep my pots on top of my refrigerator during winter months—it creates a perfect microclimate. For colder climates, consider using a seedling heat mat set to 80°F until sprouts appear.
Transplanting Technique: When you're ready to transplant those 2-3 true leaf seedlings, here's the game-changer: make a small trench around each seedling before removing it from the pot. This preserves the root ball and minimizes transplant shock. Moonflowers have delicate roots that can break easily, so handle them like you would a glass vase—gently but with purpose. The deeper planting you do now will pay off with stronger vines later.
Fertilizer Timing: That 4-week feeding schedule is perfect, but timing matters more than you'd think. I apply my diluted 10-10-10 fertilizer right after watering—this prevents root burn. The key is consistency: stick to the schedule, but don't overdo it. Too much nitrogen will give you lush leaves but few flowers. For maximum blooms, reduce nitrogen by half in the last feeding before flowering season begins.
Pro Tips for Moonflower Seed Grow A Garden
- Here's what nobody tells you about growing these magical climbers from scratch.
- Soaking Secret: That 12-hour soak in lukewarm water isn't just about softening the seed shell—it's also a hydration test.
- Temperature Matters: The 75-85°F range for germination is non-negotiable, but here's the thing: most homes don't maintain consistent warmth.
Frequently asked questions
Got questions about growing moonflowers from seed? You’re not alone—these fast-growing climbers spark curiosity! Here are answers to the most common queries to help you cultivate your own nighttime garden magic.
How long does it take for moonflower seeds to germinate?
Moonflower seeds are fast—expect germination in 5–10 days if planted in warm (70–85°F), moist soil. Keep them consistently damp (not soggy) and in indirect light until sprouts appear. Pro tip: Soak seeds overnight before planting to speed things up!
When is the best time to plant moonflower seeds?
Plant after the last frost when soil is at least 60°F (late spring to early summer in most zones). They thrive in warm weather and can’t handle frost, so wait until nighttime temps stay above 50°F. For a longer bloom season, start seeds indoors 4–6 weeks before transplanting.
Do moonflower seeds need light to germinate?
Nope! Moonflower seeds don’t require light to sprout—they’re non-photoblastic. Focus on keeping them moist and warm in a shaded spot (like under a thin layer of soil or a damp paper towel) until they germinate. Once sprouted, move them to bright, indirect light for healthy growth.
Why aren’t my moonflower seeds sprouting? Troubleshooting tips
Try these fixes if your seeds are slow to germinate:
Cold soil? Moonflowers need warmth—try a heat mat or move pots to a sunny windowsill.
Dry seeds? Soak them in water for 12–24 hours before replanting.
Old seeds? Moonflower seeds lose viability after 1–2 years—check the seed packet date.
Rot risk? If mold appears, repot in fresh, sterile soil and reduce watering.
Double-check your soil mix (well-draining is key!) and planting depth (½ inch max).Can I grow moonflowers in containers or small spaces?
Moonflowers are perfect for containers—just use a 5-gallon pot or larger with drainage holes. Train vines up a trellis, fence, or even a balcony railing. For small gardens, opt for dwarf varieties (like ‘Moonlight’) or prune vines to control spread. Bonus: They’re great for vertical gardens!
How do I extend the blooming season for nighttime flowers?
Moonflowers bloom for 1–2 nights per flower, but you can prolong the show by:
- Deadheading spent blooms early in the morning to encourage new flowers.
- Planting seeds in succession (every 2–3 weeks) for staggered blooms.
- Avoiding heavy pruning—let vines grow long for maximum flower production.
Wrapping up and next steps
Growing moonflowers from seed is a rewarding journey that brings magical nighttime beauty to your garden with minimal effort! 🌙 Their fast germination and easy-care nature make them perfect for beginners or busy gardeners—plus, the dreamy blooms will leave your neighbors in awe.
Now that you’re armed with the right tips, why not start small? Try planting a few seeds in a pot first to test your green thumb, or dedicate a sunny corner of your yard for a full moonflower show. Happy growing—your garden’s nighttime glow-up awaits! ✨