
Container Gardens
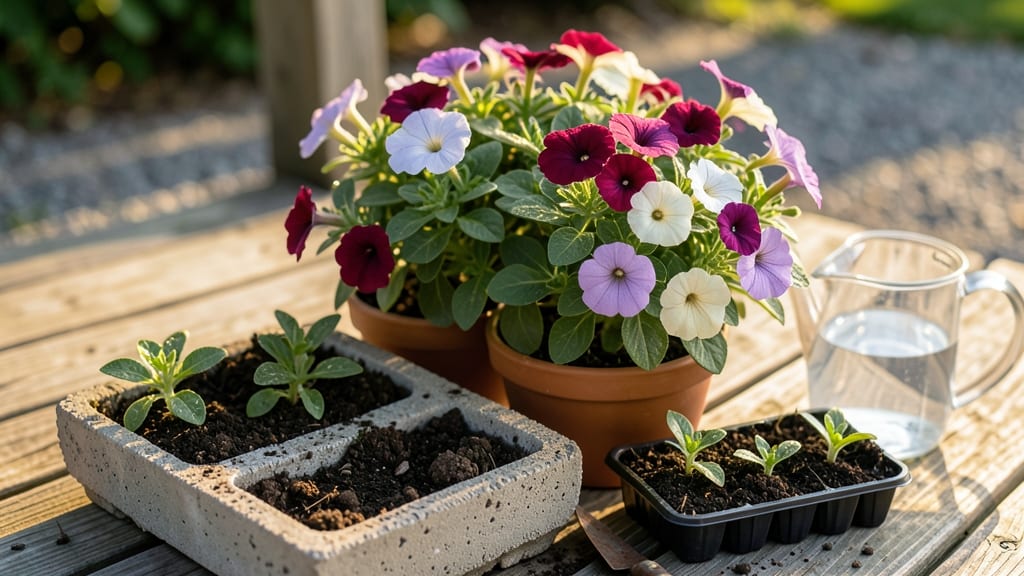
Transforming simple molds into durable concrete flower pots is one of those satisfying weekend projects that elevates your garden's aesthetic while standing the test of seasons.
The first time I mixed my own, I was surprised by how much control I had over texture, shape, and even subtle color—unlike anything you'd find at a nursery. These planters don't just hold plants; they become statement pieces that age beautifully, developing a natural patina over time.
You'll need basic materials like quick-setting concrete mix, a sturdy mold (plastic or silicone works best), and a few simple tools—a trowel, gloves, and a mixing bucket. The process takes about 2 hours from start to finish, including drying time, and costs far less than store-bought alternatives.
What's more, you can customize sizes to fit everything from tiny succulents to bold statement planters for roses or shrubs.
Once cured, your concrete pots will outlast plastic or ceramic options, resisting cracks and fading while developing a rustic charm. Imagine them arranged along a pathway, lining a patio, or even stacked vertically for a modern vertical garden.
The best part? Each pot tells a story of your garden's evolution, with subtle weathering that only adds character over time.
For those worried about weight, these pots are surprisingly manageable when made in standard sizes, and you can always add drainage holes for proper water flow. Whether you're revamping an existing garden or starting fresh, these planters offer a foolproof way to merge function with artistic expression—without breaking the bank.
📚 In This Guide
- What you need
- Instructions
- Tips and common mistakes
- Wrapping up and next steps
What you need
- ● Concrete mix: 1 bag (typically 40–60 lbs) of pre-mixed concrete (e.g., Quikrete or Sakrete). Check the label for water-to-mix ratios.
- ● Water: ~1 gallon per 40 lbs of mix (adjust based on mix instructions).
- ● Mold: 1–2 reusable silicone or plastic molds (choose shapes like circles, squares, or floral designs).
- ● Release agent: Cooking spray, vegetable oil, or mold release spray (to prevent sticking).
- ● Mixing container: A sturdy bucket, wheelbarrow, or large plastic tub (at least 5-gallon capacity).
- ● Mixing tools: 1 sturdy trowel or shovel
- ○ 1 drill with a paddle mixer attachment (optional but helpful)
- ● Vibration tool: A handheld concrete vibrator or a rubber mallet (to remove air bubbles).
- ● Safety gear: Gloves (nitrile or rubber)
- ● Safety glasses
- ● Long sleeves/pants (concrete can irritate skin)
- ● Embedded decor: Small pebbles, seashells, or colored glass chips (for texture/design).
- ● Dye or pigment: Concrete stain or powdered pigments (for colored pots).
- ● Sealer: Acrylic or epoxy sealer (to protect against weathering and stains).
- ● Drill & bits: For adding drainage holes (if your mold doesn’t have them).
- ● Stir sticks or chopsticks: For smoothing edges or creating details.
Step-by-step instructions for crafting concrete flower pots
Here's how to create sturdy, custom planters that'll last seasons—and let your garden shine.
Gather and Prepare Your Materials
Start by collecting 4 individual molds (plastic buckets, cardboard tubes, or silicone forms) and 12 pounds of quick-setting concrete mix—enough for four medium-sized pots. Line your workspace with plastic sheeting to protect surfaces, and gather 4 plastic cups for mixing. You'll also need 4 plastic wrap sheets to seal the concrete once poured, and 1 gallon of water for the mix.
Measure out 1 cup of water for every 4 pounds of concrete mix—this ratio ensures proper hydration without making the mixture too runny. Stir the mix in small batches to avoid clumping, and keep a wooden stick or popsicle stick handy for smoothing edges. Wear gloves and safety goggles—concrete dust is abrasive and can irritate skin and eyes.
Pour and Shape the Concrete
Pour the mixed concrete into your molds, filling them ¾ full—this leaves room for the pot to expand slightly as it cures. Use the wooden stick to tap the sides gently, removing air bubbles and ensuring even distribution. Press the concrete firmly against the mold edges to create crisp, defined lines. Work quickly but deliberately; concrete starts setting within 15-20 minutes.
Once the top layer begins to harden (about 10 minutes after pouring), smooth it with a dampened stick or trowel. This step prevents a rough, uneven surface that could harbor moisture and cause mold. If using textured molds, press decorative elements (like leaves or lattice) into the concrete while it’s still soft but not liquid. Let the pots sit undisturbed for 24 hours—this ensures full curing before removal.
Demold and Seal for Longevity
After 24 hours, carefully remove the pots from their molds by tapping the sides gently and wiggling them free. If using cardboard or plastic forms, peel them away slowly to avoid cracking. Let the pots air-dry for an additional 48 hours in a shaded area—direct sunlight can cause uneven drying and weaken the structure. Once fully dry, inspect each pot for rough spots or cracks; sand down imperfections with 120-grit sandpaper for a smooth finish.
Seal the pots with 2 coats of outdoor concrete sealer, allowing each layer to dry for 4 hours between applications. This step is critical—it protects against moisture absorption, prevents cracking over time, and makes the pots easier to clean. For added durability, consider brushing on a waterproofing additive mixed into the concrete before pouring. Once sealed, your pots are ready for planting—just add soil and your favorite blooms!
Plant and Maintain Your Pots
Fill each pot with well-draining potting mix, leaving 1 inch of space at the top to prevent overflow during watering. Choose plants suited for container gardening, like succulents, herbs, or compact annuals, and water thoroughly after planting. Place the pots in a location with 6+ hours of sunlight daily—concrete absorbs heat, so monitor soil moisture closely in hot climates. Water when the top inch of soil feels dry, and avoid letting pots sit in standing water.
To extend the life of your concrete pots, clean them annually with mild soap and water, scrubbing away dirt or mineral deposits. If cracks appear over time, patch them with concrete repair caulk and reseal. With proper care, these pots will remain functional and stylish for years, becoming a standout feature in your garden.
Tips & tricks for perfect concrete flower pots
Common pitfalls—and how to sidestep every one—when crafting your own durable garden planters.
Mixing Precision: The 1 cup of water to 4 pounds of concrete mix ratio is non-negotiable for structural integrity. I learned this the hard way after creating pots that crumbled under plant weight—too much water weakens the mix, while too little makes it impossible to work with. Measure carefully, and stir in small batches to maintain consistency throughout the entire 12 pounds. For a smoother finish, add the water gradually while mixing, checking the texture frequently.
Demolding Strategy: That 24-hour curing period is your best friend, but removing the pots too early is a surefire way to crack your hard work. After the full 24 hours, tap the sides of the molds firmly before wiggling them free—this helps break the seal without stressing the concrete. If using cardboard forms, soak them in water for 10 minutes before peeling to prevent tearing. And here's what nobody tells you: if you're working in humid conditions, extend the curing time by 6-8 hours to prevent surface cracks.
Sealing Secrets: The two coats of outdoor concrete sealer with 4-hour drying time between applications isn't just about aesthetics—it's about longevity. I've seen unsealed concrete pots develop hairline cracks within months from moisture absorption. For extra protection, especially in rainy climates, apply a waterproofing additive directly to the concrete mix before pouring. This creates an internal barrier that prevents water from penetrating the structure, which is particularly important if you plan to use these pots for moisture-loving plants like ferns or impatiens.
Texture Enhancement: Want to add visual interest without compromising durability? Press decorative elements like leaf imprints or geometric patterns into the concrete while it's still soft but not liquid during that 10-minute smoothing window. For raised designs, use a textured roller or even a fork to create subtle patterns. Just be sure to work quickly—once the concrete begins to set, you'll lose that workable consistency. And if you're using delicate molds, create a release agent by mixing dish soap with water (1 part soap to 3 parts water) and brushing it on the mold surfaces before pouring.
Pro Tips for Making Concrete Flower Pots
- Common pitfalls—and how to sidestep every one—when crafting your own durable garden planters.
- Mixing Precision: The 1 cup of water to 4 pounds of concrete mix ratio is non-negotiable for structural integrity.
- Demolding Strategy: That 24-hour curing period is your best friend, but removing the pots too early is a surefire way to crack your hard work.
Frequently asked questions
Got questions about crafting your own concrete flower pots? You’re not alone! Here are some of the most common queries—and their straightforward answers—to help you create durable, stylish planters with confidence.
How long does it take for concrete flower pots to fully cure?
Concrete typically needs 7–14 days to fully cure, though it’s strong enough for light use (like planting) after 3–5 days. For best durability, wait at least a week before filling with heavy soil or watering heavily. Place them in a shady, dry spot during curing to prevent cracking.
Can I use regular concrete mix or should I add sand for better drainage?
You can use pre-mixed concrete, but adding coarse sand (1 part sand to 2 parts concrete) improves drainage and reduces cracking. For extra strength, mix in 1–2% fiber mesh or acrylic polymer (follow package instructions). Avoid fine sand—it weakens the structure!
Will concrete flower pots survive freezing temperatures?
Yes, but with a few precautions! Let pots fully cure first, then seal them with waterproofing concrete sealer or a masonry paint rated for outdoor use. Avoid sudden temperature swings (like moving them from a garage to freezing weather). If cracks appear, repair with hydraulic cement—it bonds even when wet!
How can I add color or texture to my concrete pots without painting?
Mix in integral color pigments (like iron oxide) directly into the concrete for a permanent hue. For texture, press leaves, pebbles, or stamps into the wet mix before curing. Pro tip: Use silicone molds for geometric designs or embed glass beads for a glittery effect!
What should I do if my concrete pot cracks after curing?
Small cracks? No worry! Fill them with hydraulic cement or epoxy resin for a seamless fix. For larger cracks, rough up the edges with sandpaper, clean with water, and apply a concrete patching compound. Prevent future cracks by avoiding thin walls (aim for ½-inch thickness) and curing pots slowly (cover with plastic for 3 days).
Are there eco-friendly alternatives to traditional concrete?
Try hempcrete (a mix of hemp fibers and lime) for lightweight, breathable pots, or recycled plastic concrete (using crushed plastic as aggregate). For a natural look, use adobe clay (mix clay, sand, and straw)—it’s biodegradable but less water-resistant. Always check local regulations for material safety!
Wrapping up and next steps
You’ve now got the tools and know-how to craft sturdy, stylish concrete flower pots that’ll elevate your garden for years to come! 🌿 Whether you’re a seasoned DIYer or just starting out, these planters add a touch of modern elegance while being kind to your plants’ roots.
Ready to level up your green space?
Your next step? Grab your materials, pick a design, and let your creativity bloom. Try experimenting with colors, textures, or even adding embedded pebbles for extra flair. Happy crafting—and may your garden thrive in these handmade masterpieces! 🌸