
Flowers
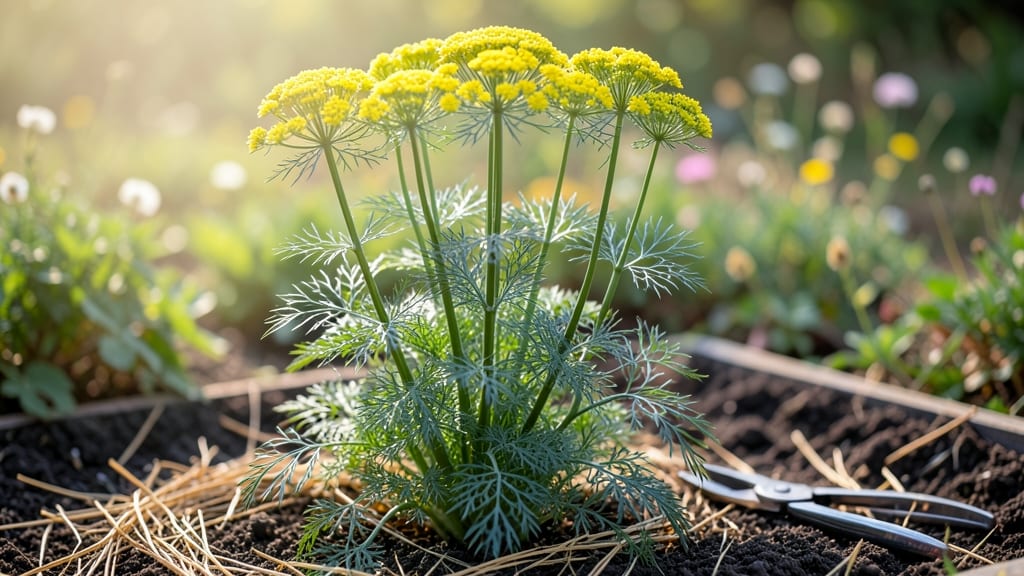
Dill with flowers isn’t just about fresh herbs—it’s a fragrant, buzzing pollinator magnet that transforms containers into tiny ecosystems. 🌿 I’ve watched bees and butterflies flock to my dill plants every summer, turning ordinary pots into vibrant hubs of life.
The secret lies in letting those delicate yellow blooms go to seed instead of snipping them all off.
Most gardeners focus on harvesting leaves, but dill’s feathery flowers are where the real magic happens. These airy blooms attract beneficial insects while adding a soft, lacy texture to container gardens.
Pair it with nasturtiums or marigolds for a pop of color, and you’ll have a self-sustaining pollinator party by midsummer.
You’ll end up with containers that smell like sunshine and hum with activity, not just pots of herbs. The flowers also self-seed, giving you free plants next year—just let a few go to seed before deadheading. This works in any sunny spot, from balconies to patio edges.
Here’s the twist: the more you let it flower, the more productive the plant becomes. Those bees aren’t just pretty—they boost your harvest by pollinating neighboring herbs. Ready to turn your dill into a garden superstar?
📚 In This Guide
- What you need
- Instructions
- Tips and common mistakes
- Wrapping up and next steps
What you need
- ● Dill seeds or seedlings: Choose Anethum graveolens (common dill) or Anethum graveolens 'Mammoth' (flowering varieties). Aim for 3–5 seeds per container or 1–2 seedlings for optimal growth.
- ● Containers: At least 12–18 inches deep and 10–12 inches wide (dill has deep roots!).
- ● Drainage holes are a must—no soggy roots here!
- ● Materials: Terracotta, fabric grow bags, or plastic (just ensure they’re sturdy).
- ● High-quality potting mix: A well-draining, organic blend (e.g., 60% potting soil + 30% perlite + 10% compost). Avoid garden soil—it compacts too easily!
- ● Slow-release fertilizer: Look for a balanced 10-10-10 or organic option (e.g., fish emulsion or worm castings). Follow package rates for containers.
- ● Basic gardening tools: Trowel or small shovel
- ○ Gloves (optional but highly recommended for seed handling)
- ● Watering can with a fine rose nozzle (to avoid disturbing soil)
- ○ Optional but helpful: Mulch (e.g., straw or shredded leaves) to retain moisture and deter weeds.
- ● Pollinator-friendly companions: Marigolds, borage, or nasturtiums (plant nearby to attract bees and butterflies!).
- ● Support stakes or cages (if your dill grows taller than 3 feet—it can get leggy!).
- ● Sunlight: Full sun (6–8+ hours daily). A south- or west-facing spot is ideal!
- ● Watering routine: Keep soil consistently moist but not waterlogged (especially after planting).
- ● Patience: Dill flowers may take 60–90 days to bloom, depending on variety and climate.
Step-by-step guide to growing fragrant dill in containers
Transform your patio into a buzzing pollinator paradise with this easy, fragrant guide.
🌱 Step 1: Choose the Right Container and Soil Mix
Dill thrives in well-draining soil, so select a container with drainage holes—at least 12 inches deep to accommodate its taproot. I prefer terracotta pots because they wick away excess moisture, preventing root rot. Fill the bottom 2 inches with gravel or perlite to ensure proper drainage before adding your 1 gallon of lightweight potting mix. Dill hates soggy roots, so this layer is non-negotiable.
Loosen the potting mix with your fingers until it feels fluffy, like crumbled cake. You want air pockets for those roots to breathe. Tap the container gently on the table to settle the soil evenly. Here's the thing—dill grows best in full sun, so position your container where it gets 6+ hours of direct light daily. If you're using a balcony or patio, rotate the pot quarter-turn weekly so the plant grows upright instead of leaning toward the sun.
🌱 Step 2: Plant Seeds at the Correct Depth and Spacing
Sow 4-5 dill seeds about ¼ inch deep in the center of the pot. Press them lightly into the soil—don't bury them too deep, or they’ll take forever to germinate. Space them evenly in a small circle, about 1 inch apart. I like to use a toothpick to create tiny holes for each seed, making it easier to place them precisely.
Cover the seeds with a thin layer of additional potting mix, just enough to hide them. Mist the soil gently with water until it’s evenly moist but not dripping. Place the pot in a warm spot (65-75°F)—a sunny windowsill or under a grow light works well. Germination takes 7-14 days, but don’t rush it. Keep the soil consistently moist by misting every 2-3 days until you see first true leaves (not the tiny seed leaves).
☀️ Step 3: Provide Sunlight and Water for Lush Growth
Once seedlings emerge, move the container to its permanent sunny spot immediately. Dill is a sun-worshipper—6+ hours of direct light is non-negotiable for those fragrant, feathery leaves and flowers. If your plants start stretching toward the light with long, thin stems, they’re begging for more sun. Adjust the pot’s position or supplement with a grow light for 14-16 hours daily.
Water at the base of the plant, avoiding the leaves to prevent fungal diseases. Let the top inch of soil dry out between waterings—dill is drought-tolerant once established, but young plants need consistent moisture. You’ll know you’re doing it right when the soil feels slightly dry to the touch at the surface but stays damp deeper down. Fertilize lightly with a balanced, water-soluble fertilizer every 4-6 weeks to encourage robust growth.
🌿 Step 4: Encourage Blooms and Support Pollinators
When your dill reaches 12-18 inches tall, it’ll start sending up those iconic yellow flower umbels—this is the moment that matters. Let some flowers go to seed to attract bees, butterflies, and beneficial wasps. If you’re harvesting leaves, you can snip flowers to prolong leaf production, but leaving a few blooms turns your container into a pollinator magnet.
To keep the plant tidy and encourage bushier growth, pinch back the top set of leaves when the plant is about 6 inches tall. This trick tells the plant to branch out instead of growing tall and leggy. Deadhead spent flowers by simply twisting them off—no tools needed. Real talk: dill self-seeds aggressively, so if you’re not careful, you’ll end up with volunteer plants popping up everywhere next year. That’s actually a bonus if you love free dill!
✂️ Step 5: Harvest and Maintain Through the Season
Harvest leaves anytime by snipping the outer stems just above a set of leaves. This encourages new growth and keeps the plant bushy. For the best flavor, harvest in the morning after the dew has dried but before the sun peaks. You’ll see fresh, vibrant leaves regrow within a week—that’s your signal everything is working.
To extend the harvest season, bring the container indoors before the first frost or overwinter it in a cool, sunny spot. Dill is a biennial, so if you let it go to seed, it might regrow the following year. If you’re growing dill for culinary use, harvest leaves before the plant bolts to flower for the most intense flavor. And here’s a pro tip: freeze fresh dill in ice cube trays with water or olive oil for easy seasoning later.
Tips & tricks for perfect container-grown dill
Here's what nobody tells you about growing fragrant dill that'll transform your container garden.
Container Selection Matters: While terracotta is ideal, you can also use fabric pots for better aeration or even repurposed buckets with drainage holes drilled in. The key is depth—dill's taproot needs that full 12 inches to establish properly. I've seen dill grow beautifully in hanging baskets too, but make sure the bottom has drainage. The container's material affects moisture retention: terracotta dries faster than plastic, so adjust your watering schedule accordingly.
Germination Secret: Those 7-14 days for germination can feel like forever, but there's a trick to speed things up. After sowing your 4-5 seeds at ¼ inch deep, cover the pot with clear plastic wrap to create a mini greenhouse. This maintains consistent warmth and humidity, often cutting germination time by half. Just remember to remove the wrap once sprouts appear to prevent mold. The 65-75°F warm spot is critical—any cooler and germination slows dramatically.
Sunlight Strategy: The 6+ hours of direct light requirement is non-negotiable, but here's how to maximize it. If your space gets intense afternoon sun, consider using a sheer curtain to filter the harshest rays during peak hours. For indoor growers, a south-facing window with a grow light on a timer set for 14-16 hours daily works wonders. I've had success with LED grow lights placed just 6 inches above the plants—closer than you'd think! Watch for those leggy stems as your first sign that your dill needs more light.
Pollinator Power-Up: To turn your dill into a true pollinator haven, plant it alongside other container-friendly flowers like nasturtiums or marigolds. The combination creates a multi-level feeding station that attracts everything from bees to ladybugs. When your dill reaches 12-18 inches and those yellow umbels appear, resist the urge to remove all flowers—leave at least 30% for pollinators. The more flowers you preserve, the more beneficial insects will visit, which in turn helps control pests naturally in your garden.
Pro Tips for Dill With Flowers
- Here's what nobody tells you about growing fragrant dill that'll transform your container garden.
- Container Selection Matters: While terracotta is ideal, you can also use fabric pots for better aeration or even repurposed buckets with drainage holes drilled in.
- Germination Secret: Those 7-14 days for germination can feel like forever, but there's a trick to speed things up.
Frequently asked questions
Got questions about growing dill with flowers in containers?
Here are some of the most common ones—and their answers—to help you cultivate a thriving, pollinator-friendly herb garden!
Why does my dill plant have flowers, and should I let them stay?
Dill naturally produces delicate yellow flowers (umbels) as it matures—this is a good sign! These blooms attract bees, butterflies, and beneficial insects while also setting seeds for future harvests. Unless you’re growing dill strictly for leaves (and want to prevent bolting), let the flowers stay for pollinators and seed production. Pro tip: Deadhead spent blooms to encourage more flowers!
How long does it take for dill to flower in a container?
Dill typically flowers 60–75 days after planting from seed, depending on variety and growing conditions. In containers, it may bloom slightly faster due to warmer root zones. If your dill bolts (sends up a flower stalk) too early, try ‘Mammoth’ or ‘Fernleaf’ varieties, which are slower to flower. For leaf-focused harvests, pinch back flower buds when they appear.
Can I grow dill with flowers indoors, or do I need outdoor containers?
Dill thrives outdoors but can grow indoors with 6+ hours of sunlight daily and a south-facing window or grow lights. However, indoor dill may still flower (especially with long daylight hours), but pollinators won’t visit. For a true pollinator haven, prioritize outdoor containers—even small balconies work! Use well-draining soil and a pot at least 12 inches deep.
What other pollinator-friendly plants pair well with dill in containers?
Dill loves company! Pair it with these container-friendly pollinator magnets:
- Basil ( repels pests while attracting bees)
- Calendula ( edible, bright, and bee-loved)
- Nasturtiums ( edible flowers + pest control)
- Marigolds ( deter aphids, attract hoverflies)
My dill flowers turned brown—what’s wrong?
Brown or wilted dill flowers are usually harmless but can signal stress. Check for:
- Underwatering (dill loves moisture; water when the top inch of soil is dry).
- Overcrowding (thin seedlings to 6–8 inches apart).
- Pests (aphids or spider mites; blast off with water or use neem oil).
- Heat stress (provide afternoon shade in hot climates).
Wrapping up and next steps
Transforming your containers into a fragrant, pollinator-friendly haven with dill with flowers is easier—and more rewarding—than you think! This versatile herb not only adds a burst of flavor to your kitchen but also invites bees, butterflies, and beneficial insects to your space.
Whether you're a seasoned gardener or just starting out, embracing dill’s beauty and utility is a game-changer for both your garden and your meals.
Ready to take the next step? Start small—plant a few dill seeds in a sunny container this weekend and watch your garden (and your dinner table) come alive! 🌱✨