
Picking
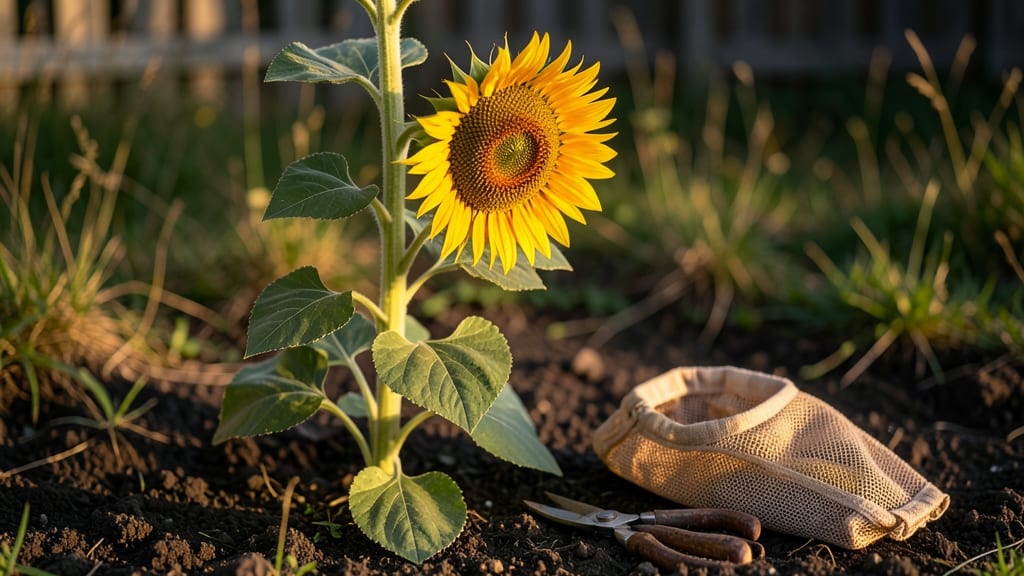
Harvesting sunflower seeds for eating starts with the perfect golden moment—when the back of the seed head turns yellow and the petals droop like a tired sunbather. 🌻 I learned the hard way that harvesting too early means bitter, underdeveloped seeds, while waiting too long risks bird theft or mold.
The sweet spot? When the seed head feels dry and papery to the touch, usually 30-45 days after the petals fade.
You’ll need just three things: a sharp pair of pruning shears, a large sheet or tarp, and a dry, dark place to cure the seeds. Skip the fancy tools—this method works with what you already have.
The key is speed: cut the seed head cleanly at the stem, then lay it on the tarp to catch falling seeds. For extra yield, give the head a gentle shake over the tarp once or twice a day for 3-5 days—patience here means more seeds, not fewer.
Once the seeds stop falling, spread them in a single layer on a baking sheet and let them dry completely in a warm, dark spot for 2-3 days. Properly dried seeds will rattle like tiny maracas when shaken.
Store them in an airtight container in the freezer for up to 6 months—this preserves their rich, nutty flavor and crunch. The first handful you taste will taste like victory after all that waiting.
Common mistakes? Harvesting on damp days (seeds mold) or rushing the drying process (seeds stay oily and go rancid). If birds get to your heads first, try covering them with netting—it’s a small trade-off for a pantry full of homegrown snacks.
With this method, you’ll go from sunflower to snack in just a few weeks, and every crunch will remind you of the garden’s generosity.
📚 In This Guide
- What you need
- Instructions
- Tips and common mistakes
- Wrapping up and next steps
What you need
- ● Mature sunflowers: Choose fully bloomed heads with brown, dry petals (usually late summer/early fall). Aim for at least 10-15 plants for a satisfying harvest.
- ● Pruning shears or sharp knife: For cleanly cutting stems (sterilize blades with rubbing alcohol to prevent disease spread).
- ● Large cardboard boxes or burlap sacks: 2-3 boxes (12”x18” or larger) to collect heads without crushing them.
- ● Newspaper or paper towels: Line boxes to protect seeds from moisture.
- ● Drying area: A well-ventilated, dry space (like a garage, barn, or covered porch) with temperatures between 70–85°F (21–29°C).
- ○ Food-safe storage containers: Air-tight jars or resealable bags (quart-sized or larger) with desiccant packets (optional but recommended).
- ● Gloves: Protect your hands from prickly stems and seeds.
- ● Sunflower seed huller (manual or electric): Saves time if you’re processing 50+ heads.
- ● Food dehydrator or oven: For speed-drying seeds (set to 135°F/57°C for 1–2 hours).
- ● Labeling tags: Mark containers with the harvest date to track freshness.
Step-by-step instructions for harvesting edible sunflower seeds
Here's the foolproof method I've used for years to get crisp, flavorful seeds straight from the garden.
🌿 Step 1: Wait for Full Maturity and Identify Ready Heads
Harvest sunflowers only when the back of the flower head turns completely brown and the petals dry up and fall away. This usually happens 8-12 weeks after planting, depending on your variety. The seed heads should feel heavy in your hand—this means they're fully developed and packed with flavor.
Run your fingers over the back of the head. If the seeds inside rattle loudly when you shake the stem, they're ready. If you hear a hollow sound, they need more time. I always check two heads per plant to ensure consistency—some varieties mature faster than others.
✂️ Step 2: Cut the Heads and Prepare for Drying
Use clean, sharp pruning shears to cut the entire head 2-3 inches below the base. Leave the stems attached—they help support the heavy heads during drying. Place the cut heads in a single layer on a clean, dry towel or wire rack in a well-ventilated area away from direct sunlight.
Here's where it gets important: do not wash the heads. Any moisture will encourage mold and ruin your seeds. Instead, gently brush off loose dirt with your hands or a soft brush. Arrange the heads with their flat sides up to maximize airflow around the seeds.
💧 Step 3: Dry the Heads Thoroughly
Let the heads dry in a cool, dark place with good air circulation for 7-10 days. The seeds are ready when they're completely dry and the outer husks easily crumble between your fingers. You'll know it's time when the seeds inside look plump and the husks turn a light tan color.
I like to check daily by gently squeezing a seed between my fingers. If it feels hard and doesn't leave any residue, it's ready. If it's still soft or leaves a white powder, keep drying for another day or two. Never rush this step—proper drying prevents rancidity and ensures maximum shelf life.
🪴 Step 4: Remove Seeds and Clean for Storage
Once fully dry, place the head in a large paper bag and tie it securely at the top. Shake vigorously for 30-60 seconds until all the seeds fall out. The husks will stay in the bag while the clean seeds collect at the bottom. I always do this over a clean towel to catch any stragglers.
Spread the seeds on a clean surface and pick out any remaining husk fragments or debris by hand. For extra clean seeds, run them through a fine-mesh strainer or sift them with a kitchen strainer. This ensures you get the crisp, nutty seeds without any gritty bits.
⏰ Step 5: Store Properly for Maximum Freshness
Transfer the clean seeds to an airtight glass jar or food-grade container with a tight-sealing lid. Store in a cool, dark place like a pantry or cupboard. Properly dried and stored seeds will keep for 6-12 months while maintaining their crunch and flavor.
For even longer storage, freeze the seeds in small portions. Portion them into ice cube trays, freeze solid, then transfer to a freezer bag. This preserves freshness for up to 2 years. Label your containers with the harvest date—older seeds lose their crispness over time.
Tips & tricks for perfect sunflower seed harvesting
These simple tricks will help you avoid common pitfalls and get the most flavorful seeds from your sunflowers.
Maturity Test: The 8-12 week timeline is just a guideline—your best indicator is that loud rattling sound when you shake the stem. I've learned the hard way that checking two heads per plant is worth it; some varieties mature unevenly. If one head rattles and another doesn't, give the slower one a few more days rather than harvesting prematurely.
Drying Conditions: That 7-10 day drying period is critical for preventing rancidity. I've found the best spot is on a wire rack in my garage during cool evenings—never in direct sunlight which can cause uneven drying. A small fan on low speed creates gentle airflow without disturbing the seeds. If your kitchen feels too humid, extend the drying time by 2-3 days rather than rushing.
Storage Wisdom: The 6-12 month shelf life assumes proper drying and airtight containers. I double-check my glass jars have completely sealed lids by pressing down firmly after filling. For extra protection, I add a small packet of silica gel to absorb any moisture that might develop over time. Labeling with the harvest date helps track freshness—older seeds lose their crispness but can still be used in cooking.
Pro Tips for Harvest Sunflower Seeds For Eating
- These simple tricks will help you avoid common pitfalls and get the most flavorful seeds from your sunflowers.
- Maturity Test: The 8-12 week timeline is just a guideline—your best indicator is that loud rattling sound when you shake the stem.
- Drying Conditions: That 7-10 day drying period is critical for preventing rancidity.
Frequently asked questions
Got questions about harvesting sunflower seeds for snacking? You’re not alone! Here are answers to the most common queries—from timing to troubleshooting—to help you crush (literally) the process with confidence.
When is the best time to harvest sunflower seeds for eating?
The ideal time is when the sunflower heads turn brown and papery, and the back of the seed head feels dry to the touch—usually 4–6 weeks after flowering. If you harvest too early, seeds won’t be fully mature; too late, and they’ll scatter or sprout. Pro tip: Test one head by cracking open a seed—if the kernel is plump and white (not green), you’re golden!
How long does it take for sunflower seeds to dry after harvesting?
Freshly harvested seeds need 1–2 weeks of indoor drying in a warm, dry spot (like a mesh bag in a sunny window or a dehydrator at 95°F/35°C). Spread them in a single layer to prevent mold. Patience pays off! Rushed drying = chewy, unappetizing seeds.
What do I do if my sunflower seeds have bugs or mold?
Don’t toss them yet! Start by freezing seeds in a sealed bag for 3–4 days to kill pests. For mold, discard heavily contaminated seeds and store the rest in an airtight container with a silica gel packet or rice (natural moisture absorber). If infestations persist, try a different variety next time—some (like ‘Russian Mammoth’) are more resilient.
Can I eat sunflower seeds straight from the head, or do I need to shell them?
You can eat them both ways! Unshelled seeds are great for roasting whole (toss in oil + salt, bake at 300°F/150°C for 20 mins), while shelled seeds are perfect for snacking raw, adding to salads, or blending into butter. For convenience, use a nutcracker or rolling pin to crack them open—just wear gloves (they stain!) .
What if my sunflower plants don’t produce seeds, or the heads are empty?
Empty heads usually mean pollination failed—common in rainy weather or isolated plants. To fix it next year:
- Plant multiple varieties (or at least 3–4 plants) to ensure cross-pollination.
- Hand-pollinate by gently brushing flowers with a paintbrush early in the morning.
- Choose disease-resistant varieties like ‘Autumn Beauty’ or ‘Moulin Rouge.’
Wrapping up and next steps
Harvesting sunflower seeds for eating is a rewarding way to enjoy nature’s nutty treats—fresh, free, and packed with flavor! By following the right steps—drying, shaking, and storing—you’ll unlock a delicious snack with minimal effort.
Whether you’re a gardener or a forager, this simple process turns your sunflowers into a crunchy, protein-rich delight.
Now that you’re ready to harvest, why not share your bounty? Try baking sunflower seed butter, sprinkling seeds on salads, or gifting them to friends. Happy harvesting—and enjoy that nutty goodness! 🌻✨