
Flowers
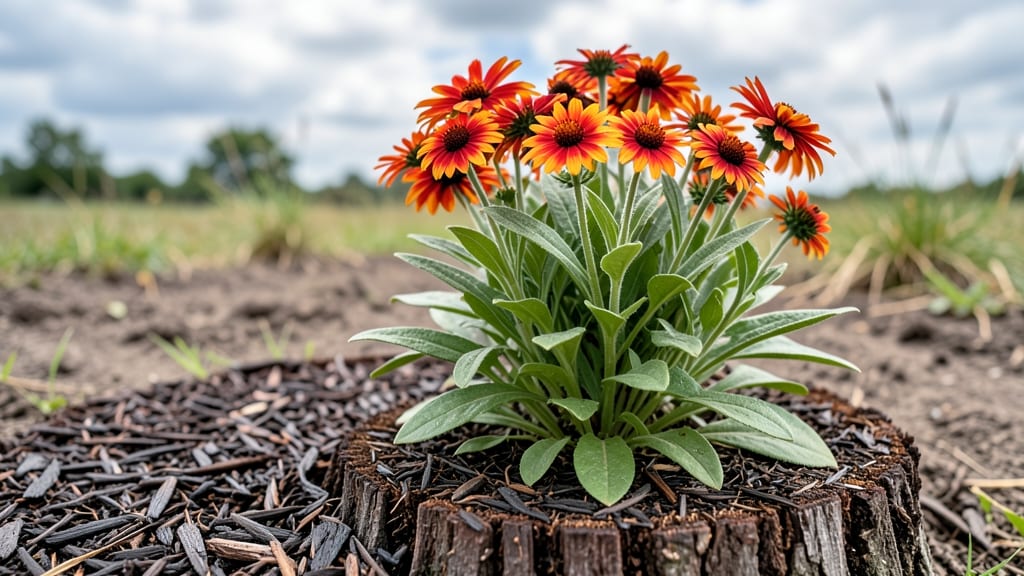
Turn that old tree stump into a whimsical planter bursting with color—no boring mulch pile here. 🌸 I’ve turned stumps into vertical gardens that bloom from spring through frost, using drought-tolerant flowers that thrive in shallow roots and limited soil.
The secret? Choosing the right plants and a few clever prep steps to keep moisture where it belongs.
Start with sun-loving annuals like petunias, geraniums, or salvia, which spill over the edges like a living waterfall. For perennials, try heuchera (for bold foliage) or sedum (which handles dry spells).
A simple soil mix of potting soil and perlite keeps roots happy, and a watering ring at the base prevents spills while keeping roots moist.
By midsummer, your stump will be a vertical explosion of blooms, drawing bees and butterflies while adding unexpected charm to your yard. The best part? It’s a low-maintenance focal point that works in any garden style—rustic, cottage, or modern. Just add flowers and watch your space transform.
Works for any stump size—small patio stumps or giant oak remnants. Here’s how to make it happen without the mess or the fuss.
📚 In This Guide
- What you need
- Instructions
- Tips and common mistakes
- Wrapping up and next steps
What you need
- ● Tree stump: Freshly cut (preferably within the last 24 hours) or dried, with a diameter of at least 6 inches for stability. Ensure it’s free of disease or pests.
- ● Drill: A 1/2-inch or 5/8-inch drill bit (for drainage holes) and a 1-inch spade bit (for planting pockets). Cordless drills work best for portability.
- ○ Screws or wooden dowels: 1-inch long, galvanized or treated wood to secure planting pockets (optional but recommended for sturdiness).
- ● Potting soil: Well-draining, peat-free mix (e.g., cactus/succulent blend) or a 50/50 mix of potting soil and perlite for aeration.
- ● Mulch or landscape fabric: To suppress weeds and retain moisture around the base.
- ● Slow-release fertilizer: Balanced, 10-10-10 or 20-20-20 granules to nourish roots over time.
- ● Watering can or hose: With a gentle spray nozzle to avoid displacing soil.
- ● Stump sealant: Non-toxic, water-based sealant to protect the wood and enhance aesthetics (e.g., AFM Safecoat).
- ● Drainage gravel: Pebbles or crushed stone (1/4-inch size) to improve drainage at the base.
- ● Moss or decorative stones: For a natural, finished look around the stump’s base.
- ● Solar-powered stake lights: To highlight your stump garden after dark.
- ● Child-safe paint: If you want to add whimsical designs (use only on sealed stumps!).
Step-by-Step guide to creating stunning tree stump flower planters
Transforming old stumps into vibrant planters is easier than you think—here's how to turn them into living works of art.
🪴 Step 1: Prepare the Stump for Planting
Start by cleaning the stump thoroughly with a wire brush to remove any loose bark, debris, or moss. This ensures a clean surface for your plants and prevents pests from hiding in crevices. If the stump is particularly rough, sanding it lightly with medium-grit sandpaper will create a smoother planting surface—just avoid going too deep, or you might damage the wood.
Next, drill ¼-inch drainage holes every 6-8 inches around the stump’s perimeter. These holes are critical—they prevent water from pooling at the base, which can rot the wood and drown your plants. Use a hole saw bit for cleaner edges, and tap the stump gently after drilling to remove any wood dust from the holes.
💧 Step 2: Line and Fill with Moisture-Retentive Mix
Line the inside of the stump with landscape fabric, cutting it to fit snugly and securing it with small staples or landscape pins. This fabric keeps soil in place while allowing excess water to drain through the holes you drilled. If the stump is particularly deep, fold the fabric upward along the sides to create a 2-3 inch barrier—this prevents soil from spilling out as you plant.
Fill the stump with a well-draining potting mix blended with orchid bark or coconut coir for extra aeration. I like to mix in a handful of slow-release fertilizer at this stage to give your plants a nutrient boost right from the start. Moisten the mix with water until it’s damp but not soggy—you want it to hold moisture without becoming waterlogged.
☀️ Step 3: Choose and Plant Drought-Tolerant Flowers
Select plants that thrive in shallow, well-draining conditions—sedum, ferns, heuchera, and ornamental grasses are perfect choices. For a cascading effect, tuck trailing plants like creeping thyme or ajuga along the edges. Space plants 3-4 inches apart to allow room for growth without overcrowding.
Dig small holes in the soil mix, just deep enough to accommodate the roots of each plant. Gently place the plants in their spots, pressing the soil around them lightly to secure them. Water the newly planted stump thoroughly to settle the soil and help the roots establish contact with the mix. Avoid compacting the soil too much—you want it to stay loose for optimal drainage.
✂️ Step 4: Mulch and Maintain for Long-Term Beauty
Spread a 1-inch layer of mulch over the soil surface to help retain moisture and suppress weeds. Use wood chips or shredded bark for a natural look that blends seamlessly with the stump’s rustic charm. Avoid piling mulch directly against the stump’s base—keep it 2-3 inches away to prevent rot.
Water your stump planter deeply once a week, or more frequently during hot, dry spells. The key is to keep the soil consistently moist but never waterlogged. After a few weeks, you’ll notice your plants settling in—watch for new growth and vibrant blooms as a sign that your stump is thriving. A little regular care keeps these planters looking fresh and lively for years.
Tips & tricks for perfect tree stump flower planters
Here's what nobody tells you about transforming stumps into stunning planters that last.
Drainage is Non-Negotiable: Those ¼-inch holes you drill every 6-8 inches? They're not just helpful—they're essential. I've seen stumps rot within weeks when people skip this step. Use a hole saw bit for cleaner edges, and tap out wood dust afterward. If your stump has natural cracks, seal them with waterproof caulk before drilling to prevent leaks.
The Fabric Barrier Trick: When lining your stump with landscape fabric in Step 2, create that 2-3 inch side barrier I mentioned—but here's the secret: fold the fabric upward along the sides before filling with soil. This creates a natural lip that prevents soil from spilling out when you water. If your stump is particularly deep, consider adding a second layer of fabric at the bottom for extra protection against root rot.
Soil Mix Secrets: The blend of well-draining potting mix with orchid bark or coconut coir creates the perfect environment, but here's my pro move: add a ½ cup of perlite to every 5 gallons of mix. This increases aeration even further, which is crucial for shallow-rooted plants like sedum. For extra nutrients, I sometimes mix in a handful of worm castings instead of just fertilizer—they're gentler on plant roots.
Plant Placement Strategy: When arranging your drought-tolerant flowers in Step 3, place taller plants like ornamental grasses toward the center and trailing varieties like creeping thyme along the edges. This creates a natural tiered effect that makes your stump look like a professional landscaper designed it. For maximum impact, group plants with similar water needs together—this makes maintenance much easier.
Pro Tips for Tree Stump Flowers
- Here's what nobody tells you about transforming stumps into stunning planters that last.
- Drainage is Non-Negotiable: Those ¼-inch holes you drill every 6-8 inches?
- The Fabric Barrier Trick: When lining your stump with landscape fabric in Step 2, create that 2-3 inch side barrier I mentioned—but here's the secret: fold the fabric upward along the sides before filling with soil.
Frequently asked questions
Got questions about turning tree stumps into blooming works of art? You’re not alone! Here are some of the most common queries—and their answers—to help you get started with confidence.
Can I use any tree stump for planting flowers?
Not all stumps are created equal! Softwoods like willow or pine decay faster, making them great for short-term projects. Hardwoods (oak, maple) last longer but may need extra sealing. Avoid stumps with active rot or pests—clean and treat them first for a safe, long-lasting planter.
How long does it take for flowers to grow in a stump?
Patience is key! If you’re planting annuals (like petunias or marigolds), expect blooms in 6–8 weeks. Perennials (e.g., hostas, daylilies) may take 1–2 seasons to mature. Pre-planted stumps (with bulbs or seedlings) can flower immediately—just check the label!
What’s the best way to seal a stump before planting?
Sealing protects your stump from moisture and pests. Use a non-toxic wood sealer (like linseed oil) for organic options or a waterproof paint for durability. Apply 2–3 coats, letting each dry fully. Pro tip: Sand rough edges first for a smoother finish!
Are there alternatives if I don’t have a tree stump?
Try these creative planters:
- Log slices (horizontal or vertical)
- Cinder blocks (paint them bright!)
- Upcycled buckets (drill drainage holes)
- Terracotta pots (stack for a whimsical look)
Why aren’t my stump flowers thriving?
Common culprits:
- Poor drainage → Add gravel or a drainage hole.
- Over/under-watering → Check soil moisture weekly.
- Too much shade → Move to sunnier spot (6+ hours/day).
- Nutrient deficiency → Use slow-release fertilizer.
Still struggling? Test your soil’s pH—most flowers prefer 6.0–7.0.
Wrapping up and next steps
Transforming tree stumps into vibrant flower planters is a creative and rewarding way to breathe new life into your garden! 🌸 With just a few simple materials and a dash of imagination, you can turn an old stump into a stunning, year-round display that adds charm and beauty to any outdoor space.
Whether you're a seasoned gardener or a beginner, this project is a fun and fulfilling way to upcycle and enhance your surroundings.
Ready to get started? Grab your tools, pick your favorite flowers, and let your creativity bloom! Next, visit your local nursery to select the perfect plants for your stump planter—then watch your garden shine brighter than ever. 🌿✨