Container Gardens
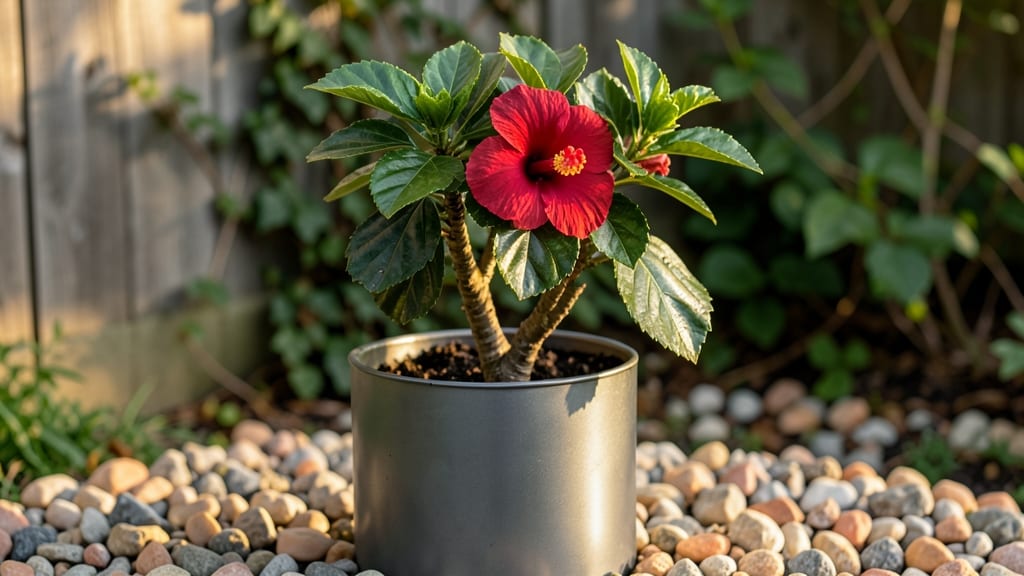
Steel flower pots won’t rust if you prep them right—my galvanized steel planters have been holding up for five years in every season, from frost to scorching summer sun.
The key is choosing the right finish and placement, because these aren’t just containers—they’re statement pieces that transform any garden into something bold and modern. I’ve used them for everything from dramatic focal points to subtle urban accents, and the durability means zero replacements, just endless styling potential.
What makes them special? First, they resist weather like nothing else—no cracking, no fading, and no need for repainting every few years. Second, their sleek lines work in any aesthetic: pair galvanized steel with terracotta for contrast or stack them in monochrome for a minimalist look.
And third, they’re surprisingly lightweight for metal, so you can move them around to follow the sun or protect plants from harsh afternoon rays. The only real requirement is a little elbow grease to keep them looking fresh.
You’ll end up with a garden that feels intentional and effortless—plants thrive in the stable temperature steel provides, and the pots themselves become part of the design. Imagine trailing ferns spilling over the edges of a galvanized trough or vibrant petunias popping against a dark steel background.
The best part? No more worrying about pots degrading over time. These containers stay beautiful while your plants grow.
Perfect for city balconies, modern patios, or even as unexpected planters in a rustic garden—just swap out the liner every few years to prevent soil buildup.
The versatility is what sold me, and once you try them, you’ll see why so many designers can’t resist their clean, industrial charm. Let’s get styling!
📚 In This Guide
- What you need
- Instructions
- Tips and common mistakes
- Wrapping up and next steps
What you need
- ● Steel sheets or pre-made steel containers: Galvanized steel (0.05–0.125 inch thickness) or stainless steel (for extra rust resistance).
- ● Quantity: Enough to cover your pot’s dimensions (e.g., 18-gauge steel for lightweight durability).
- ● Fasteners: Stainless steel screws (¼–½ inch, depending on thickness).
- ● Sheet metal screws or pop rivets (for seamless joints).
- ● Quantity: ~10–20 screws per pot (adjust for size).
- ○ Sealant (optional but recommended): Rust-proof paint (e.g., Rust-Oleum or Zinsser Perma-White).
- ● Waterproof sealant (like Sikaflex) for edges.
- ● Drainage: Steel mesh or pre-drilled holes (¼ inch diameter).
- ○ Optional: Plastic drainage plug (if using pre-made pots).
- ● Essential tools: Tin snips or metal shears (for cutting steel).
- ● Drill with metal bits (for drainage holes).
- ● Screwdriver or impact driver (for assembly).
- ● Metal file or sandpaper (to smooth edges).
- ○ Optional upgrades: Clamps (to hold pieces during assembly).
- ● Heat gun (for bending steel without cracking).
- ● Paintbrush or sprayer (for sealant application).
- ● Safety first: Wear gloves, safety goggles, and a mask when cutting/painting steel.
- ● Design plan: Sketch your pot’s dimensions (height, diameter, and depth) before cutting.
- ● Workspace: Flat surface (like a table or garage floor) with good ventilation.
- ● Plant prep: Choose lightweight potting mix (steel pots can be heavy when full!).
How to select and prepare steel flower pots for long-term plant growth
Steel pots offer unmatched durability for seasonal gardens—here's how to choose and prep them for thriving plants.
Choose the Right Size and Style for Your Plants
Steel pots come in various sizes, but 6- to 12-inch diameters work best for most annuals and perennials. For larger shrubs or small trees, opt for 14- to 18-inch pots with at least 12 inches of depth to accommodate root systems. I always match pot size to plant maturity—smaller pots dry out too quickly, while oversized pots retain excess moisture.
Look for thick-gauge steel (16- to 18-gauge) to prevent warping under weight. The heavier the pot, the more stable it stays in wind or when watered. Avoid decorative designs with thin metal—these bend easily and won’t last through multiple seasons. Check for pre-drilled drainage holes or plan to add them yourself with a drill and ½-inch bit.
Clean and Prep the Pots for Planting
Before planting, scrub the pots thoroughly with hot, soapy water to remove any manufacturing residue or old soil. Steel pots can harbor bacteria or fungal spores from previous use, so I like to disinfect them with a 10% bleach solution (1 part bleach to 9 parts water). Let the solution sit for 10 minutes, then rinse three times with clean water to remove all bleach traces.
Sand any rough edges or sharp corners with 120-grit sandpaper—this prevents injury when handling and ensures a smoother finish. If the pot has a protective coating, lightly scuff it with sandpaper in areas where drainage holes will go. This helps the coating adhere better after drilling. Let the pots dry completely in the sun before planting, as moisture trapped inside can cause rust over time.
Add Drainage and Protective Layers
Place a ½-inch layer of gravel or broken pottery in the bottom of each pot to improve drainage. Steel pots drain faster than ceramic or plastic, so this layer prevents soil from washing out while allowing excess water to escape. I use coarse gravel because it doesn’t compact like finer materials and lasts longer.
Next, line the interior with landscape fabric cut to fit snugly against the sides. This keeps soil from clogging the drainage holes while still allowing water to pass through. Secure the fabric with a staple gun or heavy-duty staples, ensuring no gaps remain. For extra rust protection, apply a clear acrylic sealant to the interior surfaces—this adds a barrier without affecting drainage.
Fill with High-Quality Soil and Plant
Use a well-draining potting mix designed for containers, as steel pots don’t retain moisture like heavier materials. Avoid garden soil—it compacts easily and can lead to root rot. Fill the pot ¾ full, leaving room for root growth and watering. Press the soil lightly to remove air pockets, but don’t compact it too tightly.
Plant your chosen species, ensuring the root ball sits at the same depth as it did in its original container. Water thoroughly until moisture runs freely from the drainage holes. Place the pot in its final location, ensuring it gets the light and temperature conditions its plants need. Steel pots heat up faster in sun, so I often place mine on elevated stands or saucers to prevent overheating and root stress.
Maintain and Protect for Seasonal Use
Water steel pots more frequently than ceramic or plastic—steel conducts heat and dries out soil quicker. Check moisture by sticking your finger 1 inch into the soil; water when it feels dry. In hot climates, water in the early morning to reduce evaporation and prevent leaf scorch. During winter, move pots to a sheltered area or cover them with burlap to protect from freezing temperatures.
Inspect pots twice a year for signs of rust or wear. If rust appears, sand it off with fine-grit sandpaper and apply a metal primer followed by rust-resistant paint designed for outdoor use. Avoid spray paints—they don’t adhere well and can peel off with moisture. With proper care, steel pots can last 10 years or more, making them a sustainable choice for any garden.
Tips & tricks for perfect steel flower pots
Here's what I've learned after years of using steel pots—these small details make all the difference for long-lasting plant health.
Material Selection: When choosing steel pots, prioritize 16- to 18-gauge thickness for durability. I've found that heavier pots (14-18 inches) stay stable in windy conditions, while lighter ones can tip over. For wind-prone areas, consider adding small weights like pebbles in the bottom before planting—this adds stability without affecting drainage.
Drainage Layer Strategy: The ½-inch gravel layer in Step 3 is non-negotiable for steel pots. I've seen soil clog drainage holes completely when this step is skipped, leading to root rot. For extra insurance, I use coarse river rock instead of broken pottery—it lasts longer and won't decompose over time. Make sure to create a small mound in the center to prevent soil from settling directly against holes.
Rust Prevention Pro Tip: After cleaning with the 10-minute bleach solution, I apply a thin layer of clear acrylic sealant to all interior surfaces before planting. This creates an invisible barrier that prevents moisture from causing rust over time. For exterior surfaces, I use a rust-resistant paint designed for outdoor metal—just avoid spray paints as they don't adhere well to steel.
Seasonal Transition Hack: In late fall, I move my steel pots to a sheltered location and cover them with burlap before the first frost. This simple step prevents temperature fluctuations that can cause metal stress and potential cracking. For winter storage, I elevate pots slightly off the ground using wooden pallets—this improves air circulation and prevents moisture buildup at the bottom.
Pro Tips for Steel Flower Pots
- Here's what I've learned after years of using steel pots—these small details make all the difference for long-lasting plant health.
- Material Selection: When choosing steel pots, prioritize 16- to 18-gauge thickness for durability.
- Drainage Layer Strategy: The ½-inch gravel layer in Step 3 is non-negotiable for steel pots.
Frequently asked questions
Got questions about steel flower pots?
You’re not alone! Whether you’re a seasoned gardener or just starting out, these rustproof containers can seem a bit tricky at first. Below, we’ve rounded up the most common questions—and answers—to help you grow with confidence.
What makes steel flower pots better than plastic or ceramic?
Steel pots are rustproof thanks to galvanized or stainless steel coatings, making them durable and long-lasting. Unlike plastic, they won’t crack in freezing temps, and unlike ceramic, they won’t chip or absorb moisture. Plus, their sleek, modern look elevates any garden space!
Can steel flower pots freeze in winter, and will they crack?
Nope! Steel is highly resistant to temperature extremes, so freezing won’t crack or damage them. However, if your pot is filled with water and left outside in extreme cold, the water inside could expand and cause stress. To prevent this, either:
- Empty and store pots indoors, or
- Use them for hardy plants like succulents or ornamental grasses that tolerate cold.
How can I prevent rust on my steel flower pot?
Even rustproof steel pots can develop surface rust over time if exposed to moisture. To keep them looking fresh:
- Wipe down pots with a damp cloth after watering to remove mineral deposits.
- Apply a light coat of car wax or silicone spray annually for extra protection.
- Avoid placing pots in direct, prolonged contact with soil—use a saucer or pot feet.
What types of plants thrive best in steel flower pots?
Steel pots excellent for heat retention, making them ideal for:
- Succulents & cacti (drought-tolerant and love warmth)
- Herbs like rosemary and thyme (thrive in well-draining conditions)
- Ornamental grasses (handle temperature swings well)
- Vegetables like peppers and tomatoes (benefit from heat retention)
Are steel flower pots worth the investment compared to cheaper alternatives?
While steel pots may cost more upfront, their longevity and low maintenance make them a smart buy. Unlike plastic (which degrades in UV light) or ceramic (prone to chipping), steel pots last years or even decades with minimal care. Think of them as a premium, eco-friendly upgrade for your garden!
How do I clean and maintain my steel flower pot?
Cleaning is a breeze! Start by:
- Rinsing with warm, soapy water to remove dirt and debris.
- Scrubbing stubborn stains with a soft brush or sponge.
- Drying thoroughly to prevent moisture buildup.
- For deep cleaning, use a mild vinegar solution (1:3 vinegar-to-water ratio).
Wrapping up and next steps
Steel flower pots are a game-changer for gardeners seeking durability, style, and year-round plant success—without the hassle of rust or fading. Whether you're a seasoned green thumb or just starting, their low-maintenance charm and versatile designs make them the perfect upgrade for your garden.
Ready to transform your space? Start small: Pick a pot, choose your favorite plants, and let your creativity bloom! 🌱✨