
Vegetables
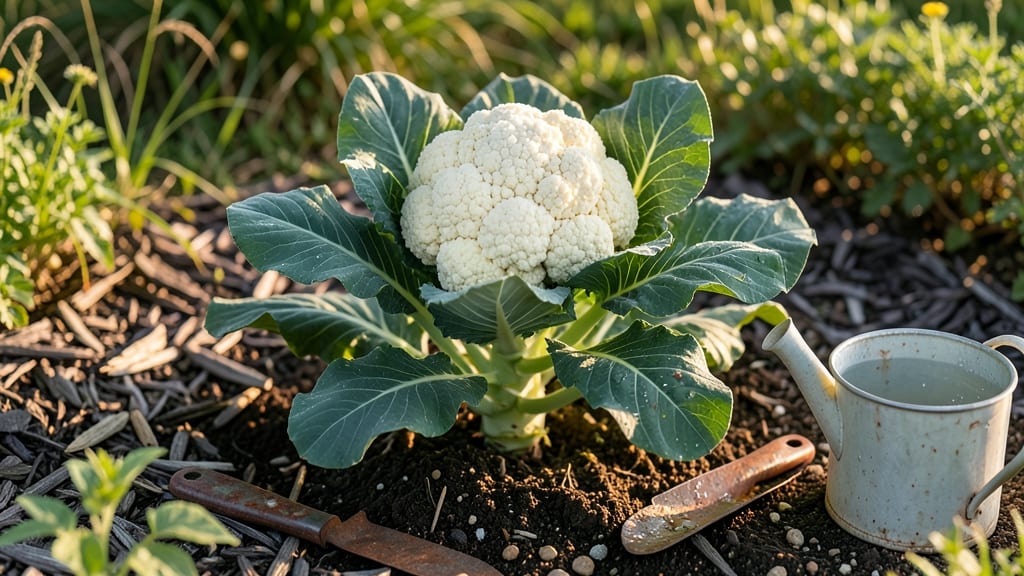
Watching a cauliflower grow from a tiny seed to a snow-white head is like witnessing a slow-motion magic trick. 🌱 The stages of cauliflower growth reveal how patience and precise care transform a simple seed into one of the most satisfying vegetables you'll ever harvest.
My first attempt ended with a single, sad head—until I learned the exact timing and conditions each stage demands.
From the moment those first green leaves push through the soil to the day you cut into a perfectly tight curd, there are seven distinct phases where temperature, light, and water make all the difference.
Too much heat at the wrong time and your plant bolts; too little water during curd formation and the head splits. I've tracked every season's progress, and the key is knowing what to watch for—leaf shape, stem thickness, and that telltale white puff of florets.
By the time you reach harvest, you'll have a head that's 6-8 inches wide, firm to the touch, and ready to steam or roast.
The secret isn't just waiting—it's giving your plants exactly what they need at each step, from the cozy germination blanket to the cool shade that prevents bolting. Even the most stubborn gardeners get results when they follow these stages.
Whether you're growing purple, orange, or classic green cauliflower, this method works for succession planting too—just stagger your sowing by two weeks. The first harvest will teach you everything you need to know for the next. Let's break down each phase so you can grow like a pro.
📚 In This Guide
- What you need
- Instructions
- Tips and common mistakes
- Wrapping up and next steps
What you need
- ● Cauliflower Seeds: Choose disease-resistant varieties like Snowball Y Improved or Purple of Sicily. Start with 10-20 seeds (or 1-2 seed packets) for a small garden.
- ● Seed Starting Mix: A sterilized, seed-specific potting mix (avoid garden soil—it’s too dense!). Use about 2-3 gallons for indoor seed starting.
- ● Containers for Seedlings: Small biodegradable pots (2-3 inches deep) or seed trays (for 10-20 seedlings).
- ○ Optional: Peat pellets (easy to transplant later!).
- ● Garden Soil: Well-draining, loamy soil with a pH of 6.0-6.8. Amend with compost (1-2 gallons per planting area) for nutrients.
- ● Fertilizer: Balanced fertilizer (10-10-10 or 5-5-5) for seedlings.
- ● High-nitrogen fertilizer (like fish emulsion) when transplanting.
- ● Calcium supplement (e.g., crushed eggshells or lime) to prevent blossom end rot.
- ● Watering Can or Hose: A gentle spray nozzle for seedlings; a soaker hose for mature plants.
- ● Mulch: Straw or shredded leaves (1-2 inches thick) to retain moisture and suppress weeds.
- ● Garden Gloves & Hand Trowel: For planting and soil prep—gardening is hands-on!
- ● Temperature: Cauliflower thrives in cool weather (50-75°F / 10-24°C). Use row covers if nights dip below 50°F (10°C).
- ● Sunlight: Full sun (6-8 hours daily). A south-facing spot is ideal in the Northern Hemisphere.
- ● Space: Plant seeds 12-18 inches apart; mature heads need 18-24 inches between plants.
- ○ Optional Extras: Grow lights (for indoor seed starting).
- ● Drip irrigation system (for consistent moisture).
- ● Pest control (neem oil or insect netting for cabbage moths).
How to track cauliflower development through its key growth stages
Here's the straightforward way to recognize each phase—no guesswork, just clear checkpoints.
🌱 Step 1: Germination (Seed to Sprout)
Plant seeds ½ inch deep in well-draining soil at 70-80°F. You'll see tiny green shoots emerge in 5-10 days. Keep the soil consistently moist but not soggy—this is where most seedlings fail. A humidity dome helps maintain even moisture without drowning the seeds.
Watch for the first true leaves (not the initial seed leaves) to appear. These will look like small, rounded leaves rather than the heart-shaped cotyledons. This stage marks the transition from seedling to active growth, and you can remove the humidity dome once you spot them.
🌿 Step 2: Early Vegetative Growth (Seedling to Leaf Development)
Once seedlings have 4-6 true leaves, they're ready for their first true growth spurt. This phase lasts 3-4 weeks, where the plant focuses on building a strong stem and leaf structure. You'll notice leaves growing larger and more frequent, with a deep green color.
Here's the thing—cauliflower seedlings need full sun (6+ hours daily) to avoid leggy growth. If your seedlings stretch toward the light with pale stems, move them closer to the window or under grow lights. Strong seedlings have thick stems and leaves spaced 1-2 inches apart.
☀️ Step 3: Head Formation (Curding Begins)
When the plant reaches 12-18 inches tall, you'll start seeing the first signs of curd formation. Look for a small, tight cluster of leaves in the center—this is where the head will develop. This stage occurs 4-6 weeks after germination, depending on variety and growing conditions.
This is the moment that matters: support the head as it grows. Use a small piece of cheesecloth or netting to gently wrap the forming head. This prevents the head from splitting open due to sun exposure or uneven growth. Keep the soil moist but not waterlogged—consistent moisture is key.
💧 Step 4: Head Maturation (From Small Bump to Harvest-Ready)
The head will grow rapidly over 2-3 weeks, expanding from a small bump to a 6-8 inch diameter. You'll notice the outer leaves wrapping tightly around the curd, which should remain firm and compact. If the head starts to loosen or turn yellow, it's time to harvest before it bolts.
Real talk: overwatering now causes splitting. Water deeply but only when the top 1 inch of soil feels dry. Avoid wetting the leaves to prevent disease. The head should feel solid and heavy—this is your signal it's ready for harvest.
✂️ Step 5: Harvesting (Picking at Peak Freshness)
Harvest when the head reaches 6-8 inches in diameter and the surrounding leaves are still green and tight. Use a sharp knife to cut the stem 1-2 inches below the head. This allows the plant to potentially produce a second, smaller head if it's a suitable variety.
Don't skip this: harvest on a cool, overcast day. Hot sun causes the curd to yellow and become bitter almost immediately after cutting. Store harvested heads in the fridge for 5-7 days or blanch and freeze for long-term storage.
Tips & tricks for perfect cauliflower growth
Let me save you from the common pitfalls I've seen with cauliflower cultivation—these are the game-changers that'll make your harvest thrive.
Germination Success: The 70-80°F temperature range is non-negotiable for those first 5-10 days. I've seen too many gardeners give up when seeds don't sprout because they didn't maintain consistent warmth. Use a seedling heat mat if your home runs cooler—it's worth the investment. Once you spot those first true leaves (not the initial seed leaves), you can safely remove the humidity dome, but keep monitoring moisture levels closely.
Lighting Strategy: In Step 2, when your seedlings have 4-6 true leaves, that's when you need to get serious about light. If you notice pale, stretched seedlings reaching for the sky, they're telling you they're hungry for more sun. Move them to a south-facing window or invest in a grow light—cauliflower needs that full 6+ hours of sunlight daily to avoid leggy, weak plants. I've had to start over twice because I underestimated this phase.
Head Support System: When you first see that tight cluster of leaves forming in Step 3, that's your cue to act. Wrap the forming head with cheesecloth or netting—this isn't optional, it's prevention. I've seen beautiful heads split open because they weren't supported, and that's heartbreaking after all that work. The key is gentle wrapping that doesn't restrict growth but provides that crucial support as the head expands.
Watering Wisdom: The most critical watering rule comes in Step 4: never let the top inch of soil dry out completely, but don't drown the plant either. I learned this the hard way when my first cauliflower head split open from too much water. Use your finger to check moisture—it should feel damp but not soggy. And here's the thing about leaves: water at the base only to prevent fungal diseases that can ruin your harvest.
Pro Tips for Stages Of Cauliflower Growth
- Let me save you from the common pitfalls I've seen with cauliflower cultivation—these are the game-changers that'll make your harvest thrive.
- Germination Success: The 70-80°F temperature range is non-negotiable for those first 5-10 days.
- Lighting Strategy: In Step 2, when your seedlings have 4-6 true leaves, that's when you need to get serious about light.
Frequently asked questions
Got questions about growing cauliflower?
You’re not alone! Here are answers to the most common queries about its growth stages, from seed to harvest.
How long does it take for cauliflower to go from seed to harvest?
Most cauliflower varieties take 70–100 days to mature, depending on the type (early, mid-season, or late). Check the seed packet for specifics—cool-season varieties (like ‘Snowball’) often mature faster (70–80 days), while larger heads may need 90+ days. Plant at the right time to avoid bolting (premature flowering)!
Why does my cauliflower turn yellow or brown before harvest?
Yellowing or browning is usually caused by heat stress, uneven watering, or nutrient deficiencies. Cauliflower thrives in cool (50–75°F) weather—if temps rise above 80°F, the head may bolt or discolor. Try blanching (tying outer leaves over the head) to protect it from sunlight, or replant in a cooler season.
Can I harvest cauliflower at different stages of growth?
Yes! While cauliflower is best harvested when the head is firm and compact (6–8 inches wide), you can try “baby cauliflower” by picking smaller heads (3–4 inches) for salads or stir-fries. Note: Harvesting early may encourage more side shoots, but larger heads yield fewer but bigger florets.
What can I plant after cauliflower in the same spot?
Cauliflower is a heavy feeder, so follow it with light-rooted crops like lettuce, radishes, or beans. Avoid replanting brassicas (broccoli, kale) in the same spot for 3+ years to prevent disease. Use compost or a balanced fertilizer to replenish nutrients before the next planting.
How do I prevent pests like cabbage worms or aphids in my cauliflower?
Start with row covers to block pests early. Handpick worms or use neem oil for aphids. Diatomaceous earth can deter slugs, and rotating crops yearly reduces long-term infestations. Healthy plants (with proper watering and nitrogen) are less attractive to pests!
Wrapping up and next steps
Understanding the stages of cauliflower growth transforms gardening from guesswork to a rewarding journey! 🌱 From tiny seeds to a lush, harvest-ready head, each phase—like seed germination, leaf growth, and curd formation—plays a vital role in success.
With patience and care, you’ll enjoy a bountiful harvest packed with flavor and nutrition.
Ready to grow your own? Start by planting those seeds this season and watch your garden thrive! 🌟 For extra confidence, explore local gardening guides or connect with fellow green thumbs in online communities. Happy growing!