
Flowers
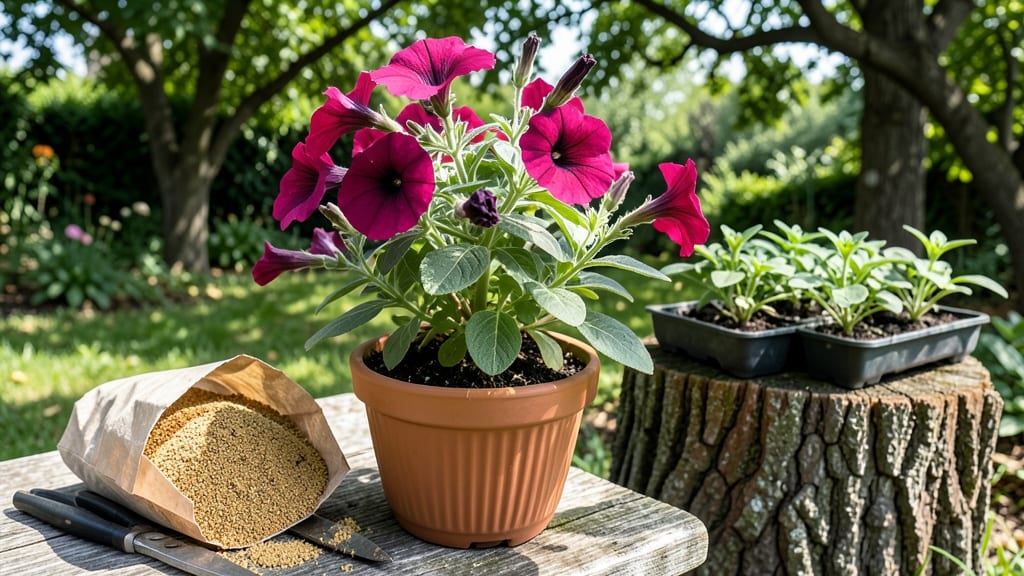
Adding sand to flower beds isn’t just about drainage—it’s the difference between soggy roots and thriving blooms that keep coming back year after year. 🌸 I’ve seen wilting petunias transform into lush, vibrant plants just by loosening the soil with a handful of coarse sand, and the secret isn’t complicated: flowers hate sitting in wet feet, but they love well-aerated soil that lets roots breathe.
The magic happens when you mix one part sand with two parts garden soil for most annuals and perennials—think marigolds, geraniums, or even delicate snapdragons. For heavy clay soils, start with 20-30% sand to break up compaction without washing away nutrients.
The key is using coarse sand (like builder’s sand), not fine playground sand, which clumps instead of improving drainage.
What you’ll notice first is how quickly water drains away after rain, preventing root rot and fungal diseases. Within weeks, stems stay upright instead of flopping, and blooms last longer because the plants aren’t struggling to survive.
Even drought-tolerant flowers like lavender benefit from this trick—just don’t overdo it, or you’ll dry out the soil too fast.
For clay-heavy gardens, work sand into the top 6 inches of soil in early spring, then top-dress with compost to replenish nutrients. And if your flowers start looking stressed after a few months, it’s time to reamend—this isn’t a one-and-done fix, but the payoff is worth the effort.
📚 In This Guide
- What you need
- Instructions
- Tips and common mistakes
- Wrapping up and next steps
What you need
- ● Coarse sand: 50% of the mix (e.g., builder’s sand or horticultural sand, not fine beach sand). Quantity: 1 part by volume (e.g., 1 cubic foot for a small pot or 2–3 cubic feet for a flower bed).
- ● Perlite or pumice: 30% of the mix (improves aeration and moisture control). Quantity: 0.6 parts by volume.
- ● Organic matter: 20% of the mix (choose coco coir, peat moss, or compost for nutrients). Quantity: 0.4 parts by volume.
- ● Garden gloves (to protect your hands from grit).
- ● Wheelbarrow or large bucket (for mixing—5-gallon capacity minimum).
- ● Garden trowel or shovel (for amending soil or filling pots).
- ○ pH testing kit (optional but helpful—ideal range: 6.0–7.0 for most flowers).
- ● Watering can or hose (for moistening the mix before use).
- ● 💡 Avoid fine sand: It compacts easily, defeating the purpose! Stick to coarse, gritty textures.
- ● 🌡️ Sterilize materials: If reusing containers, rinse with a 10% bleach solution to prevent disease.
- ● ✨ Layer for heavy feeders: Add a 1-inch layer of sand at the bottom of pots for plants like succulents or orchids.
How to use sand for flowers: the drainage Technique that works
Here's how to incorporate sand into your flower beds for better drainage and healthier roots.
🌱 Step 1: Test Your Soil’s Current Drainage
Before adding sand, assess your soil's natural drainage. Dig a small hole about 6 inches deep and fill it with water. If the water drains within 1-2 hours, your soil is already well-draining. If it sits for longer, sand will help. I like to do this test in multiple spots—soil can vary even within the same garden bed.
For a quick visual check, squeeze a handful of moist soil. If it holds its shape like clay or forms a ball, it’s too dense. If it crumbles easily, it’s already loose. The goal is to improve without over-amending—sand shouldn’t turn your soil into pure grit.
💧 Step 2: Choose the Right Sand and Mix It Properly
Use coarse builder’s sand (not fine beach sand, which compacts). Mix it into the top 6-8 inches of soil at a ratio of 1 part sand to 3 parts existing soil. Overdoing it can create a sandy layer that repels water, causing drainage issues below. I like to blend it in with a garden fork, working it gently to avoid disturbing roots.
For container plants, mix 1 part sand per 4 parts potting mix. This prevents compaction in pots, where water can pool at the bottom. Test the blend by squeezing it—it should hold shape slightly but crumble when tapped. If it feels like wet sandpaper, you’ve added too much.
☀️ Step 3: Amend the Soil and Plant Your Flowers
Spread the sand-soil mix evenly over the planting area, then water it in thoroughly. Let it settle for 24 hours before planting. This gives the sand time to integrate without creating pockets of pure grit. I find that watering helps the sand distribute naturally, filling gaps without clumping.
When planting, place flowers at the same depth they were in their containers. Press the soil gently around the roots to eliminate air pockets, but don’t compact it. Water deeply after planting to encourage roots to grow into the amended soil. You’ll notice better drainage immediately—water will sink in faster, and puddles will disappear within minutes.
✂️ Step 4: Monitor and Adjust Over Time
After the first few waterings, check for signs of over-amendment. If water runs off the surface instead of soaking in, you’ve added too much sand. In this case, mix in 2 inches of compost to improve water retention. If flowers wilt quickly after watering, the sand may be pulling moisture away too fast—add a layer of mulch to slow evaporation.
Reassess drainage every 3-4 months, especially in containers. Over time, organic matter breaks down, and sand can shift. Top-dress with a ½-inch layer of sand and compost annually to maintain balance. You’ll know it’s working when your flowers bloom longer and roots stay healthy, even after heavy rains.
Tips & tricks for perfect sand amendments in flower beds
Took me years of trial-and-error to master these soil secrets—here’s how to avoid the common pitfalls while maximizing your flowers’ potential.
Soil Test Timing: The 1-2 hour drainage test in Step 1 is your baseline, but I recommend testing at least three different spots in your garden. Clay soil in one area might drain differently than sandy loam just a few feet away. If water disappears in under an hour, you’re dealing with naturally fast-draining soil—sand won’t help much here, and you might want to focus on adding organic matter instead. This test prevents over-amending, which can create its own drainage problems.
Sand Selection Matters: Builder’s sand is your best bet, but if you can’t find it, coarse horticultural sand works too. The key is particle size—think rice grains, not flour. Fine beach sand compacts like cement when wet, defeating the whole purpose. I’ve seen gardeners use crushed granite as a gritty alternative, though it’s heavier and may alter soil pH over time. Always sieve your sand to remove any debris or clay particles that could clog drainage paths.
Mixing Technique: When blending sand into your soil in Step 2, work it in in layers—no more than 2 inches at a time. This prevents creating a non-porous sand layer that repels water. Think of it like making a lasagna: alternate between your existing soil and the sand, then blend gently with your fork. For containers, I like to pre-mix the sand with potting soil in a wheelbarrow before filling pots. This ensures even distribution without creating pockets where roots might get stuck.
Post-Planting Care: That 24-hour settling period in Step 3 is non-negotiable. I’ve seen impatient gardeners plant immediately and end up with roots growing into dry sand pockets. After planting, I recommend a light mulch layer (¼-inch) to help retain just enough moisture while still allowing excess water to drain. This is especially important for container plants, which dry out faster. Watch for wilting after watering—if it happens within 30 minutes, your sand ratio might be too high.
Pro Tips for Sand For Flowers
- Took me years of trial-and-error to master these soil secrets—here’s how to avoid the common pitfalls while maximizing your flowers’ potential.
- Soil Test Timing: The 1-2 hour drainage test in Step 1 is your baseline, but I recommend testing at least three different spots in your garden.
- Sand Selection Matters: Builder’s sand is your best bet, but if you can’t find it, coarse horticultural sand works too.
Frequently asked questions
Got questions about using sand for your flowers? You’re not alone! Here are some of the most common queries—and their answers—to help you get the best results with this gritty drainage secret.
Why do some flowers need sand in their soil?
Sand improves drainage, especially for plants like succulents, cacti, or tropical blooms that hate soggy roots. It prevents compaction, allowing water and air to flow freely. Think of it as a lifeline for plants that despise "wet feet"!
When is the best time to add sand to flower pots?
Mix sand into fresh potting soil before planting, or top-dress established pots with a thin layer (¼ inch) during repotting. Avoid adding it mid-season unless you notice poor drainage—sudden changes can stress plants.
Can I use regular beach sand for my flowers?
Nope! Beach sand is too fine and may contain salt or debris. Opt for coarse horticultural sand (like builder’s sand) or crushed granite. Sterilized sand ensures no harmful pathogens or chemicals harm your blooms. →
How much sand should I use for potted flowers?
Start with a 10–20% sand ratio in potting mix (e.g., 1 part sand to 4 parts soil). For heavy clay pots, lean toward 20%. Overdoing it can make soil too gritty, so test drainage first—water should run out in 10–15 minutes.
My flowers look wilted after adding sand. What went wrong?
This usually means the sand altered moisture balance too drastically. Try these fixes:
- Flush the pot with water to settle the mix.
- Add organic matter (peat moss or compost) to balance grit.
- Reduce watering slightly—sandy soil dries faster!
Wrapping up and next steps
Transforming your garden with sand for flowers is simpler—and more rewarding—than you think! By improving drainage and aeration, you’re giving your blooms the gritty foundation they need to thrive. Whether you’re a seasoned gardener or just starting, this small tweak can make a big difference in your flower beds.
Ready to see your garden flourish? Grab your supplies, roll up your sleeves, and give it a try—your flowers will thank you! 🌸 For even more tips, check out our guide on maintaining healthy soil next.