
Flowers
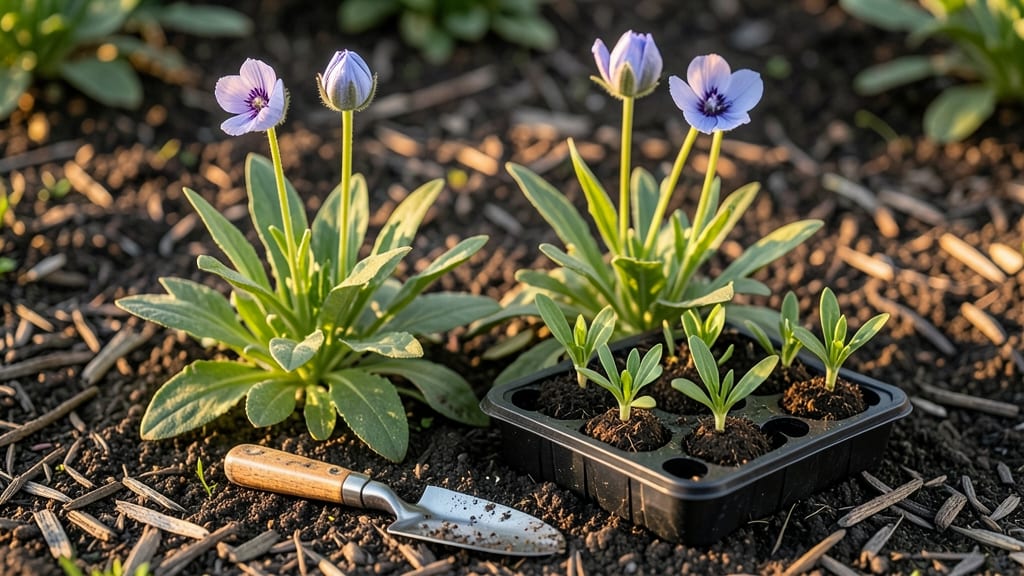
Balloon flowers (Platycodon grandiflorus) bloom like clockwork—even when other perennials take a summer nap. 🌸 I planted mine last spring and now they’re the star of my late-summer garden, with those signature puffball blooms lasting from July through frost.
The secret isn’t fancy soil or constant fussing—it’s three strategic trims that keep them flowering year after year.
You’ll need well-draining soil (amend with compost if yours is heavy clay), 6 hours of sunlight daily, and a spot where they won’t get crowded—18-24 inches apart for full-size plants. Containers work too, just use 5-gallon pots for each plant.
The real magic happens in the pruning: cut back spent blooms, then again after frost, and once more in early spring. Each trim triggers a fresh wave of flowers.
What you end up with is a nearly nonstop show of sky-blue, white, or purple blooms that hummingbirds adore. The foliage stays tidy, the plants spread slowly but surely, and you’ll have cut flowers for arrangements that last 10 days in a vase.
Even my neighbor’s skeptical “I don’t get perennials” comment changed after she saw mine.
Works in zones 3-9, thrives in both ground beds and containers, and handles drought once established. Here’s how to get those first blooms going—without the guesswork that usually comes with perennials.
📚 In This Guide
- What you need
- Instructions
- Tips and common mistakes
- Wrapping up and next steps
What you need
- ● Balloon flower seeds, bulbs, or rooted cuttings – Choose Platycodon grandiflorus varieties (e.g., ‘Astra Double,’ ‘Blue Ball,’ or ‘White Queen’). Tip: Seeds take longer to bloom (2+ years), while bulbs/cuttings flower faster!
- ● Well-draining potting mix or garden soil – A blend of 60% topsoil, 30% compost, and 10% perlite/sand works best. For containers: Use a lightweight mix with added organic matter.
- ● Containers or garden bed – For seeds: 4–6" deep pots (group 3–5 seeds per container).
- ● For bulbs/cuttings: 8–12" deep pots (1 bulb per pot) or a sunny garden bed with 6–12" spacing between plants.
- ● Slow-release fertilizer (10-10-10 or 5-10-10) – 1 tbsp per plant mixed into soil at planting.
- ● Garden trowel or small hand shovel – For digging holes or transplanting.
- ● Watering can or hose with a gentle spray nozzle – Balloon flowers hate soggy roots!
- ● Pruning shears – For trimming spent blooms and shaping plants.
- ○ Gloves (optional) – Protects hands from thorns (some varieties) and soil.
- ● Mulch (straw or shredded bark) – 2–3" layer to retain moisture and suppress weeds.
- ● Sunlight: Full sun (6+ hours/day) for vibrant blooms. Partial shade (4–6 hours) works in hot climates.
- ● Watering routine: Keep soil evenly moist (not waterlogged) until established. Drought-tolerant once mature!
- ● Hardiness zone: USDA Zones 3–9. In colder zones, plant bulbs in fall for spring blooms.
Step-by-step guide for planting balloon flowers
Here's how to establish these striking perennials so they reward you with bold blooms season after season.
🌱 Step 1: Choose the Perfect Planting Location
Balloon flowers thrive in full sun to partial shade, with at least 6 hours of direct sunlight daily. I always scout the site first—look for spots where other perennials have thrived, as balloon flowers share similar growing conditions. They tolerate a range of soil types but prefer well-draining soil with a slightly acidic to neutral pH.
Dig a hole that's twice as wide as the root ball but no deeper. Loosen the sides of the hole to encourage root spread. If your soil is heavy clay, mix in 2-3 inches of compost to improve drainage. The key is getting the roots established quickly—they'll thank you with stronger stems and more abundant blooms.
🪴 Step 2: Plant at the Right Depth and Spacing
Place the plant so the top of the root ball sits 1 inch below soil level. This prevents stem rot while allowing roots to access moisture. I gently spread the roots outward in the hole before backfilling with native soil mixed with a handful of compost. Press the soil lightly around the base to remove air pockets.
Space plants 18-24 inches apart for full, lush growth. Balloon flowers self-seed readily, so give them room to establish without competing with their own offspring. Water deeply right after planting to settle the soil and eliminate air gaps around the roots. You'll know it's done right when the soil surface looks slightly firm but not compacted.
☀️ Step 3: Maintain Consistent Watering and Light
Keep the soil evenly moist for the first 2-3 weeks after planting, then gradually reduce watering to once weekly once established. Balloon flowers are drought-tolerant once mature, but young plants need consistent moisture to develop strong root systems. I check soil moisture by sticking my finger 1 inch deep—if it feels dry, it's time to water.
These plants reward good light habits with prolific blooms. If you notice stems growing tall and leggy with few leaves, they're stretching for more light. Move them to a sunnier spot immediately. The ideal spot gives morning sun and afternoon shade in hot climates, preventing leaf scorch while still encouraging flowering.
✂️ Step 4: Implement the Three Simple Trims for Year-Round Blooms
First, deadhead spent blooms by cutting stems back to the first set of healthy leaves. This redirects the plant's energy into producing new flowers instead of setting seed. I do this every 2-3 weeks during the blooming season—you'll see fresh buds forming within 10-14 days of the trim.
Second, cut back the entire plant by one-third after the first flush of blooms. This rejuvenates the plant and encourages a second round of flowers. The timing matters—do this when the first blooms start to fade but before the plant looks tired. Third, in late fall, cut stems back to 4-6 inches tall to promote bushier growth next season.
Tips & tricks for planting balloon flowers
Real talk: These perennials are forgiving, but a few simple adjustments make all the difference between "nice" and "stunning" blooms.
Soil Prep Secret: Before planting, I always test the soil's drainage by digging a small hole and filling it with water. If it drains within 1 hour, your soil's fine. If not, mix in an extra 2-3 inches of compost or coarse sand to that hole—this prevents root rot while encouraging strong root spread, just like the instructions recommend. Balloon flowers hate soggy feet, and this simple test saves me from waterlogged disasters every season.
Timing Tip for the First Trim: Those 2-3 weeks between deadheading and new buds forming feel like forever, but here's the thing: The 10-14 day window is your plant's natural rhythm. Mark your calendar when you deadhead—you'll notice fresh buds appear right when the old blooms start wilting. It's nature's way of telling you, "I'm ready for another round!" This visual cue helps me stay consistent with the trimming schedule.
Light Adjustment Hack: If you're in a hot climate, I've found that morning sun and afternoon shade works best for these plants. To test your spot, place a white board where you plan to plant—if it gets hotter than 120°F, move your balloon flowers to a slightly shadier location. They'll reward you with more vibrant blooms and fewer stressed leaves. This is especially important if your area gets intense afternoon sun.
Compost Boost: Don't skimp on that handful of compost when backfilling! I've seen plants struggle when they get just the native soil. For the first year, I mix in an extra 1/2 cup of compost per plant at each watering (about once weekly) to give them a nutrient boost. This helps compensate for any less-than-ideal soil conditions and gives you stronger stems for those bold blooms.
Pro Tips for Planting Balloon Flowers
- Real talk: These perennials are forgiving, but a few simple adjustments make all the difference between "nice" and "stunning" blooms.
- Soil Prep Secret: Before planting, I always test the soil's drainage by digging a small hole and filling it with water.
- Timing Tip for the First Trim: Those 2-3 weeks between deadheading and new buds forming feel like forever, but here's the thing: The 10-14 day window is your plant's natural rhythm.
Frequently asked questions
Got questions about growing balloon flowers (Platycodon grandiflorus)? You’re not alone! Here are answers to the most common ones to help you grow these cheerful blooms with confidence.
When is the best time to plant balloon flowers?
Plant them in early spring or early fall for the best results. This gives roots time to establish before summer heat or winter frost. If you’re in a mild climate, you can plant in late winter—just protect young plants from frost with mulch or row covers.
How long does it take for balloon flowers to bloom?
With patience, you’ll see blooms in 60–90 days after planting! First-year plants may focus on root growth, but established ones reward you with continuous blooms from summer to fall. Deadheading spent flowers encourages more flowers.
Can I grow balloon flowers in containers?
They thrive in 5–7 gallon pots with well-draining soil. Choose a container with drainage holes and place it in partial shade (morning sun, afternoon shade works best). Just keep soil consistently moist and fertilize lightly every 4–6 weeks.
What pests or diseases should I watch for?
Balloon flowers are generally pest-resistant, but keep an eye out for aphids, slugs, or powdery mildew in humid conditions. Neem oil or insecticidal soap helps with pests, while improving airflow prevents mildew. Remove affected leaves promptly to keep plants healthy.
How do I overwinter balloon flowers?
In colder zones (below USDA Zone 5), cut back foliage to 2–3 inches and mulch heavily with straw or leaves. They’ll regrow in spring! In warmer climates, they may bloom year-round with minimal care—just water occasionally during dry spells.
Wrapping up and next steps
Planting balloon flowers is your ticket to vibrant, year-round blooms with minimal effort—just three simple trims! These hardy perennials reward patience with stunning colors and resilient growth, making them a must-have for any garden.
Whether you're a beginner or a seasoned gardener, their low-maintenance charm and cheerful flowers will brighten up your outdoor space effortlessly.
Ready to transform your garden? Grab your shears, pick a sunny spot, and get trimming! Start with your first cut this season, and watch your balloon flowers thrive with zero fuss. Happy gardening! 🌸✂️