
Flowers
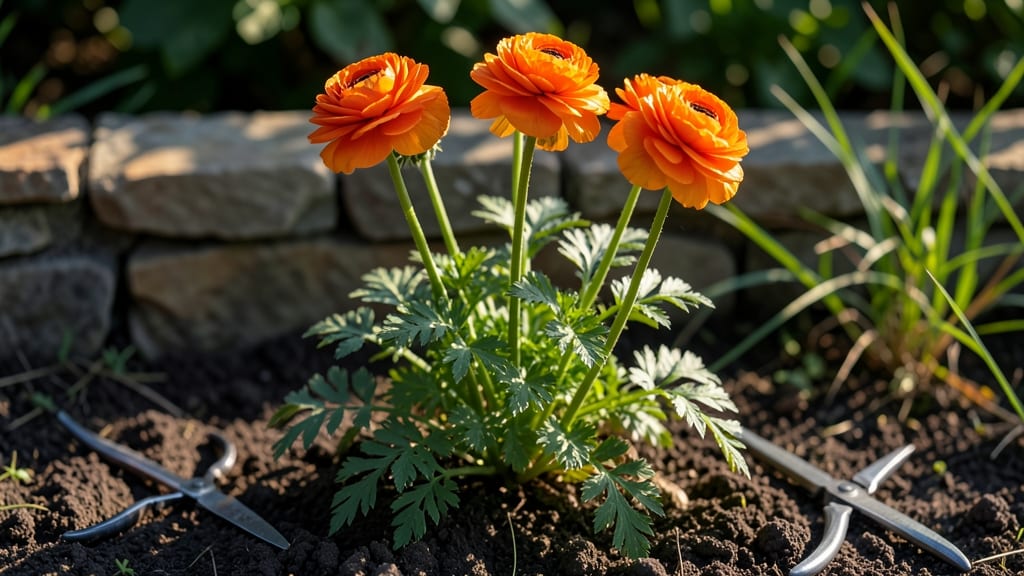
Growing orange ranunculus flowers starts with a bold choice—these layered, papery blooms brighten up spring gardens like nothing else.
I’ve grown them for three seasons now, and the secret to their vibrant color isn’t just the bulbs but the timing: plant them in late summer for winter chill, and you’ll see those fiery blooms emerge by March.
The first time I saw them unfurl, I nearly dropped my pruners—they look like tiny, delicate fireworks.
You’ll need well-draining soil, 6 hours of sunlight daily, and patience (they take 10-12 weeks to bloom). The bulbs are delicate, so handle them like you would a fresh rose—no squeezing, just gentle placement in loose, sandy soil.
Water lightly after planting, then let nature do the rest until shoots appear. Most gardeners overwater at this stage, but ranunculus bulbs rot faster than they thrive if kept soggy.
By late spring, you’ll have clusters of blooms that last weeks, their petals layered like a peony but with a ranunculus’s signature quirk: they open flat in the morning and cup as the day warms.
The fragrance? Subtle but sweet—like a whisper of citrus. Prune spent blooms to encourage more, and you’ll keep the show going until summer’s heat forces them to rest.
Perfect for cutting gardens, containers, or borders, these flowers adapt to zones 3-9 with the right winter protection. The key is not to rush them—they reward careful timing with months of color when most spring blooms have faded. Let’s get those bulbs in the ground!
📚 In This Guide
- What you need
- Instructions
- Tips and common mistakes
- Wrapping up and next steps
What you need
- ● Orange Ranunculus Bulbs: 10–20 bulbs (depending on desired cluster size; choose certified disease-free bulbs for best results).
- ○ Well-Draining Potting Mix: A high-quality, sterile mix (e.g., 60% peat moss, 30% perlite, 10% vermiculite). Optional: Add a slow-release fertilizer (10-10-10 ratio) for extra nutrients.
- ● Containers or Garden Bed: For Containers: 6–8" deep pots with drainage holes (1–2 bulbs per 6" pot).
- ● For Garden Beds: Full sun to partial shade (4–6 hours of sunlight daily) with loose, well-draining soil (amend with compost if needed).
- ● Watering Can or Spray Bottle: For gentle hydration (avoid soaking bulbs).
- ● Fertilizer: Balanced liquid fertilizer (20-20-20) or organic options like fish emulsion (apply every 4–6 weeks).
- ● Gloves: To protect hands from sharp bulb edges.
- ● Trowel or Bulb Planter: For easy planting in garden beds.
- ● Mulch: Straw or shredded bark to retain moisture and regulate soil temperature.
- ● Grow Lights (Indoor Growing): LED full-spectrum lights (12–14 hours/day) if natural light is insufficient.
- ● Floral Preservative: For extending vase life once blooms are cut (e.g., floral food packets).
Step-by-Step guide to growing vibrant orange ranunculus flowers
Here’s how to cultivate these stunning, layered blooms with minimal fuss—just follow these precise steps.
🌱 Step 1: Start Corms Indoors in Late Winter
Ranunculus corms need a long growing season, so begin indoors 8-10 weeks before your last frost date. Plant each corm 1 inch deep in a 4-inch pot filled with well-draining potting mix. Use a mix designed for bulbs or amend regular potting mix with 20% perlite to prevent rot. The corms should sit 1 inch below the soil surface, never buried deeper.
Place the pots in a cool, bright spot—60-65°F is ideal—with 6-8 hours of indirect light daily. A north-facing windowsill works well. Water lightly after planting, then keep the soil barely moist (never soggy). Overwatering at this stage causes corms to rot before sprouting. You’ll see green shoots in 4-6 weeks, signaling it’s time to adjust care.
☀️ Step 2: Transition to Stronger Light and Fertilize
Once shoots reach 2-3 inches tall, move the pots to a sunnier location with full sun (6+ hours daily). If using a grow light, position it 6 inches above the plants for 12-14 hours per day. Ranunculus stems grow weak without sufficient light, so watch for leggy, pale stems—this is your cue to boost light immediately.
Start fertilizing when true leaves appear (not the first tiny cotyledons). Use a balanced liquid fertilizer (10-10-10) diluted to half-strength every 2 weeks. Avoid high-nitrogen feeds, which promote foliage over flowers. The goal is strong stems and bud formation, not bushy leaves. You’ll notice buds forming in 6-8 weeks after planting.
🪴 Step 3: Harden Off and Plant Outdoors
4-6 weeks before your last frost, begin hardening off the plants. Move them outdoors to a sheltered, shaded spot for 1-2 hours the first day, gradually increasing exposure over 10-14 days. By the time you transplant, they should tolerate full sun and cooler nights without stress.
Choose a well-draining garden bed with full sun and amend the soil with compost to improve fertility. Plant corms 2 inches deep, spacing them 4-6 inches apart in rows 6 inches apart. Water deeply after planting to settle the soil. Mulch with 1-2 inches of straw to retain moisture and prevent weeds. You’ll see new growth in 2-3 weeks, confirming successful transplanting.
💧 Step 4: Maintain Moisture and Support Blooms
Ranunculus thrive with consistent moisture—water 1-2 inches per week, more in extreme heat. Let the top inch of soil dry slightly between waterings to prevent rot, but never allow the soil to stay bone-dry. The layered blooms form best with steady hydration, so monitor soil moisture closely during dry spells.
As stems grow 12-18 inches tall, they’ll need support. Install flower stakes or cages at planting to prevent flopping. The blooms are heavy, and unsupported stems snap easily in wind or rain. Deadhead spent flowers by snipping stems just above the next set of buds to encourage continuous blooming through the season.
✂️ Step 5: Extend the Season and Prepare for Winter
To prolong blooms, cut flowers in the morning when stems are fully hydrated. Harvest when lower petals unfurl—this stage ensures the longest vase life. After blooming, allow foliage to yellow naturally before cutting back. This process returns nutrients to the corms for next year’s growth.
In fall, after the first frost blackens the foliage, dig up corms and let them dry in a cool, dark place for 2 weeks. Store them in a paper bag (not plastic) in a dry, cool spot (50-60°F) until replanting the following winter. Properly stored corms remain viable for 2-3 years, making ranunculus a low-maintenance perennial investment.
Tips & tricks for growing vibrant orange ranunculus
Here's what I've learned after growing these delicate blooms for years—these details make all the difference between average and show-stopping results.
Light Transition Strategy: The shift from 6-8 hours of indirect light in Step 1 to 12-14 hours of full sun in Step 2 is crucial. I recommend using a grow light on a timer during cloudy days to maintain that consistent 12-14 hour light cycle. If you notice stems elongating or turning pale, that's your signal to increase light immediately—ranunculus stems grow weak without proper light exposure. The goal is sturdy stems that can support those heavy, layered blooms.
Soil Drainage Secret: Ranunculus corms rot faster than you'd think when soil stays too wet. In Step 1, I add an extra 10% coarse sand to that 20% perlite mix for even better drainage. For outdoor planting in Step 3, choose a spot where water pools don't linger—even for a few hours. Amending with compost improves fertility, but it must be well-draining. You can test your soil by squeezing a handful: if it forms a tight ball, add more perlite or sand.
Fertilizer Timing: That half-strength 10-10-10 fertilizer every 2 weeks starting when true leaves appear is non-negotiable for bud formation. I switch to a low-nitrogen, high-phosphorus fertilizer (5-10-10) once buds form to encourage blooming. The key is consistency—never skip a feeding once you start. If you see mostly leaves with few buds after 6-8 weeks, you're likely over-fertilizing with nitrogen. The goal is strong stems, not lush foliage.
Harden-Off Gradually: The 4-6 week hardening-off period in Step 3 is where many growers rush and end up with stressed plants. Start with just 1-2 hours in that sheltered spot, then increase exposure by 1 hour daily. Watch for wilting—if leaves droop, they're not ready for more sun. By the time you transplant, your plants should be able to handle full sun and cooler nights without stress. This gradual process prevents transplant shock that can delay blooming.
Pro Tips for Orange Ranunculus Flower
- Here's what I've learned after growing these delicate blooms for years—these details make all the difference between average and show-stopping results.
- Light Transition Strategy: The shift from 6-8 hours of indirect light in Step 1 to 12-14 hours of full sun in Step 2 is crucial.
- Soil Drainage Secret: Ranunculus corms rot faster than you'd think when soil stays too wet.
Frequently asked questions
Got questions about growing orange ranunculus flowers? You’re not alone! Here are some of the most common concerns—plus expert answers to help you cultivate these stunning, layered blooms with confidence.
How long does it take for orange ranunculus to bloom after planting?
With proper care, you’ll see buds forming in about 8–12 weeks after planting, and full blooms typically appear within 10–14 weeks. For faster results, start seeds indoors 10–12 weeks before your last frost or opt for pre-planted tubers in early spring. Patience pays off—these flowers reward you with vibrant color and texture!
Do orange ranunculus need full sun, or can they grow in partial shade?
While they thrive in full sun (6+ hours daily), orange ranunculus can tolerate partial shade (4–6 hours), especially in hot climates. However, too little light may reduce blooming or cause leggy stems. If growing in shade, ensure well-draining soil and supplement with balanced fertilizer every 3–4 weeks for optimal growth.
Why are my ranunculus leaves turning yellow or wilting?
Yellowing leaves often signal overwatering or poor drainage, while wilting can mean underwatering or root stress. Check soil moisture—it should stay evenly damp but not soggy. Ensure pots/tubs have drainage holes, and avoid letting them sit in standing water. If pests (like aphids) are the culprit, treat with neem oil or insecticidal soap.
Can I grow orange ranunculus in containers, or do they need a garden bed?
Ranunculus loves containers—just use pots at least 6 inches deep with drainage holes. Choose well-draining potting mix, and group 3–5 tubers per pot for a fuller look. Containers also make it easier to rotate them for even sunlight and protect them from harsh weather. Perfect for patios or balconies!
Are there orange ranunculus alternatives if I can’t find them?
If orange ranunculus are hard to source, try these similar-looking blooms:
- Calendula: Bright orange, edible petals, and drought-tolerant.
- Marigold (French or African varieties): Bold color and pest-repelling properties.
- Poppy flowers: Delicate, layered blooms in warm hues (though shorter-lived).
- Ranunculus in other colors: Pink, red, or white varieties often share the same care needs.
Wrapping up and next steps
Growing orange ranunculus flowers is a rewarding journey that brings vibrant color and delicate charm to your garden in just three months! With the right soil, sunlight, and care, these layered blooms can transform any space into a cheerful haven.
Don’t let challenges like slugs or overwatering discourage you—every gardener starts somewhere, and your patience will pay off in stunning results.
Ready to dive in? Start small—plant a few bulbs this season and watch your garden bloom with confidence! 🌱✨ Next, explore our tips for extending their season or pairing them with complementary flowers to create a show-stopping display.