Flowers
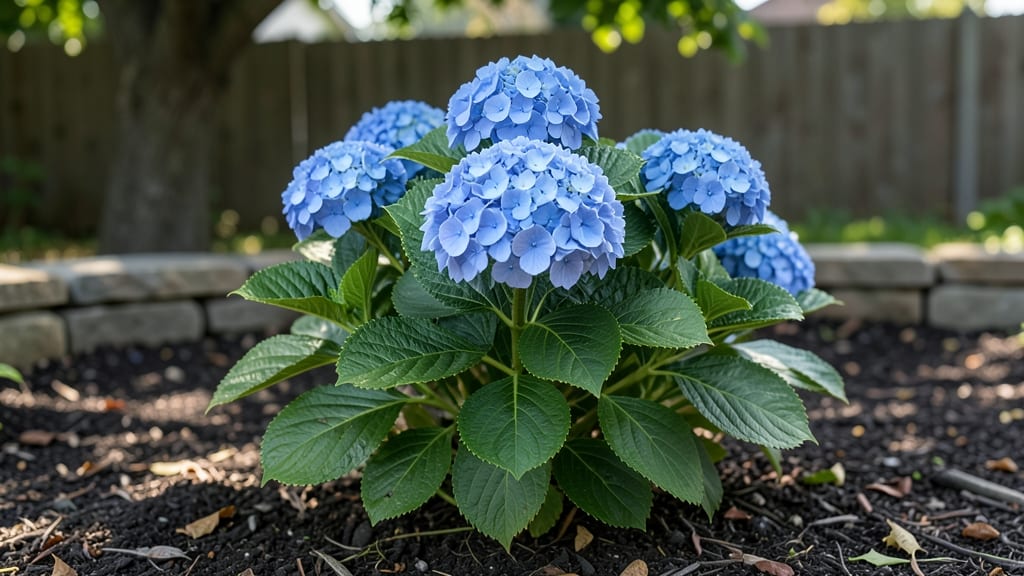
Growing mini hydrangea flowers in containers lets you enjoy lush blooms without the space or maintenance of full-sized shrubs. 🌿 I learned the hard way that these compact varieties need the same care as their larger cousins—but with a few key adjustments for their smaller stature.
The right pot, soil, and pruning schedule make all the difference between a bushy, blooming plant and a leggy disappointment.
These little powerhouses thrive in partial shade, well-draining soil, and consistent moisture. My 5-gallon containers work perfectly for dwarf varieties like 'Mini Penny,' while mounding types need slightly larger pots. The secret to their success?
A balanced fertilizer in spring and summer, and a light pruning after they finish blooming. I’ve had mine produce continuous blooms from June to frost—no fuss, just beauty.
You’ll love how these hydrangeas adapt to balconies, patios, or even sunny windowsills. Their delicate blooms add color and texture to small spaces, and they’re far easier to manage than their sprawling relatives.
With the right care, you’ll get neighborhood-stopping displays in half the space. Let’s get those roots settled in the perfect home!
Whether you’re growing Hydrangea microphylla or a compact macrophylla variety, the principles stay the same. Winter care is simple: mulch lightly in colder zones and protect pots from freezing temps. Once you master these basics, you’ll be snapping photos of your bloom-filled containers all season long.
📚 In This Guide
- What you need
- Instructions
- Tips and common mistakes
- Wrapping up and next steps
What you need
- ● Mini hydrangea plants: Choose Hydrangea macrophylla or Hydrangea serrata varieties like 'Little Lime' or 'Endless Summer' (dwarf types, 12–24" tall). Buy 1–3 plants per container (depending on size).
- ● Containers: Minimum 12–14" diameter for 1 plant, 16–18" for 2–3 plants (deeper is better for roots).
- ● Drainage holes (non-negotiable!). Opt for terracotta, ceramic, or high-quality plastic (avoid cheap, flimsy pots).
- ○ Self-watering pots (optional but handy for busy gardeners!).
- ● Potting mix: 1 part high-quality peat or coconut coir + 1 part perlite/pumice + 1 part compost. Avoid garden soil—it compacts!
- ○ Slow-release fertilizer: 10–10–10 or 12–12–12 (follow label for dosage). Optional: Organic options like worm castings or fish emulsion.
- ● Mulch: 1–2" of pine bark fines or shredded leaves (helps retain moisture and regulate soil temp).
- ● Watering can or hose with gentle spray nozzle: Mini hydrangeas hate soggy roots but need consistent moisture.
- ● Pruning shears: Bypass pruners (sharp and clean to avoid disease).
- ○ Gloves: (Optional but recommended—hydrangea leaves can be prickly!).
- ● Sunlight: Partial shade to dappled sun (3–6 hours of morning sun, especially in hot climates). Avoid harsh afternoon sun.
- ● Location: Protected spot (e.g., patio, balcony, or under a tree). Mini hydrangeas thrive in USDA Zones 5–9.
- ● Water access: Containers dry out faster! Plan to water daily in summer or use a moisture meter.
- ○ pH testing kit (optional): Mini hydrangeas love acidic soil (pH 5.5–6.2). Adjust with sulfur or aluminum sulfate if needed (for blue flowers).
Step-by-step guide for cultivating mini hydrangeas in containers
Here’s how I’ve mastered growing these charming compact varieties—thriving in containers with minimal fuss.
🪴 Step 1: Select the Right Container and Drainage
Mini hydrangeas need 5-7 gallon containers with drainage holes—12-14 inches deep is ideal for root spread. I use unglazed terra cotta because it breathes, preventing root rot in humid conditions. If your pot lacks holes, drill 3-4 additional holes along the bottom to ensure excess water escapes.
Place a 2-inch layer of gravel or expanded clay pebbles at the bottom before adding soil. This creates an air pocket that prevents soggy roots, which mini hydrangeas despise. The reason? Their delicate root systems can’t tolerate waterlogged conditions for long.
🌱 Step 2: Prepare Well-Draining Soil Mix
Fill the container with a custom mix: 60% premium potting soil, 30% perlite, and 10% compost. This blend ensures aeration and moisture retention without compacting. I avoid garden soil—it’s too dense and can suffocate roots.
Moisten the mix until it’s evenly damp but not soggy. Press it down lightly so the surface is firm but not packed. You’ll know it’s right when a handful crumbles easily when squeezed—this mimics their natural, well-drained woodland habitat.
☀️ Step 3: Plant and Position for Optimal Light
Dig a hole twice as wide as the root ball but no deeper. Gently remove the plant from its nursery pot, loosen the roots if they’re circling, and place it in the hole. Fill around the base with soil, pressing lightly to eliminate air pockets. Water deeply until it drains from the bottom holes.
Mini hydrangeas thrive in morning sun with afternoon shade—4-6 hours of direct light daily is perfect. A south-facing window or dappled sunlight outdoors works best. Too much harsh afternoon sun will scorch their delicate foliage, while too little light results in leggy growth and sparse blooms.
💧 Step 4: Water and Fertilize for Consistent Blooms
Water when the top 1-2 inches of soil feel dry—about once every 5-7 days in summer, less in winter. I use a self-watering pot to prevent underwatering, which causes buds to drop. Always water at the base to avoid wetting the leaves, reducing fungal risks.
Feed with a balanced 10-10-10 fertilizer every 4-6 weeks during spring and summer. For blue flowers, add aluminum sulfate (1 tablespoon per gallon of water) monthly. For pink blooms, skip the aluminum and use lime instead. Over-fertilizing leads to leafy growth at the expense of flowers—so follow the half-strength rule for best results.
✂️ Step 5: Prune and Maintain for Compact Growth
Prune in late winter or early spring before new growth starts. Cut back one-third of the oldest stems to encourage fresh, vigorous growth. Remove any dead, diseased, or crossing branches to improve airflow and prevent pests.
Pinch back new growth in early summer to promote bushier, more compact foliage. This is key for mini hydrangeas—they naturally stay small, but pinching encourages denser blooms and prevents legginess. Avoid pruning in fall, as it removes next year’s flower buds.
Tips & tricks for perfect mini hydrangea flowers in containers
These pro tips will help you avoid common pitfalls and maximize those stunning compact blooms.
Container Material Matters: While terra cotta is ideal, plastic containers work too—just ensure they have those critical drainage holes. I've found that glazed ceramic pots can trap excess moisture, so avoid them unless you're diligent about watering. The 5-7 gallon size is non-negotiable for mini hydrangeas; smaller pots restrict root growth and lead to stunted plants. For winter protection, wrap plastic pots in bubble wrap to prevent temperature fluctuations that stress the roots.
Soil Mix Secrets: When preparing your 60-30-10 soil blend, sift the perlite first to remove any dust or fine particles that can compact. I like to add a handful of worm castings to the compost portion for extra microbial activity—this boosts nutrient availability without overloading the plant. For containers without drainage, mix in an extra 10% perlite to improve aeration and prevent waterlogging.
Light Positioning Hack: The 4-6 hours of morning sun is crucial, but don't overlook the importance of east-facing windows—they provide gentle morning light without the intense afternoon heat. If using outdoor containers, place them where they'll receive morning sun and afternoon shade from nearby structures or trees. A white reflective surface (like a white wall or umbrella) placed 1-2 feet behind the plant can increase light exposure by up to 20% without adding heat.
Fertilizer Timing: The 4-6 week feeding schedule works best when you start fertilizing in early spring as new growth begins. I've found that applying fertilizer right after a thorough watering helps prevent root burn. For container plants, you can actually increase the frequency to every 3-4 weeks during peak growing season (May-August) since nutrients leach out faster in containers. Always flush the soil with water after each fertilizer application to prevent salt buildup.
Pro Tips for Mini Hydrangea Flowers
- These pro tips will help you avoid common pitfalls and maximize those stunning compact blooms.
- Container Material Matters: While terra cotta is ideal, plastic containers work too—just ensure they have those critical drainage holes.
- Soil Mix Secrets: When preparing your 60-30-10 soil blend, sift the perlite first to remove any dust or fine particles that can compact.
Frequently asked questions
Got questions about growing mini hydrangeas? You’re in the right place!
Whether you're a beginner or looking to refine your care routine, these answers will help you cultivate stunning compact blooms with ease. Let’s dive in!
What’s the best time of year to plant mini hydrangeas?
Plant mini hydrangeas in early spring or early fall for the best results. Avoid extreme heat or frost, as these can stress young plants. Spring planting gives roots time to establish before summer, while fall allows them to settle before winter dormancy. If you’re in a warm climate, late winter can also work!
How often should I water mini hydrangeas in containers?
Water mini hydrangeas when the top inch of soil feels dry—usually every 2–3 days in hot weather or daily in extreme heat. Containers dry out faster than garden beds, so check soil moisture regularly. Pro tip: Use well-draining soil and a saucer to catch excess water and prevent root rot.
Do mini hydrangeas need full sun or partial shade?
Mini hydrangeas thrive in partial shade (morning sun + afternoon shade), especially in hot climates. Too much direct sun can scorch leaves and reduce blooms. In cooler regions, they tolerate 4–6 hours of sun daily. Observe your plant—if leaves yellow or wilt, adjust light exposure gradually.
Why aren’t my mini hydrangeas blooming?
Common reasons include over-fertilizing (too much nitrogen = lush leaves, few flowers), pruning at the wrong time (prune after blooming, never in late summer), or insufficient sunlight. Try deadheading spent blooms to encourage new growth and use a balanced bloom booster fertilizer in early spring.
Can I grow mini hydrangeas in small pots or hanging baskets?
Mini hydrangeas are perfect for containers as small as 8–12 inches wide. For hanging baskets, choose trailing varieties like Hydrangea macrophylla ‘Mini Penny’. Ensure pots have drainage holes, use lightweight potting mix, and repot every 2–3 years to refresh nutrients. Bonus: They’re great for balconies and patios!
How do I overwinter mini hydrangeas in pots?
Move pots to a protected spot (garage, shed, or insulated porch) before temperatures drop below 20°F (-7°C). Wrap pots in bubble wrap or use a frost blanket to shield roots. Water sparingly in winter (only when soil is dry) and resume regular care in spring. Avoid fertilizing until new growth appears!
Wrapping up and next steps
Mini hydrangea flowers are the perfect choice for adding compact elegance to your containers—whether you're a seasoned gardener or just starting out! 🌸 With the right care, these charming blooms will reward you with vibrant colors and lush foliage year after year.
The key is patience, consistency, and a little love for their specific needs.
Ready to dive in? Start small—pick a sunny spot, gather your supplies, and give these tiny beauties the attention they deserve. Your next step? Plant that first mini hydrangea today and watch your container garden transform into a showstopper! 🌱