
Flowers
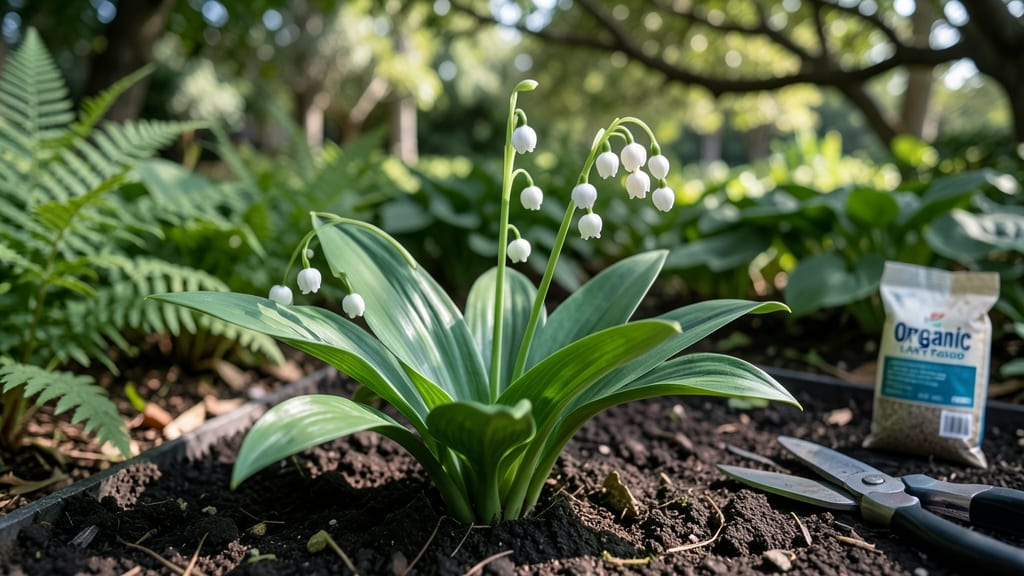
Lily of the valley in flower beds transforms shady corners into fragrant, lush retreats that feel like a secret garden. 🌿 The delicate white spikes and sweet scent make it the star of woodland-inspired designs, but it thrives in any low-light spot.
I’ve seen it spread gracefully under trees where nothing else grows, creating a carpet of emerald leaves and delicate blooms by spring.
The key to success is patience—it multiplies slowly but reliably, filling gaps naturally over time. Pair it with hostas, ferns, or bleeding hearts for a layered, textured look, or let it shine solo in a moon garden where its glow stands out at dusk.
The fragrance alone makes it worth the wait, drifting through the air like a whisper.
You’ll end up with a flower bed that smells like spring all season, with minimal effort. The plants spread through underground runners, so they’ll fill in over years, creating a living tapestry of green and white. Perfect for gardeners who love low-maintenance beauty with a touch of magic.
Works best in partial to full shade, though it tolerates morning sun in cooler climates. The secret? Don’t rush—let it grow at its own pace, and it’ll reward you with years of effortless charm.
📚 In This Guide
- What you need
- Instructions
- Tips and common mistakes
- Wrapping up and next steps
What you need
- ● Lily of the Valley Plants: 3–5 mature plants (for a small bed, ~1 sq ft)
- ● OR 20–30 seeds (if starting from scratch—note: seeds take 2–3 years to bloom!)
- ● OR 10–15 divisions (for faster, established growth)
- ● Soil: Well-draining, moisture-retentive soil (amend with 2–3 inches of compost or peat moss if your soil is sandy/clay-heavy).
- ● Mulch: 2–3 inches of organic mulch (e.g., shredded bark, pine needles, or leaf mold) to retain moisture and suppress weeds.
- ○ Fertilizer (optional but helpful): Balanced 10-10-10 fertilizer (1 tbsp per plant at planting time)
- ● OR compost tea (for organic gardeners)
- ● Garden trowel or transplant spade
- ● Garden fork (for loosening soil)
- ● Watering can or hose with a gentle spray nozzle
- ● Measuring tape or ruler (for spacing plants)
- ● Gloves (to protect hands from sap—lily of the valley can be irritating!)
- ● Pruners (for trimming dead foliage post-planting)
- ● Location: Partial shade (3–6 hours of morning sun; afternoon shade in hot climates). Avoid full sun.
- ● Spacing: 12–18 inches apart (allows for natural spreading).
- ● Best Planting Time: Early spring (March–April) or early fall (September–October).
- ● Watering: Keep soil consistently moist but not soggy (especially critical in the first year).
- ● Hardiness Zone: USDA Zones 3–8 (cold-hardy but thrives in mild climates).
- ● Slow-release fertilizer pellets (for long-term nourishment)
- ● Edging stones or mulch rings (to define the flower bed)
- ● Companion plants: Hostas, ferns, or bleeding hearts (they love the same shade!)
- ● Pest deterrent: Neem oil (if slugs or snails become an issue)
Step-by-Step guide for planting lily of the valley in a flower bed
Here's how to create a fragrant, evergreen ground cover that thrives with minimal fuss.
🌱 Step 1: Choose the Perfect Location and Prepare the Soil
Lily of the valley loves shade and rich soil. Pick a spot that gets partial to full shade—it thrives under trees or on north-facing beds. The soil should be well-draining but moist, so avoid sandy areas or spots where water pools after rain.
Before planting, loosen the soil to a depth of 6 inches with a garden fork. Mix in 2-3 inches of compost (or the organic matter from your materials) to enrich the soil naturally. Lily of the valley spreads aggressively, so mark your planting area with stakes to keep it contained if needed. Here's the thing—this plant does best when left undisturbed, so choose a spot where it can establish for years.
🌿 Step 2: Plant the Rhizomes at the Right Depth and Spacing
Lily of the valley grows from rhizomes (thick, horizontal roots), not seeds. Plant them in early spring or fall when temperatures are mild. Dig small trenches 1-2 inches deep—deeper than the rhizomes themselves. Space them 6-12 inches apart, depending on how quickly you want coverage (closer spacing = faster spread).
Place each rhizome horizontally in the trench, with the buds facing upward (they’ll look like small bumps). Cover lightly with soil, leaving the buds exposed. Water gently but thoroughly to settle the soil around the rhizomes. You’ll see new shoots emerge within 2-3 weeks—that’s your signal everything is working. Don’t skip this step: burying the buds too deep will delay flowering.
☀️ Step 3: Mulch and Water for Lush, Fragrant Growth
Spread 2-3 inches of mulch (like shredded bark or leaves) over the soil to retain moisture and suppress weeds. Lily of the valley hates competition, so keep the area weed-free until it establishes. Water 1-2 times per week during the first growing season, keeping the soil evenly moist but not soggy. Once established, it’s drought-tolerant but still appreciates regular watering in dry spells.
Here’s the moment that matters: After 2-3 years, your bed will be a fragrant carpet of bell-shaped flowers in late spring. The key is patience—this plant spreads slowly at first but rewards you with decades of blooms. If you notice yellowing leaves, it’s usually a sign of too much sun or poor drainage. Adjust by moving plants to a shadier spot or improving soil drainage.
✂️ Step 4: Divide and Maintain for Long-Term Beauty
Every 3-5 years, divide the clumps in early spring or fall to keep them vigorous. Dig up sections with a sharp spade, separating the rhizomes into smaller clusters. Replant them immediately in fresh soil, spacing them 6 inches apart. This prevents overcrowding and ensures healthy blooms. Lily of the valley spreads naturally, so you can also share divisions with fellow gardeners!
Deadhead spent flowers if you prefer a tidier look, but leaving them on encourages seed production for wild areas. In late fall, cut back the foliage to 2 inches tall to keep the bed neat. This plant is low-maintenance, but a little care goes a long way. Real talk: Once established, it’s nearly indestructible—just water and admire the fragrance.
Tips & tricks for perfect lily of the valley planting
Here's what I wish I knew before planting my first lily of the valley bed—these tricks make all the difference for fragrant, long-lasting blooms.
Soil Prep Secret: The 6-inch soil loosening in Step 1 isn't just about aeration—it's about creating the perfect sponge-like texture that holds moisture while preventing root rot. I learned this the hard way after planting in heavy clay soil that stayed waterlogged. Amend with that 2-3 inches of compost right down to the 6-inch depth, not just on top. Think of it like making a fluffy cake layer for your plants' roots.
Rhizome Placement: When planting those rhizomes in Step 2, here's the thing: those buds facing upward aren't just decorative—they're your plant's future flowers. I once buried them too deep (thinking deeper meant safer), and it took two extra years before I saw blooms. Leave those buds exposed like little green buttons peeking out—this ensures spring flowers arrive on schedule. The 1-2 inch depth is perfect for encouraging both roots and shoots to establish quickly.
Mulch Magic: That 2-3 inches of mulch in Step 3 does more than just look pretty. It creates a microclimate that keeps soil temperatures stable and moisture consistent. I use shredded hardwood mulch because it breaks down slowly, but pine needles work too. The key is keeping it 2-3 inches thick—any less and weeds will outcompete your lily of the valley. Pro tip: Refresh the mulch layer every spring to maintain its insulating properties.
Patience Payoff: The 2-3 year wait mentioned in Step 3 feels like forever, but here's why it's worth it: Each year your plants establish, they build stronger root systems that support bigger, more abundant blooms. I've seen gardeners impatiently dig up plants after one year—big mistake! Let them spread naturally. The first year might just be pretty foliage, but by year three, you'll have that magical carpet of fragrant flowers you dreamed of.
Pro Tips for Lily Of The Valley In Flower Bed
- Here's what I wish I knew before planting my first lily of the valley bed—these tricks make all the difference for fr...
- Soil Prep Secret: The 6-inch soil loosening in Step 1 isn't just about aeration—it's about creating the perfect spong...
- Rhizome Placement: When planting those rhizomes in Step 2, here's the thing: those buds facing upward aren't just dec...
Frequently asked questions
Got questions about growing lily of the valley in your flower bed?
You’re not alone! Here are some of the most common queries—and their answers—to help you cultivate these fragrant beauties with confidence.
When is the best time to plant lily of the valley?
The ideal time to plant lily of the valley is in early fall (September–October) or late winter to early spring (February–March). This gives the roots time to establish before the growing season. Avoid planting in extreme heat or drought conditions, as the delicate roots need moisture to settle in. Pro tip: If you miss the fall window, spring planting still works—just water deeply after planting and mulch to retain moisture!
How long does it take for lily of the valley to bloom?
Patience is key! Lily of the valley typically takes 3–5 years to bloom after planting from seed, but if you’re using corms or divisions, you might see flowers in just 1–2 years. Once established, they’ll reward you with fragrant spikes in late spring (April–May, depending on your climate). Fun fact: Older plants produce more abundant blooms, so give them time to thrive!
Why isn’t my lily of the valley blooming?
Several factors could be at play: overcrowding (divide clumps every 3–4 years), poor soil (they prefer rich, well-draining, slightly acidic soil), or too much sunlight (partial shade is ideal). Check for pests like slugs or disease (like fungal issues from overwatering). If your plant is healthy but not flowering, it might just need another year or two—they’re slow but steady!
Can I grow lily of the valley in containers instead of a flower bed?
Lily of the valley thrives in large, deep containers (at least 12 inches wide and deep) with well-draining potting mix. Use a mix of peat moss, perlite, and compost for optimal growth. Place the container in partial shade and water regularly. Just be aware that container-grown plants may bloom less prolifically than those in the ground, but they’ll still reward you with sweet fragrance!
Are there any plants that pair well with lily of the valley?
Lily of the valley loves shady, moist companions! Try pairing it with:
- Hostas (for lush foliage contrast)
- Ferns (like Japanese painted ferns)
- Bleeding heart (Dicentra) (for similar shade-loving habits)
- Hellebores (early spring bloomers)
Wrapping up and next steps
Incorporating lily of the valley into your flower bed isn’t just about adding beauty—it’s about creating a fragrant, low-maintenance sanctuary that feels like a fairy tale. 🌿 These delicate blooms thrive with minimal effort, rewarding you with their iconic scent and lush foliage.
Whether you’re a seasoned gardener or just starting, their adaptability makes them a perfect choice for any outdoor space.
Ready to transform your garden? Start small—plant a few clumps in shady spots and watch them multiply naturally. Before you know it, your flower bed will be alive with the magic of lily of the valley! Happy gardening! 🌸