
Flowers
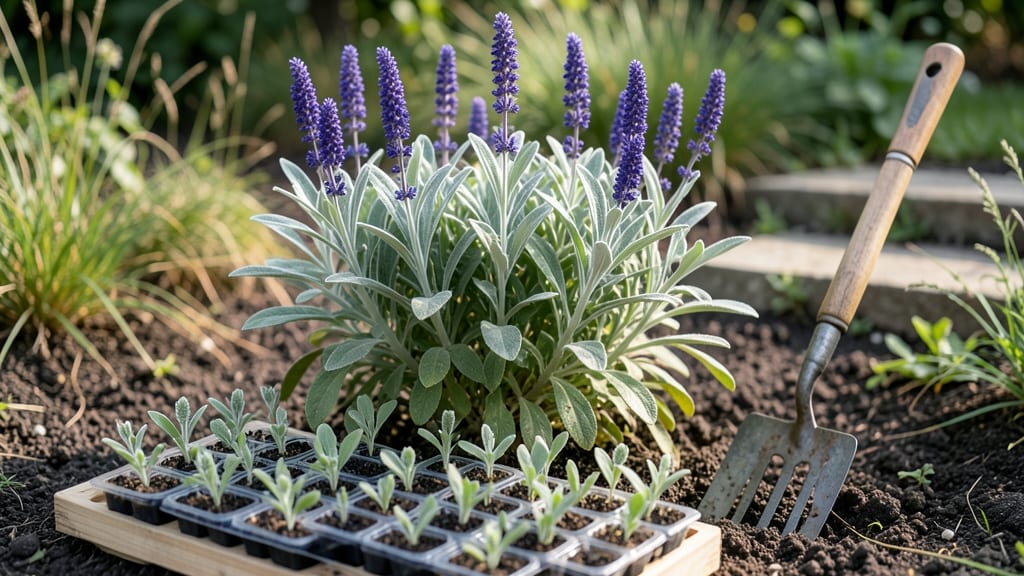
Starting a flower bed from scratch is where the magic of gardening begins—where empty space transforms into a vibrant, fragrant haven that draws hummingbirds and neighbors alike.
I’ve turned my own patch of grass into a four-season showstopper, and the secret isn’t expensive plants or fancy tools, but the right soil prep and a little planning.
The key is choosing a spot that gets the right amount of sun for your climate, then loosening the earth so roots can spread without fighting compacted soil.
You’ll need basic supplies: a shovel, compost, mulch, and plants that thrive in your sunlight conditions. My first flower bed failed because I ignored the shade map—now I test spots for at least six hours of sun before digging.
The payoff comes when you see those first sprouts pushing through the soil, knowing you built the perfect foundation for blooms that’ll last all season.
Once planted, a 2-inch layer of mulch keeps weeds at bay and moisture locked in, while proper spacing prevents overcrowding. Within weeks, you’ll have a lush, low-maintenance garden that outperforms anything from a big-box store.
The best part? Every year, it gets easier as your soil improves and your plant choices prove themselves.
This method works for any size space—from a small window box to a backyard border. Whether you’re fixing a tired lawn or creating a pollinator paradise, the principles stay the same. Let’s get that shovel in the ground and make it happen!
📚 In This Guide
- What you need
- Instructions
- Tips and common mistakes
- Wrapping up and next steps
What you need
- ● Garden soil or potting mix: 1–2 bags (depending on bed size), well-draining and enriched with compost (e.g., Miracle-Gro Garden Soil or FoxFarm Ocean Forest).
- ● Compost or organic fertilizer: 1–2 bags (e.g., blank">Espoma Organic Garden Soil), to boost nutrient levels.
- ● Mulch: 1–2 bags (e.g., blank">cedar or pine straw mulch), to retain moisture and suppress weeds.
- ● Garden hose or watering can: For hydration needs.
- ● Gloves (heavy-duty): 1 pair, to protect your hands from thorns and dirt.
- ● Shovel or spade: 1, for digging and turning soil.
- ● Garden rake: 1, to level and smooth the soil.
- ● Measuring tape: 1, to mark out your flower bed dimensions.
- ○ Stakes or string: 1 roll, to outline the bed (optional but helpful for beginners).
- ● Plants or seeds: Choose native or climate-appropriate flowers (e.g., marigolds, petunias, or sunflowers).
- ● Soil tester kit: To check pH and nutrient levels.
- ● Knee pads: For comfort during long digging sessions.
- ● Wheelbarrow: For hauling soil, mulch, or tools.
- ● Pruners: For trimming plants or weeds.
- ● Edging tools: To create clean borders for your flower bed.
- ● Slow-release fertilizer pellets: For long-term plant health.
- ● Rain gauge: To monitor watering needs.
Step-by-Step guide to creating a thriving flower bed
Ready to transform a blank space into a vibrant display? Here's how to build a flower bed that blooms beautifully.
Mark and Outline Your Flower Bed
Use a garden hose or spray paint to trace the shape of your flower bed onto the ground. I like to use a 12-inch wide border for small beds and 18-inch wide for larger ones—this gives plenty of room for mature plants while keeping maintenance manageable. Walk around your design to visualize how it will look once planted.
Check for underground utilities before digging—call your local utility locator service if you're unsure. Once you're confident it's safe, remove any grass, weeds, or debris from the outlined area. You'll want a clean, level surface to work with. For a more polished look, consider edging with landscape fabric or bricks along the border.
Loosen and Amend the Soil
Dig down 8-12 inches deep using a shovel or tiller to break up compacted soil. This helps roots penetrate easily and prevents waterlogging. Work in sections if your bed is large—don't try to till the entire area at once, or you'll compact the soil again with your feet.
Mix in 2-3 inches of compost into the top 6 inches of soil. This improves drainage, adds nutrients, and encourages healthy root growth. If your soil feels heavy or clay-like, add 1-2 inches of coarse sand to help with aeration. For sandy soil, incorporate 1-2 inches of peat moss to retain moisture. Water the amended soil lightly to help everything settle.
Plan Your Plant Layout
Group plants by their sunlight, water, and height needs to create a cohesive look. Place taller plants like delphiniums or hollyhocks at the back or center, medium-height plants like daylilies or black-eyed Susans in the middle, and shorter flowers like impatiens or pansies at the front. This ensures everything gets the right conditions and nothing gets shaded out.
Space plants according to their mature size—check the plant tags for guidance. For example, daylilies need 2-3 feet of space, while impatiens can be planted 6-12 inches apart. Sketch a simple layout on paper first if you're unsure. Overcrowding leads to competition for nutrients and water, while too much space can leave bare spots. Aim for a balanced mix of colors and textures for visual appeal.
Plant Your Flowers
Dig holes twice as wide as the root ball but no deeper than the container's depth. Gently remove plants from their pots and loosen any circling roots with your fingers. Place each plant in its hole, ensuring the top of the root ball sits level with or slightly above the surrounding soil. This prevents water from pooling around the stem, which can cause rot.
Fill the hole with soil and press lightly around the base to eliminate air pockets. Water each plant deeply to help settle the roots and remove any air gaps. Avoid stepping on the soil around newly planted flowers—this can compact it and suffocate the roots. Mulch the bed with 2-3 inches of organic mulch (like shredded bark or straw) to retain moisture, suppress weeds, and regulate soil temperature.
Water and Maintain
Water your new flower bed deeply once a week for the first month, or more often if the weather is hot and dry. Check the soil 1 inch below the surface—if it feels dry, it's time to water. Early morning is the best time to water, as it reduces evaporation and gives plants time to dry out before nightfall, which helps prevent fungal diseases.
Monitor your flower bed regularly for weeds, pests, or signs of stress like yellowing leaves or wilting. Remove weeds by hand or with a hoe to avoid disturbing the roots of your flowers. Fertilize lightly every 4-6 weeks during the growing season with a balanced, slow-release fertilizer to keep plants thriving. With proper care, your flower bed will reward you with vibrant blooms all season long.
Tips & tricks for perfect flower bed creation
Here's what I wish I knew before starting my first flower bed—these tricks will help you avoid common pitfalls and create a stunning display that thrives.
Design with Future Growth in Mind: When planning your layout in Step 3, imagine how plants will look when fully mature. I made the mistake of placing tall plants too close to the front once, which blocked sunlight from reaching shorter varieties. Leave at least 12 inches between plants that will reach 3 feet tall, and consider drawing a scale diagram if your bed is larger than 4 feet wide.
Soil Prep is Non-Negotiable: The 8-12 inch deep tilling in Step 2 is crucial for root health, but don't stop there. If your soil feels like concrete, consider renting a rototiller for larger beds—it breaks up compaction more thoroughly than a shovel. For clay soil, mix in 1-2 inches of coarse sand only after tilling, not before, to prevent creating pockets of sand that won't integrate properly.
Planting Technique Matters: In Step 4, when placing plants in their holes, resist the urge to bury the stems too deeply. The top of the root ball should sit at soil level or just slightly above—burying stems can cause rot. For container-grown plants, gently squeeze the pot sides to encourage roots to spread outward before planting. This helps prevent transplant shock and gives roots better access to nutrients right away.
Watering Wisdom: The once-weekly watering guideline in Step 5 works for most climates, but check soil moisture at 1 inch depth with your finger before watering. Early morning watering is ideal, but if you must water in the evening, avoid getting foliage wet to prevent fungal diseases. For new beds, consider installing a soaker hose along the edges—it delivers water directly to roots without disturbing soil structure.
Pro Tips for Start A Flower Bed
- Here's what I wish I knew before starting my first flower bed—these tricks will help you avoid common pitfalls and create a stunning display that thrives.
- Design with Future Growth in Mind: When planning your layout in Step 3, imagine how plants will look when fully mature.
- Soil Prep is Non-Negotiable: The 8-12 inch deep tilling in Step 2 is crucial for root health, but don't stop there.
Frequently asked questions
about starting a flower bed—here’s what you need to know before digging in!When is the best time of year to start a flower bed?
The ideal time depends on your climate! In most regions, early spring (after the last frost) or early fall (6-8 weeks before the first frost) are perfect. These times give plants enough time to establish roots before extreme weather hits. For tropical zones, year-round planting is possible, but avoid peak summer heat.
Can I start a flower bed on a budget?
Skip expensive soil mixes by using compost, leaves, or grass clippings for mulch. Reuse materials like bricks or stones for borders, and propagate plants from cuttings or seeds instead of buying mature ones. Even a small investment in quality soil amendments (like compost) can make a big difference!
How do I keep pests and weeds out of my new flower bed?
Prevention is key! Start by removing weeds before planting and adding a 2-3 inch layer of mulch to suppress growth. Choose disease-resistant plants and rotate crops yearly if growing edibles nearby. Natural predators like ladybugs (for aphids) or neem oil sprays can also help without harsh chemicals.
What if my soil is rocky or clay-heavy?
Don’t let tough soil stop you! For rocky soil, add organic matter (like compost or peat moss) to improve drainage and root space. For clay soil, mix in sand, perlite, or gypsum to loosen it up. Raised beds are another great solution—they let you control the soil mix entirely!
How long until I see flowers after planting?
Patience pays off! Annuals may bloom in 6-12 weeks, while perennials can take 1-2 years to fully establish and flower. Some plants (like impatiens) are fast growers, while others (like peonies) reward you with stunning blooms after a longer wait. Check seed packets or plant tags for specific timelines!
What if my flower bed isn’t thriving after planting?
Troubleshoot step by step: Check for adequate sunlight (most flowers need 6+ hours/day), proper watering (deep but infrequent), and soil pH (test with a kit or send a sample to a local extension office). Overcrowding or poor drainage can also stunt growth—thin plants and improve soil structure if needed.
Wrapping up and next steps
Starting a flower bed is a rewarding journey that brings beauty and life to your outdoor space! 🌸 By choosing the right location, prepping the soil, selecting complementary plants, and maintaining consistency, you’ve set the stage for a vibrant, thriving garden. Remember: patience and care are key—your hard work will bloom into stunning results over time.
Now that you’re ready to dig in, why not take the next step? Explore seasonal planting guides or browse flower varieties that suit your climate. Happy gardening—your future flower bed awaits! 🌱