
How To
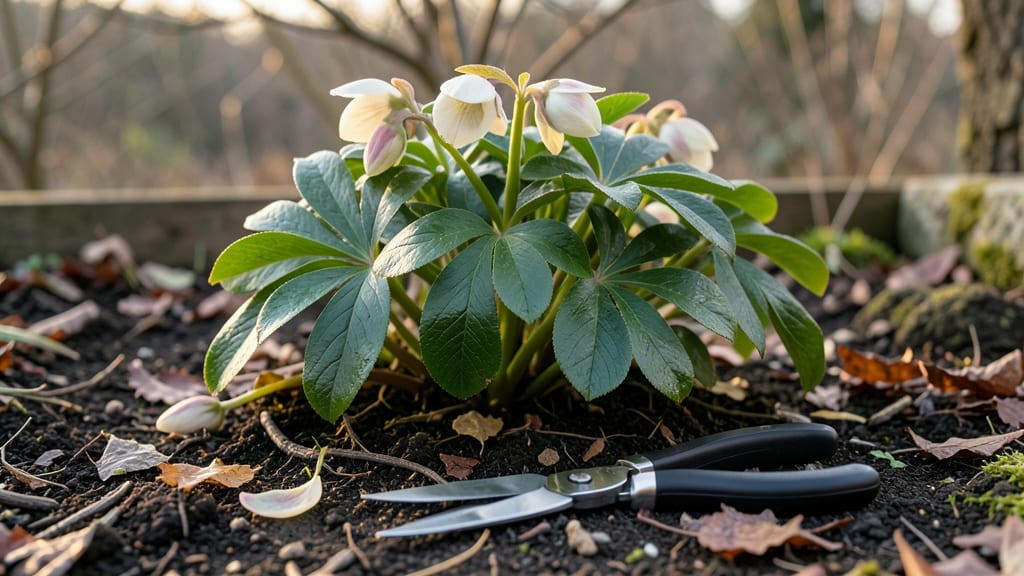
Cleaning up flower beds in spring isn’t just about clearing clutter—it’s the secret to vibrant blooms all season long. I’ve spent years watching gardens transform from tired and overgrown to lush and inviting, all because of this simple reset.
The key is timing: wait until the soil warms to at least 50°F, when frost risk fades but before weeds take over.
You only need three basic tools—a sturdy pair of pruners, a garden fork for aerating, and a wheelbarrow for debris. Skip the fancy gear; even my first spring cleanup used just these.
The real work happens in layers: start by removing dead foliage, then prune back perennials by one-third, and finally top-dress with compost. It takes about 90 minutes for a 10x10-foot bed, and the results are worth every minute.
What you’ll end up with is a bed that looks neat and intentional, not chaotic. Plants breathe easier, pests have fewer hiding spots, and new growth shoots up faster.
Plus, the soil stays healthier, so your flowers bloom bigger and longer. This isn’t just maintenance—it’s the foundation for a garden that thrives from spring to frost.
The best part? These steps work for any flower bed, whether it’s a wild cottage garden or a structured perennial border. Beginners can tackle it in one afternoon, and experienced gardeners will spot opportunities to upgrade mulch or divide overcrowded plants. Let’s get started—your garden’s fresh season begins now.
📚 In This Guide
- What you need
- Instructions
- Tips and common mistakes
- Wrapping up and next steps
What you need
- ● Garden gloves (1–2 pairs) – Choose nitrile-coated for durability or cotton-lined for comfort.
- ● Pruning shears (1) – Bypass pruners (for clean cuts) or anvil pruners (for thicker stems).
- ● Garden rake (1) – A bow rake (for debris) or leaf rake (for fine cleanup).
- ● Garden fork or trowel (1) – For weed removal or aerating soil.
- ● Heavy-duty trash bags (2–4) – 30–50 gallon size for bulky debris.
- ● Wheelbarrow or bucket (1) – 5–10 gallon for hauling waste.
- ● Hose with nozzle – Adjustable spray for rinsing tools and beds.
- ○ Garden hose attachment (optional) – Pressure nozzle for stubborn dirt or mulch.
- ● Mulch (1–2 bags) – Shredded bark or pine straw (2–3 cubic feet per bed).
- ● Compost or fertilizer (1 bag) – Balanced 10-10-10 or organic compost.
- ● Knee pads (1 pair) – For comfort during long sessions.
- ● Safety glasses (1) – Protects eyes from debris or dust.
- ● Garden kneeler pad (1) – Foldable for extra cushioning.
Step-by-step guide for spring flower bed refresh
Here's the straightforward method I use to transform tired flower beds into vibrant spaces without the overwhelm.
Remove Debris and Inspect Plant Health
Start by raking out all winter debris, dead leaves, and last year's spent blooms. I use a sturdy metal rake to pull up stubborn mulch and twigs—this prevents pests and diseases from hiding over winter. Look for any plants that died back completely; these can be pulled now to make room for new growth.
Check for signs of life in perennials by gently scratching the soil surface with your finger. If you see green growth just below the surface, leave it be—this means the plant is still alive and will emerge with time. For woody stems, cut back any blackened or mushy parts with clean pruners, but avoid cutting into healthy tissue.
Prune and Shape Established Plants
For perennials, I trim back last year's growth to about 2-3 inches above the ground, unless you know the plant has basal rosettes (like hostas or daylilies) that need to be left intact. Always prune with clean, sharp tools to avoid tearing stems, which can introduce infections. Start with the oldest growth first—this prevents hiding any hidden pests or diseases.
Shape shrubs and ornamental grasses by removing any dead or crossing branches. I like to step back every few cuts to visualize the plant's natural form. For spring-blooming shrubs like lilacs or forsythia, wait until after they finish flowering before cutting back—this ensures you don't remove next year's blooms.
Refresh Soil and Mulch for New Growth
Loosen the top 2-3 inches of soil with a garden fork or tiller to aerate it and encourage root growth. This is especially important if your soil feels compacted from winter rains. Add a 1-2 inch layer of compost to the surface and gently work it into the top inch of soil—this feeds both existing plants and prepares the bed for new additions.
Spread a fresh layer of mulch, about 2-3 inches thick, keeping it 2-3 inches away from plant stems to prevent rot. I use shredded bark or pine straw because they break down slowly and improve soil structure over time. Water the bed thoroughly after mulching to help settle everything in place and encourage root development.
Tips & tricks for perfect spring flower bed refresh
Common pitfalls—and how to sidestep every one—when refreshing your flower beds. These simple strategies will save you time and frustration while ensuring your garden thrives.
Timing Secret: Don't rush the cleanup process in early spring. Wait until the soil is workable and you've had at least two warm days above 50°F—this ensures tender new growth isn't damaged by cold snaps. I've learned this the hard way after ruining three batches of early-season perennials by working too soon. The 2-3 inch pruning height mentioned for perennials works best when plants have already started pushing new growth from the base, so timing matters.
Tool Technique: For Step 1, use a stiff-bristled rake to remove debris, then switch to a hand pruner for woody stems—this two-step approach prevents tearing plant tissue. I keep a small bucket nearby to collect debris and diseased plant material, which I then dispose of in the trash (never compost diseased material). Clean your tools with rubbing alcohol between cuts to prevent spreading pathogens from one plant to another.
Visual Cues for Pruning: When shaping shrubs in Step 2, look for branches that cross or rub against each other—these are prime candidates for removal. I like to step back every few cuts to visualize the plant's natural form. For spring-blooming shrubs, wait until after flowering to prune, as the blooms form on last year's growth. The 2-3 inch compost layer in Step 3 should be spread evenly, avoiding piles that can smother plant stems.
Mulch Strategy: Apply mulch after watering thoroughly—this helps settle the mulch and prevents it from washing away during the first rain. The 2-3 inch thick layer is ideal for moisture retention, but avoid piling mulch directly against plant stems to prevent rot. I use a flat-edged tool to create a slight depression around stems before adding mulch, which creates a natural barrier.
Pro Tips for Clean Up Flower Beds In The Spring
- Common pitfalls—and how to sidestep every one—when refreshing your flower beds.
- Timing Secret: Don't rush the cleanup process in early spring.
- Tool Technique: For Step 1, use a stiff-bristled rake to remove debris, then switch to a hand pruner for woody stems—this two-step approach prevents tearing plant tissue.
Frequently asked questions
Got questions about spring flower bed cleanup?
You’re not alone! Here are answers to the most common concerns to help you tackle the task with confidence.
When is the best time to clean up flower beds in spring?
The ideal window is after the last frost (typically late March to early May, depending on your zone). Wait until perennials have sprouted but before they bloom—this ensures you’re not pruning new growth too early. Pro tip: If your area has unpredictable frost, err on the side of waiting a few extra weeks!
Should I cut back dead plants all the way to the ground?
Not always! For perennials, trim back dead or brown foliage but leave dormant stems (they protect emerging buds). Annuals and spent perennials can go down to the base. Exception: If a plant is diseased, remove everything and dispose of it in the trash (not compost).
What’s the easiest way to remove weeds without chemicals?
Start with a sharp shovel or weeding fork to dig out deep-rooted weeds like dandelions. For stubborn patches, try a vinegar-based spray (3% acetic acid + dish soap) on sunny days—it’s organic and effective. Bonus: Mulch heavily after to smother regrowth!
Can I compost everything I remove from the flower bed?
Mostly yes! Compost healthy plant debris, grass clippings, and leaves—but avoid diseased plants, weeds with seeds (like thistle), or invasive species. If in doubt, bag and trash those. Hot tip: Shred larger plant clippings first to speed up decomposition.
What if I see bugs or pests after cleaning up?
Spring cleanup often stirs up overwintering pests like slugs or aphids. Act fast: Handpick visible bugs, use neem oil for soft-bodied pests, or introduce beneficial insects (like ladybugs). Prevent future issues by keeping beds mulched and healthy—pests target stressed plants!
What if it rains right after I clean up?
Rain is great for settling mulch and soil—but if heavy downpours hit immediately after, compacted soil may form. Wait 24–48 hours to rake and fluff the bed gently. Silver lining: Rain helps wash away dust and settles fresh mulch perfectly!
Wrapping up and next steps
Spring is the perfect time to refresh your flower beds and set the stage for a stunning, low-maintenance garden all year long! By removing debris, prepping the soil, and adding fresh mulch, you’re not just tidying up—you’re giving your plants the best start for vibrant blooms and healthy growth. 🌸
Now that you’ve got the know-how, roll up those sleeves and enjoy the process! Your garden will thank you with lush, colorful displays that bring joy season after season.
Ready for the next step? Plan your planting schedule—whether it’s perennials, annuals, or veggies—and watch your hard work bloom into beauty! 🌱