
Flowers
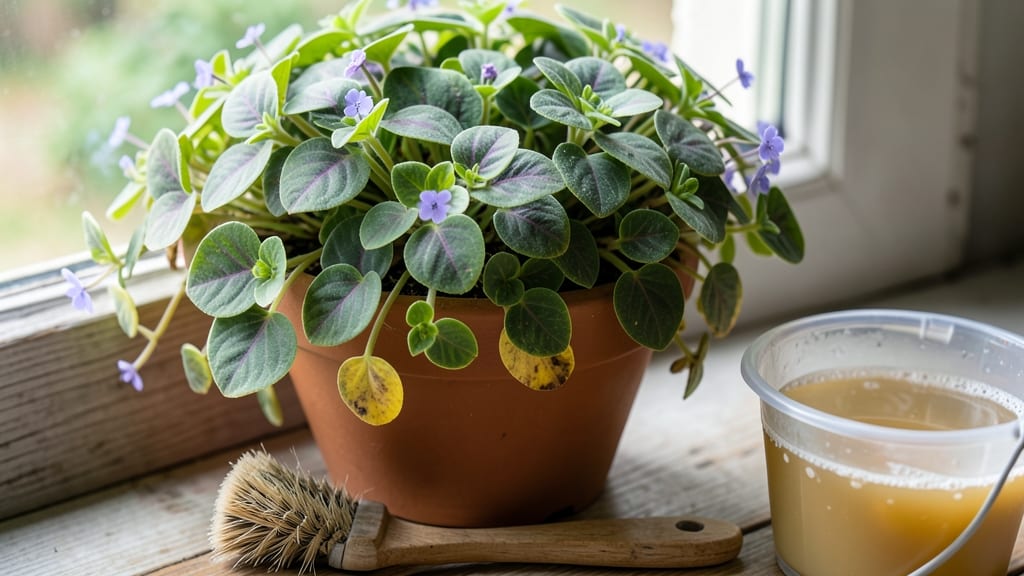
Cleaning a flower pot isn’t just about making it look nice—it’s about keeping your plants healthy and thriving. 🌱 That black, crusty buildup isn’t just unsightly; it can harbor mold, bacteria, and pests that stress your plants.
I’ve learned the hard way that skipping this step leads to stunted growth and wilting leaves, even with the best soil and watering routine.
The good news? You don’t need harsh chemicals or hours of scrubbing. A simple mix of vinegar and water (or a bleach solution for tough stains) does the job in 10-15 minutes, and it works on plastic, ceramic, and clay pots alike.
The key is choosing the right method for your pot type—some materials need gentler treatment to avoid damage, while others can handle a little elbow grease.
By the end, your pots will look brand new, free of stains and mold, and ready to support your plants without any hidden threats. The best part? This routine becomes a 5-minute chore once you get into the habit—no more dreading pot day. Let’s get those containers sparkling clean!
Whether you’re dealing with organic buildup from old soil or hard water stains, the right approach makes all the difference. And if you’re worried about damaging your pots, I’ll show you how to test solutions first—so you can clean confidently without the guesswork.
📚 In This Guide
- What you need
- Instructions
- Tips and common mistakes
- Wrapping up and next steps
What you need
- ● Gloves (1 pair) – Nitrile or rubber gloves to protect your hands from harsh cleaners and sharp debris.
- ● Scrub brush – A stiff-bristled brush (like a bottle brush or deck brush) for scrubbing tough stains and crevices.
- ● Soft-bristled brush or sponge – For gentle cleaning of delicate or glazed pots.
- ● Bucket or large basin – To hold water and cleaning solutions (preferably 5+ gallons for deep cleaning).
- ● Mild dish soap – 1-2 tablespoons (e.g., Dawn or Joy) for general grime removal.
- ● White vinegar – 1 cup (natural disinfectant and deodorizer; avoid for unglazed terracotta—it can weaken the material over time).
- ● Baking soda – ½ cup (for scrubbing mold and stains; acts as a gentle abrasive).
- ● Hydrogen peroxide (3%) – 1 cup (for stubborn mold; test on a small area first to avoid discoloration).
- ○ Rubbing alcohol (70% isopropyl) – ¼ cup (optional but effective for disinfecting and cutting through grease).
- ● Old towels or rags (2-3) – For drying and wiping down pots.
- ● Plastic wrap or aluminum foil – To cover work surfaces and protect them from spills.
- ● Trash bag or compost bin – For disposing of old soil, roots, or debris.
- ● Bleach (unscented, diluted) – 1 tablespoon per gallon of water (for severe mold; rinse thoroughly afterward). ⚠️ Avoid on porous or unglazed pots.
- ● Steam cleaner – For sanitizing without harsh chemicals (great for large or outdoor pots).
- ● Pot scrubber or melamine sponge – For extra tough stains on ceramic or plastic pots.
- ● Essential oils (tea tree or eucalyptus) – 5-10 drops added to vinegar or water for a natural, fresh scent and antifungal properties.
- ● Sandpaper (fine-grit, 220-400) – For removing old paint or stubborn residue from ceramic or metal pots.
- ● Pot reviver or commercial cleaner – Like Simple Green or Krush (follow label instructions).
Step-by-Step instructions for reviving your flower pots
Here's the method I rely on to restore pots to like-new condition—no harsh chemicals, just effective techniques.
🪴 Step 1: Remove and Inspect All Plant Debris
Start by emptying the pot completely and scraping out any leftover soil or root fragments. Use a butter knife or plastic putty knife to dislodge stubborn residue from the drainage holes—this prevents mold buildup. I always work outside or over a trash bag to avoid messes.
Flip the pot upside down and tap it gently against a hard surface to dislodge any packed-on dirt. For stubborn mineral deposits, soak the pot in warm water for 10-15 minutes first—this loosens dried-on grime before scrubbing. Check the drainage holes to ensure they're completely clear, as clogged holes lead to waterlogged soil and root rot.
💧 Step 2: Choose Your Cleaning Method Based on Stains
For organic stains like soil or algae, fill the pot with equal parts white vinegar and warm water and let it soak for 30-60 minutes. The acidity breaks down mineral deposits and kills mold spores without damaging the pot. I find this works best for terracotta and ceramic pots that develop greenish algae stains.
For tough mineral deposits or baked-on dirt, create a paste using baking soda and water (about 2 tablespoons baking soda per ½ cup water). Apply it to stubborn areas with a sponge, let it sit for 15 minutes, then scrub with a stiff-bristled brush. Avoid steel wool—it scratches glazed surfaces and leaves micro-cracks where dirt collects.
✂️ Step 3: Scrub and Rinse Thoroughly
Use a nylon scrub brush or old toothbrush to work the cleaning solution into crevices, especially around drainage holes and decorative textures. For textured or ornate pots, I dip the brush in the solution and scrub in circular motions—this prevents streaking and ensures even cleaning. Pay special attention to the pot's interior, as hidden grime can harbor mold.
Rinse the pot thoroughly under running water until the water runs clear. For pots that still feel slimy, refill them with 1 part hydrogen peroxide (3%) to 3 parts water and let soak for 10 minutes before rinsing again. This extra step eliminates any remaining mold spores that could regrow quickly in damp conditions.
☀️ Step 4: Dry and Sanitize for Next Use
Place the cleaned pot in a well-ventilated area and let it dry completely—this usually takes 24-48 hours depending on humidity. I prop it upside down on a towel to ensure all moisture evaporates, especially from drainage holes. Never store pots wet, as trapped moisture encourages mold regrowth between uses.
For extra protection, wipe the interior and exterior with a 50/50 water and rubbing alcohol solution after drying. This sanitizes the pot and prevents future mold or bacterial buildup. Store pots in a dry place, and if stacking, place a sheet of newspaper between them to prevent scratches that trap dirt.
Tips & tricks for perfect flower pot revival
Between us, I've seen some truly stubborn flower pots over the years—some so encrusted with mineral deposits they looked like abstract art. But here's what nobody tells you about making this process even smoother.
The Soak Secret: That 10-15 minute warm water soak in Step 1 is your best friend for mineral deposits. I've found that adding 1 tablespoon of dish soap to the warm water makes it work even better—it cuts through grease and old plant oils that regular water misses. Just be sure to rinse thoroughly afterward, as soap residue can attract more dirt.
Vinegar Power Boost: For the 30-60 minute vinegar soak in Step 2, I like to add 1 cup of lemon juice to the vinegar-water mix. The citric acid in lemon juice works synergistically with the vinegar to break down stains faster while leaving your pot smelling fresh. This combo is particularly effective against green algae stains on terracotta.
Brush Technique Matters: When scrubbing in Step 3, I've learned that using a new toothbrush for the drainage holes makes all the difference. Old toothbrushes often have bristles that are too stiff or worn, which can scratch delicate glazes. For textured pots, I dip the brush in the cleaning solution and scrub in small sections to avoid missing any crevices where mold loves to hide.
Drying Hack: That 24-48 hour drying time can feel like forever, but here's my trick: Place your pot on a wire cooling rack instead of a towel. The airflow prevents moisture from pooling in the bottom, cutting drying time by nearly half. Just make sure the rack is clean—dirty racks can transfer grime back to your pot.
Pro Tips for Clean A Flower Pot
- Between us, I've seen some truly stubborn flower pots over the years—some so encrusted with mineral deposits they looked like abstract art.
- The Soak Secret: That 10-15 minute warm water soak in Step 1 is your best friend for mineral deposits.
- Vinegar Power Boost: For the 30-60 minute vinegar soak in Step 2, I like to add 1 cup of lemon juice to the vinegar-water mix.
Frequently asked questions
Got questions about keeping your flower pots fresh and functional?
Here are some of the most common concerns—and their easy solutions!
How often should I clean my flower pots?
Clean your pots at least once every 3–6 months, or more often if you notice mold, mildew, or mineral buildup. If you’re growing edible plants (like herbs or veggies), clean them before and after each use to prevent bacteria or chemical residue from harming your plants.
Can I clean a flower pot without scrubbing?
For lightly soiled pots, soak them in a 1:10 vinegar-to-water solution for 30 minutes, then rinse. For stubborn grime, try a baking soda paste (1 part baking soda, 1 part water) and let it sit before wiping. Avoid harsh chemicals near plants!
Why does my pot still smell moldy after cleaning?
Leftover mold spores or trapped moisture can cause lingering odors. After cleaning, dry the pot thoroughly (use a towel or air-dry in sunlight) and consider disinfecting with a hydrogen peroxide spray (3%) or boiling water for plastic/ceramic pots. Let it air out for 24 hours before reuse.
What’s the best way to clean a pot with dried-on dirt?
For baked-on gunk, soak the pot in hot water with a few drops of dish soap for 1–2 hours. Then, use a plastic scraper or old toothbrush to gently loosen debris. For terracotta pots, avoid soaking—tap them to dislodge dirt instead.
Can I reuse water from cleaning my flower pot for plants?
Only if you’ve used mild, plant-safe cleaners like vinegar, baking soda, or mild soap. Never reuse water with bleach, harsh detergents, or chemical disinfectants—these can harm roots. When in doubt, rinse thoroughly and use the water for non-edible plants (like ornamentals).
Wrapping up and next steps
Cleaning your flower pot doesn’t have to be a daunting task—with the right tools and a little elbow grease, you can restore it to like-new condition in no time! 🌿 Whether you’re tackling stubborn stains, mold, or just routine maintenance, these steps will keep your pots fresh and ready for your next green thumb project. Now that you’re armed with the know-how, why not treat yourself to a little gardening self-care?
Ready to give your pots a second life? Grab your supplies, follow the steps, and enjoy the satisfaction of a sparkling clean pot—your plants will thank you! 🌸