
Propagation
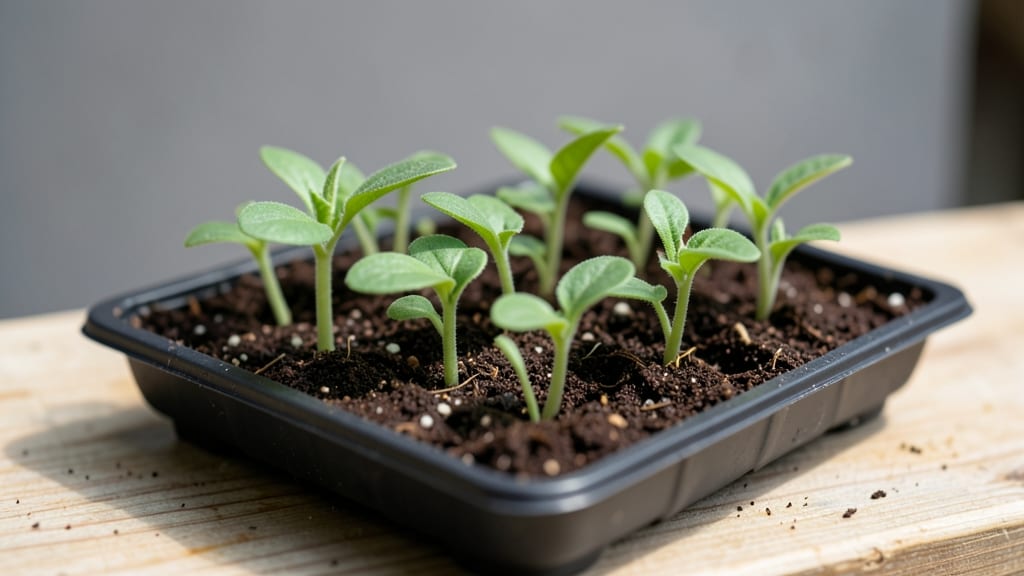
The germination of a flower in just seven days—no waiting months for blooms to break through. 🌱 The secret isn’t patience; it’s the right light trick that tricks seeds into thinking spring has arrived, even in winter.
I’ve watched tiny petunia seeds crack open like clockwork using this method, and you can too.
You’ll need just three things: a clear container (or plastic wrap), a warm spot, and a bright light source. Most seeds need moisture to wake up, warmth to stay active, and light to break through soil—even before they’re planted.
The trick? Mimic spring’s long daylight hours with a simple setup that costs less than $10.
By day 7, you’ll see those first green hooks poking through the soil, ready to grow into vibrant blooms. No more weak, leggy seedlings—just sturdy starts that transition smoothly to pots or garden beds. The best part? This works for annuals like zinnias and perennials like coneflowers alike.
Once your sprouts hit that first true leaf stage, they’re ready to graduate from their cozy germination home. Harden them off for a week, then plant them where they’ll thrive—whether that’s a sunny windowsill, balcony container, or backyard plot. Fast results start here.
📚 In This Guide
- What you need
- Instructions
- Tips and common mistakes
- Wrapping up and next steps
What you need
- ● Flower seeds: Choose fast-germinating varieties like marigolds, zinnias, or sunflowers (10–20 seeds per tray).
- ● Seed-starting tray: 1–2 shallow trays (2–3 inches deep) with drainage holes.
- ● Seed-starting mix: 1–2 cups of sterile, peat-free potting soil (or coconut coir for moisture control).
- ● Spray bottle: 8–16 oz with a fine mist nozzle (for gentle watering).
- ○ Clear plastic dome or wrap: 1 (to retain humidity; optional but highly recommended).
- ● Grow lights or sunny windowsill: 12–16 hours of bright, indirect light daily (LED grow lights work best).
- ○ Small fan (optional): A low-speed fan to improve air circulation and prevent mold.
- ● Fine-tip tweezers: For gently placing tiny seeds (1 pair).
- ● Labels & markers: To track seed types (waterproof labels preferred).
- ○ Heat mat (optional): A seedling heat mat (50–75°F range) to speed up germination.
- ○ Humidity monitor (optional): Keeps levels between 70–90% for optimal sprouting.
- ● Fertilizer (after sprouting): A diluted, balanced liquid fertilizer (5-5-5 or 10-10-10 ratio).
Step-by-step instructions for germinating flower seeds quickly
Here's how to coax seeds to sprout in just a week with a simple light hack.
🌱 Step 1: Prep Seeds for Maximum Speed
Start by soaking your flower seeds in warm water for 12 hours—this softens the outer coating and jumpstarts hydration. I use a small bowl with just enough water to cover them completely. The reason we soak first is that many flower seeds have tough outer shells that slow germination.
After soaking, drain the water and place the seeds between two damp paper towels. Roll them gently to ensure even moisture coverage, then fold the towels to create a cozy seed sandwich. This keeps them hydrated while allowing air circulation. You'll see the first signs of sprouting in 24-48 hours if conditions are right.
💧 Step 2: Create a Humid, Warm Germination Chamber
Place the towel-wrapped seeds in a sealed plastic bag or container with a tight lid. This creates a mini greenhouse effect that maintains 85-90°F temperatures—ideal for fast germination. I like to use a clear container so I can watch the progress without disturbing them.
Check daily for moisture—condensation on the bag walls means you're golden. If the towels dry out, mist them lightly with warm water. Avoid overwatering now; soggy seeds can rot before they sprout. You'll know it's working when you see tiny white roots emerging from the seeds.
☀️ Step 3: Introduce Light at the Perfect Moment
The light trick comes next: once you see white roots (usually 3-5 days in), transfer the sprouted seeds to your planting medium. Here's the key—do not expose them to direct light yet. Place the seedling tray under grow lights or in a bright, indirect window but keep them 1-2 inches below the light source for the first 48 hours.
This gradual light introduction prevents shock and encourages strong root development. After two days, you can slowly increase light exposure. Watch for the first true leaves to appear—this is your signal that the seedling is ready for more direct light. Real talk: if you rush this step, seedlings can get leggy and weak.
⏰ Step 4: Transplant to Growing Medium
When seedlings show 2-3 true leaves (usually 7 days total), it's time to plant them in your prepared growing medium. Use a small spoon to create ¼-inch deep planting holes—deeper than the seedling's roots but shallow enough that the leaves stay above soil level.
Gently press the soil around the base to secure the seedling without compacting the roots. Water lightly from the bottom to avoid disturbing the delicate stems. Here's where it gets fun—watch the cotyledons pop through the soil after a few days. That's your reward for patience!
Tips & tricks for perfect flower seed germination
Let me share the secrets I've learned to turn stubborn flower seeds into thriving sprouts in record time.
Soak Smart: The 12-hour soak is your secret weapon—warm water (around 70°F) works best. I use a small bowl with just enough water to cover the seeds completely, then let them soak in a dark spot. Confession: I skipped this step for years and wondered why my germination rates were so low. The soak softens those tough outer shells that block moisture and nutrients.
Temperature Matters: Aim for that 85-90°F range in Step 2, but don't stress if your home runs cooler. Place your sealed container on top of your fridge or near a sunny window during the day. I've had great results with a simple heating pad set to low (around 80°F) when my apartment stays chilly. The key is consistency—fluctuations slow everything down.
Light Timing: That 48-hour gradual light introduction in Step 3 is where most people mess up. I like to use a small desk lamp with a warm bulb placed 1-2 inches above the seedlings. Watch for the first true leaves—they'll be tiny but unmistakable. Once they appear, you can move to full light, but don't rush this step or you'll get those sad, leggy seedlings that flop over.
Transplant with Care: When you're ready to plant those 2-3 true leaf seedlings, use a small spoon to make those ¼-inch deep holes. Here's what nobody tells you—tap the soil around the base gently to secure the seedling, but don't pack it down. Think "light hug" not "tight squeeze." The roots need room to breathe as they establish themselves.
Pro Tips for Germination Of A Flower
- Let me share the secrets I've learned to turn stubborn flower seeds into thriving sprouts in record time.
- Soak Smart: The 12-hour soak is your secret weapon—warm water (around 70°F) works best.
- Temperature Matters: Aim for that 85-90°F range in Step 2, but don't stress if your home runs cooler.
Frequently asked questions
Got questions about getting your flower seeds to sprout fast? You’re not alone! Here are some of the most common queries—and their answers—to help you grow confidently.
How can I speed up germination for my flower seeds?
Use the light trick mentioned in our guide: place seeds in a damp paper towel, seal in a plastic bag, and expose to 12+ hours of indirect light daily. Warmth (70–85°F) also boosts speed. Avoid direct sunlight—it can dry them out!
Why aren’t my seeds sprouting after 7 days?
Patience is key! Some seeds (like snapdragons or delphiniums) take 10–14 days. Check moisture—soil should feel like a damp sponge. If using the light trick, ensure seeds aren’t moldy (toss and retry if they are). Cold-sensitive seeds may need a heat mat.
Do I need special soil for germination?
Nope! Start with a light, sterile seed-starting mix (or even coconut coir). Avoid garden soil—it’s too dense and may harbor fungi. Mix in perlite or vermiculite (20%) for airflow. Pro tip: Sanitize containers with 10% bleach solution to prevent damping-off.
Can I use the light trick for all flower seeds?
Not quite! The light trick works best for small, slow-to-germinate seeds (e.g., petunias, zinnias). Large seeds (like beans or sunflowers) should be planted directly in soil. Always check seed packets—some (like lupines) need stratification (cold treatment) first.
What if my sprouts turn yellow or wilt?
Yellowing? Overwatering or nutrient burn (from fertilizer too soon) is likely. Wilting? Check for damping-off fungus (black stems = toss plants). Move to a bright, humid spot (use a clear plastic dome or spray bottle). Thin seedlings if crowded—they’ll compete for light!
Still stuck? Drop your seed type in the comments—we’re happy to troubleshoot!
Wrapping up and next steps
The journey of watching a tiny seed transform into a vibrant flower is nothing short of magical! 🌱 With the right conditions—like the light trick and patience—you can coax sprouts in just 7 days. Remember, consistency is key: keep those seeds warm, hydrated, and exposed to gentle light.
Now that you’re armed with the know-how, why not try it today? Grab a seed packet, follow the steps, and share your blooming success with fellow plant lovers. Happy growing—your green thumb is about to get an upgrade! 🌸