
Landscaping
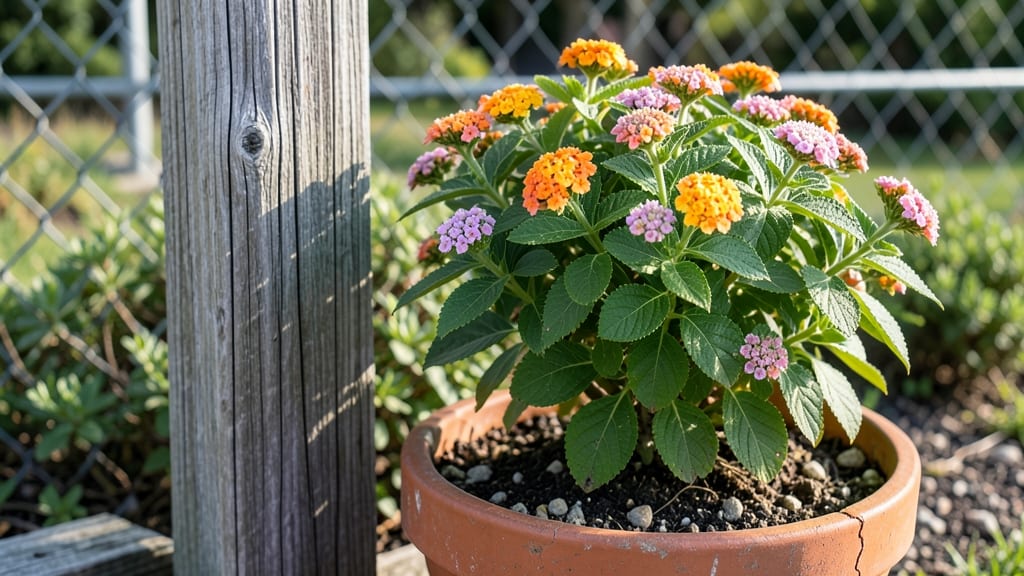
Transform old fence posts into charming flower pots that add vertical charm while saving space—no fancy tools needed. 🌿 I stumbled on this idea after struggling to find the right spot for my petunias, and now these repurposed posts create a living fence line that neighbors admire.
The best part? You can use anything from old terracotta pots to fabric-lined posts, giving your garden a cohesive, elevated look without breaking the bank.
You’ll need just a few supplies: weather-resistant posts (cedar or redwood work best), containers that fit snugly around them, quality potting soil, and your choice of drought-tolerant flowers like lavender or succulents.
The process takes under an hour, and the results last all season—no more dead zones along your fence line. Plus, vertical planting keeps roots cooler and reduces water waste compared to ground-level pots.
Imagine climbing vines spilling over the top or bright annuals framing your yard like a natural border. These planters solve two problems at once: they disguise unsightly fence posts while adding year-round texture and color.
Even in small yards, this trick creates the illusion of a lush, layered garden. Ready to transform that plain fence into a living work of art?
Works for any fence material, from chain-link to wooden pickets, and scales from a single post to an entire property border. The key is matching plant size to post height—tall posts for climbers, shorter ones for trailing flowers. Let’s get those posts blooming!
📚 In This Guide
- What you need
- Instructions
- Tips and common mistakes
- Wrapping up and next steps
What you need
- ● Fence posts: 4–6 wooden or metal posts (4x4 inches, 6–8 feet tall, pressure-treated for longevity).
- ● Flower pots: 6–12 cylindrical pots (10–12 inches in diameter, with drainage holes). Choose materials like terracotta, plastic, or fiberglass.
- ● Screws or brackets: Heavy-duty galvanized screws (3–4 inches long) or metal fence post brackets (for securing pots).
- ● Drill & drill bits: A power drill with wood/metal bits (for pre-drilling screw holes).
- ● Level & measuring tape: Ensures pots are evenly spaced and aligned.
- ● Potting soil: High-quality, well-draining soil mix (or add perlite for extra aeration).
- ● Plants: Choose trailing or bushy varieties like ferns, petunias, or ivy (ensure they thrive in your climate!).
- ○ Paint or stain (optional but recommended): Exterior-grade paint or wood stain to protect posts and add color.
- ● Decorative accents: Twine, fairy lights, or mosaic tiles for a whimsical touch.
- ● Watering system: A drip irrigation kit for low-maintenance hydration.
- ● Post caps: Decorative finials to top off your fence posts elegantly.
- ● Weatherproof sealant: Extra protection for wooden posts in rainy climates.
Step-by-Step instructions for building fence post flower pots
Here's the foolproof method I use to transform old fence posts into stunning vertical planters.
🪴 Step 1: Gather and Prepare Your Fence Post Materials
Start by selecting 4-6 wooden fence posts that are at least 4 feet tall and 4-6 inches in diameter. I like to use cedar or redwood because they resist rot naturally. Sand down any rough edges or splinters with 80-grit sandpaper—this prevents splinters when you handle them later. A quick tip: If your posts have old paint or stains, strip them with a wire brush before sanding for a cleaner finish.
Measure each post to ensure they're all the same height. If they vary by more than ½ inch, trim the longer ones with a handsaw to create a uniform look. The goal is for your finished planters to sit level against the fence or wall. I mark the cutting line with a pencil first—this prevents mistakes and gives you a clean cut.
🌿 Step 2: Add Drainage and Soil Mix
Drill 2-3 drainage holes near the bottom of each post using a ½-inch drill bit. These holes are critical—they prevent root rot by letting excess water escape. Place a small piece of hardware cloth over each hole to keep soil from washing out while still allowing drainage. Fill each post about ¾ full with a lightweight potting mix designed for containers.
Here's where it gets fun: Mix in ½ cup of perlite or pumice per post to improve drainage and aeration. The perlite will keep the soil loose so roots can breathe. Tap the post gently on the ground after filling to settle the mix evenly. You'll see the soil compact slightly—this helps prevent future sinking when you add plants.
💧 Step 3: Plant and Arrange Your Flowers
Choose plants that thrive in containers and complement your garden's style. I recommend trailing plants like nasturtiums or sweet potato vine for the top, medium-height flowers like petunias or geraniums in the middle, and compact plants like succulents or heuchera at the bottom. Water the soil thoroughly before planting to help roots settle in.
Use your finger to create holes in the soil for each plant. Place them at the same depth they were growing before, and press the soil gently around the roots. Space plants 2-3 inches apart to allow for growth without overcrowding. For trailing plants, tuck them into the top holes so they cascade beautifully over the sides.
✂️ Step 4: Secure and Position Your Planters
Once all plants are in place, water them again until water runs out the drainage holes. Let them sit for 10-15 minutes to absorb moisture. To secure the posts vertically, attach L-brackets or heavy-duty zip ties to your fence or wall. Space the brackets 12-18 inches apart for stability. If you're placing them directly in the ground, bury the bottom 4-6 inches to anchor them.
Arrange your posts in a pattern that creates visual interest. I like to stagger them slightly for a natural, organic look. For extra rustic charm, add twine or burlap strips around the top edges. Water deeply after positioning to help the plants establish roots in their new home. You'll see new growth within 2-3 weeks—that's your sign everything is working!
Tips & tricks for perfect fence post flower pots
Here's what nobody tells you about making these planters look like they came from a nursery.
Material Selection: If you're using pressure-treated wood, let the posts sit outside for a few weeks first to off-gas any chemicals. Cedar and redwood are my top picks—they resist rot and add natural beauty. For a more rustic look, choose posts with natural weathering instead of freshly cut lumber. The texture gives that charming, lived-in aesthetic we all love.
Drainage Upgrade: Those 2-3 drainage holes are a must, but here's the trick: angle them slightly upward at the bottom. This prevents soil from clogging the holes over time. I also recommend using a small piece of landscape fabric over the hardware cloth—it adds an extra layer of protection against soil loss while still allowing water to drain freely.
Planting Strategy: When arranging your plants in Step 3, think about the mature size of each variety. Place taller plants toward the back (or against the fence) and shorter ones toward the front. This creates a layered look that's both functional and visually appealing. For trailing plants, gently weave their vines through the top holes before tucking them in—this encourages them to grow outward immediately.
Watering Wisdom: After planting, give your pots a deep watering that lasts for the full 10-15 minutes. This ensures the soil is thoroughly moistened all the way to the bottom. In the first week, check soil moisture daily—container plants dry out much faster than in-ground ones. Once established, water when the top inch of soil feels dry to the touch, but never let them sit in standing water.
Pro Tips for Fence Post Flower Pots
- Here's what nobody tells you about making these planters look like they came from a nursery.
- Material Selection: If you're using pressure-treated wood, let the posts sit outside for a few weeks first to off-gas any chemicals.
- Drainage Upgrade: Those 2-3 drainage holes are a must, but here's the trick: angle them slightly upward at the bottom.
Frequently asked questions
What’s the best material for fence post flower pots?
For durability and rustic charm, cedar or redwood are top choices—they resist rot and insects. If you prefer affordability, treated pine works but may need sealing. Avoid pressure-treated wood with arsenic (older versions) for safety. For a modern twist, try galvanized metal or repurposed buckets!
How long do fence post planters last before needing replacement?
With proper care, wood fence post pots last 3–5 years outdoors. Seal them annually with outdoor paint or varnish to extend life. Metal pots can last 5–10+ years if rust-proofed. Replace when wood splinters or cracks, or metal corrodes beyond repair. Rotate pots yearly to prevent soil depletion.
Can I use fence post pots for vegetables or herbs instead of flowers?
Fence post pots work great for compact veggies like lettuce, radishes, or herbs (basil, thyme). Use well-draining soil and fertilize regularly. Avoid heavy root crops (like carrots) unless pots are deep (12"+). Just ensure pots get 6+ hours of sunlight for edibles—just like flowers!
How do I fix a wobbly or uneven fence post planter?
If your pot leans, check for uneven ground or loose screws. Dig a shallow trench to level the base, or add gravel for stability. For wood pots, reinforce with metal brackets or extra screws. If the post itself is unstable, anchor it to the fence with L-brackets or landscape staples.
What’s a creative alternative to traditional fence post pots?
Try hanging planters (for vertical gardens), stacked cinder blocks with moss, or repurposed bottles (for succulents). For a whimsical touch, paint pots in bold colors or use terracotta pots on hooks. Even old boots or wellington boots can double as quirky planters!
Wrapping up and next steps
Transforming fence posts into charming flower pots is a creative and rewarding way to elevate your garden’s vertical beauty—without breaking the bank! 🌿 Whether you’re repurposing old materials or starting fresh, these rustic planters add personality while maximizing space.
The best part? You can customize them to match your style, from classic terracotta to bold painted designs.
Ready to get started? Grab your supplies, pick a post, and let your green thumb shine! Next, sketch your design or head straight to the hardware store—your fence (and future blooms) will thank you. 🌸