
Planting
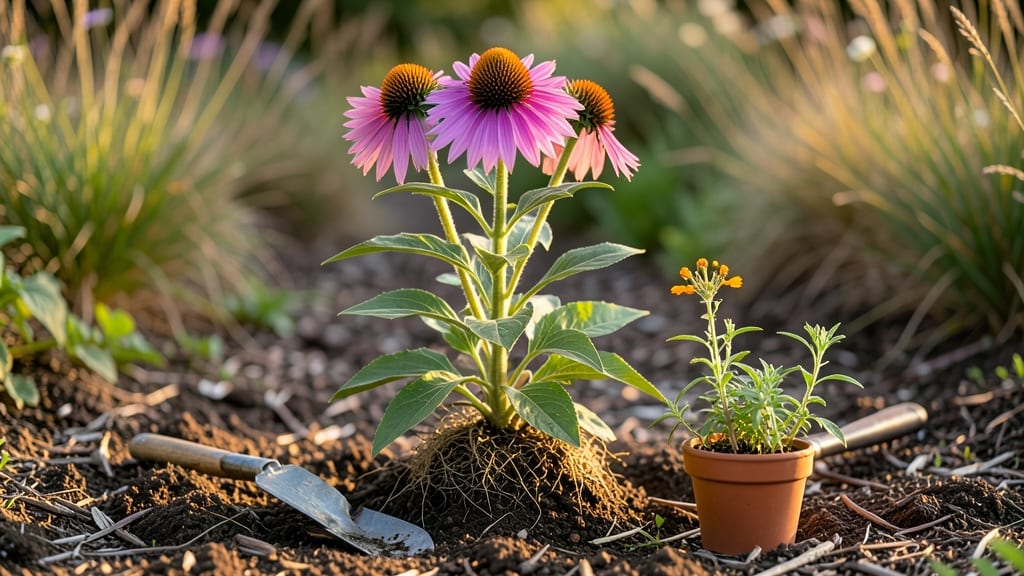
The best time to transplant perennial flowers is late fall, when my peonies thrived instead of wilting under June’s scorching heat. The secret lies in cooler soil temperatures and reduced stress, letting roots establish before winter dormancy.
Most gardeners miss this window, but timing makes all the difference between thriving clumps and wilting transplants.
This method works best in zones 3-8, where fall soil stays workable but above freezing. In warmer climates, aim for early fall before summer heat returns. You’ll need sharp shears, a wheelbarrow, and a root stimulator—simple tools that make the process foolproof.
The key is moving plants before the first hard frost, when they’re still actively growing but the air cools down.
What you’ll end up with is vibrant, established perennials that bloom earlier and more abundantly than store-bought plants. No more waiting years for them to fill out—just lush foliage and colorful flowers by next spring.
The roots grow stronger over winter, making your garden look like it’s been there for decades instead of just a season.
Works for daylilies, coneflowers, and hostas alike, whether you’re dividing overcrowded clumps or relocating a struggling plant. Here’s how to do it right—no guesswork, just results.
📚 In This Guide
- What you need
- Instructions
- Tips and common mistakes
- Wrapping up and next steps
What you need
- ● Transplanting shovel or spade – A 5–6 inch wide garden spade works best for digging up roots without damage.
- ● Pruning shears or sharp bypass pruners – For trimming dead or overgrown foliage (sterilize blades with rubbing alcohol first!).
- ● Garden gloves – Heavy-duty, waterproof gloves to protect your hands from thorns, dirt, and blisters.
- ● Watering can or hose with a gentle spray nozzle – Keep roots moist but not soggy during transplanting.
- ● Compost or well-aged manure – 5–10 pounds per plant to enrich the soil and support root growth.
- ● Mulch (straw, shredded bark, or pine needles) – 2–3 inches thick to insulate roots and retain moisture.
- ● Measuring tape or ruler – Ensures proper spacing (check plant tags for specifics) between transplants.
- ● Labeling stakes or plant markers – Waterproof tags to track varieties if transplanting multiple types.
- ● Root stimulator or mycorrhizal fungi – Boosts root growth and resilience (follow package instructions!).
- ● Transplanting fabric or burlap – Protects delicate roots if moving plants long distances.
- ● Soil tester kit – Checks pH and nutrient levels before planting (ideal range: 6.0–7.0 for most perennials).
- ● Knee pad or small stool – Saves your back during long transplanting sessions!
Instructions for transplanting perennial flowers in late fall
This proven approach ensures your perennials establish strong roots before spring's growth surge.
Choose the Optimal Transplant Window
Late fall offers the perfect balance of cooling temperatures and residual soil warmth. Aim to transplant 6-8 weeks before your first hard frost, typically in October or early November in most climates. This timing allows roots to establish before winter dormancy begins. You'll know you've timed it right when daytime highs hover between 50-60°F and nighttime lows stay above 35°F.
I always check the local frost forecast and mark my calendar. The goal is to give plants enough time to root before the ground freezes solid. If you miss this window, spring transplanting works too—but expect less vigorous first-year blooms. The key is avoiding transplant shock when plants are actively growing.
Prepare the New Location Before Moving Plants
Dig the new planting area to a depth of 12-18 inches, breaking up compacted soil and incorporating 2-3 inches of compost into the top 6 inches. This improves drainage and provides essential nutrients. Test the soil pH if you're unsure—most perennials prefer 6.0-7.0, with exceptions like azaleas needing 5.0-5.5.
Water the area thoroughly 24 hours before transplanting to settle the soil. You'll see the ground hold moisture better after this preparation, which helps roots establish more quickly. I like to create small mounds where the roots will go, gently pressing the soil to create pockets that encourage root spread rather than straight-down growth.
Dig and Handle Plants with Care
Water the original planting area 2-3 days before moving to reduce root disturbance. Dig around each plant with a sharp spade, keeping the root ball intact. For established perennials, aim to dig a 12-inch diameter around the base. You'll notice healthier roots if you've kept the soil consistently moist beforehand—they'll be white and fibrous rather than brown and brittle.
Gently lift each plant, shaking off excess soil to inspect the roots. Trim any damaged or circling roots with clean pruners. This is where many gardeners make mistakes—don't rough up the roots unnecessarily. Place each plant in its new location immediately or keep it in a shaded, protected spot with damp burlap if you need to delay planting.
Plant and Establish for Winter Success
Position each perennial at the same depth it grew in its original location. The top of the root ball should sit 1 inch below soil level to prevent crown rot. Backfill with native soil mixed with compost, pressing gently to eliminate air pockets. Water immediately after planting to help settle the soil and initiate root contact.
Apply 2-3 inches of mulch around each plant, keeping it 3-4 inches away from stems to prevent moisture buildup. This mulch layer insulates roots through winter and suppresses weeds. You'll see better survival rates and more vigorous spring growth when you protect the roots this way. Avoid heavy mulching until after the ground freezes to prevent rot.
Monitor Through Winter and Prepare for Spring
Check plants periodically during winter to ensure the mulch hasn't shifted or compacted. If heavy snow accumulates, gently brush it off to prevent stem damage. You'll notice healthier plants in spring if they've had consistent moisture protection through winter. Remove mulch in early spring to allow soil to warm and encourage new growth.
Fertilize lightly in early spring with a balanced 10-10-10 formula or compost tea. This jumpstarts growth without overwhelming newly established roots. The first flush of new leaves signals successful overwintering—your perennials are ready for their first full growing season.
Tips & tricks for perfect late-fall perennial transplanting
Timing and technique make all the difference when transplanting perennials—here's how to elevate your success rate this fall.
Timing Secret: That 6-8 week window before hard frost isn't just arbitrary—it's when soil temperatures stay warm enough (above 40°F) for roots to grow actively while air temperatures cool enough to slow top growth. I track my local frost dates religiously, but I also verify soil temps with a simple soil thermometer. The goal is to give roots time to establish before dormancy kicks in. If you're in zone 5 or cooler, aim for mid-October; zone 7-9 gardeners can extend until early November.
Soil Preparation Strategy: The 2-3 inches of compost you mix into the top 6 inches of soil isn't just about nutrients—it's about creating the perfect root zone. I swear by a 50/50 mix of native soil and compost for best results. For heavy clay soils, add perlite to improve drainage, while sandy soils benefit from peat moss to retain moisture. The key is to mimic the plant's original growing conditions as closely as possible. And remember: water that new area 24 hours before transplanting to settle the soil and create ideal conditions.
Root Care Technique: When you dig that 12-inch diameter around established perennials, you're not just removing soil—you're preserving the root structure. I've seen too many gardeners yank plants by the stems, damaging roots permanently. Instead, work the spade around the perimeter, wiggling gently to loosen the root ball. For delicate perennials like hostas or asters, I even use a garden fork to lift them intact. Once lifted, trim only the most damaged roots—healthy roots should look white and moist, not brown and dry.
Winter Protection Insight: That 2-3 inches of mulch you apply isn't just decoration—it's insulation. I use straw mulch because it breaks down slowly and improves soil structure over time. The critical detail is keeping mulch 3-4 inches away from stems to prevent rot. For extra protection in zone 4 or colder, add a layer of evergreen boughs over the mulch to shield from harsh winds. This simple layering system has helped my perennials survive winters with minimal stress and maximum vigor for spring blooms.
Pro Tips for Best Time To Transplant Perennial Flowers
- Timing and technique make all the difference when transplanting perennials—here's how to elevate your success rate this fall.
- Timing Secret: That 6-8 week window before hard frost isn't just arbitrary—it's when soil temperatures stay warm enough (above 40°F) for roots to grow actively while air temperatures cool enough to slow top growth.
- Soil Preparation Strategy: The 2-3 inches of compost you mix into the top 6 inches of soil isn't just about nutrients—it's about creating the perfect root zone.
Frequently asked questions
Got questions about transplanting perennial flowers? You’re not alone! Here are some of the most common concerns—and straightforward answers—to help you plan like a pro.
When is the absolute latest I can transplant perennials in fall?
While early fall (4–6 weeks before frost) is ideal, you can push it to late fall if your region has mild winters. Aim to transplant at least 6 weeks before hard frost—roots need time to establish before dormancy. In Zone 5–7, this often means late October to early November. If temps drop below freezing, cover transplants with mulch for protection.
Can I transplant perennials in spring instead of fall?
Yes, but spring transplanting is trickier! The best window is early spring (as soon as soil is workable, 2–3 weeks before last frost). Avoid late spring—plants may struggle with heat stress or drought. Water deeply post-transplant, and shade young plants if your climate is hot. Fall is still preferred because established roots handle winter better.
What if my perennials are already blooming? Can I still move them?
Transplanting blooming perennials is risky, but not impossible. Deadhead spent blooms first to redirect energy to root growth. Choose a cool, overcast day to reduce stress, and water thoroughly before and after. Avoid transplanting mid-summer bloomers (like coneflowers or black-eyed Susans)—wait until next fall. For spring bloomers (e.g., peonies, daffodils), fall is your only safe bet.
How do I know if my transplanted perennials are struggling?
Watch for these red flags: yellowing leaves (overwatering or poor drainage), wilted or crispy foliage (underwatering or heat stress), or no new growth after 4–6 weeks (root shock). Pro tip: Gently tug on stems—if they pull easily, roots haven’t anchored. Adjust watering, mulch heavily, and avoid fertilizing until roots recover. Most perennials bounce back with patience!
Do I need to prune perennials before transplanting?
Light pruning helps, but don’t go overboard! Trim 1/3 of the foliage to reduce stress, focusing on dead or damaged leaves. Avoid cutting back healthy stems—you want leaves to photosynthesize and fuel root growth. For woody perennials (like hostas or lavender), prune only if stems are crowded; otherwise, leave them be. Always sterilize shears with rubbing alcohol to prevent disease.
Wrapping up and next steps
Timing your perennial transplant just right—like late fall or early spring—sets the stage for vibrant, resilient blooms next season.
By understanding your climate, choosing the right tools, and following best practices, you’re not just moving plants—you’re investing in their future. 🌱 So roll up your sleeves, grab those gloves, and get ready to give your garden a head start!
Next step: Mark your calendar for the ideal transplant window in your zone, and start prepping your garden beds now. Your spring garden will thank you! 🌸