
Flowers
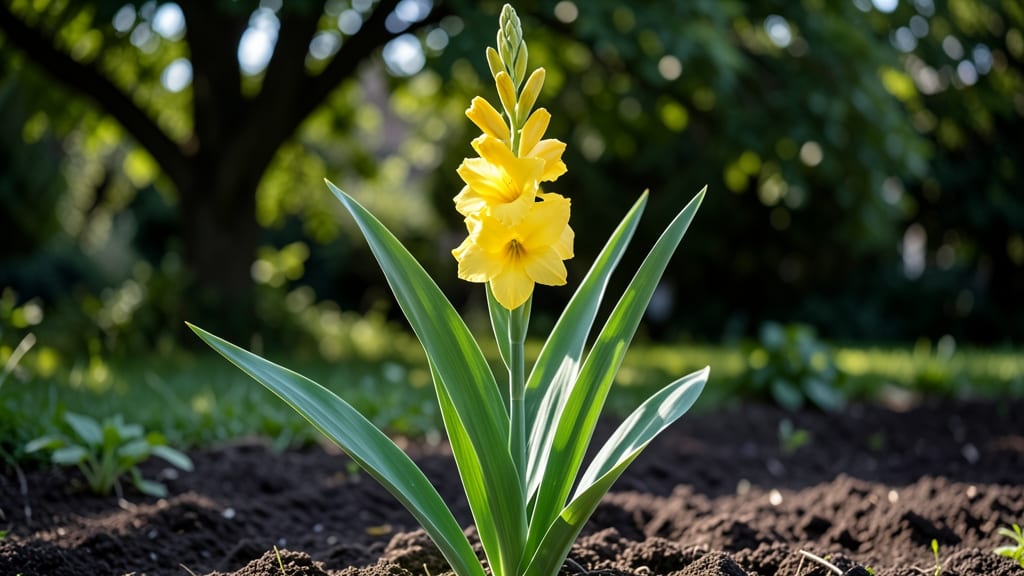
Growing yellow gladiolus flowers delivers the kind of dramatic height and sunshine that makes neighbors pause mid-conversation. ✨ These aren't your grandmother's garden flowers—they're bold, striking, and perfect for cutting gardens or dramatic borders.
The secret to their success lies in just three key steps: soil prep, strategic planting timing, and consistent care that keeps those stems sturdy and blooms abundant.
Start with well-draining soil rich in organic matter—think compost mixed into the top 12 inches. Yellow varieties like 'Golden Fleece' or 'African Queen' thrive in full sun (6+ hours daily) and need support from stakes or rings to prevent flopping.
Water deeply once a week, letting the top 2 inches dry between sessions, and fertilize every 4 weeks with a balanced 10-10-10 mix once shoots reach 6 inches tall.
What you'll end up with is a garden full of 6-foot-tall sunbursts that bloom from midsummer through fall, their golden trumpets catching light like beacons. The blooms last 5-7 days in vases, making them ideal for arrangements, and the foliage stays lush even in heat waves.
For experienced gardeners, try succession planting every 2 weeks for continuous color.
These flowers reward patience—plant corms in early spring after frost, and you'll get blooms by July. In warmer climates, fall planting works too. The key is consistency: don't let soil dry out completely, and deadhead spent blooms to encourage more flowers.
With these steps, your yellow gladiolus will be the star of every summer border.
📚 In This Guide
- What you need
- Instructions
- Tips and common mistakes
- Wrapping up and next steps
What you need
- ● Yellow gladiolus corms: 5–10 healthy, firm corms (choose certified disease-free for best results).
- ● Well-draining soil: A mix of garden soil, compost, and perlite (or sand) in a 50:30:20 ratio.
- ● Sunlight: A spot with full sun (6+ hours/day)—glads love basking!
- ● Water: A watering can with a rose attachment (to avoid disturbing corms).
- ● Fertilizer: Balanced granular fertilizer (10-10-10) – 2 tbsp per planting hole.
- ○ Slow-release bulb fertilizer (optional) – Mix 1 tbsp into the soil.
- ● Garden trowel or shovel – For digging planting holes (6" deep, 6" apart).
- ● Gloves – To protect hands from soil and sharp corm edges.
- ● Mulch (straw or shredded leaves) – 2–3 inches to retain moisture.
- ○ Stakes or trellis (optional) – For tall varieties (4–5 ft), use bamboo stakes or a lightweight trellis.
- ● Pruning shears – For trimming spent blooms to encourage more flowers.
- ● Planting calendar – Glads thrive in spring (after last frost) or early summer.
How to grow stunning yellow gladiolus blooms in your garden
Brighten your summer garden with these bold, cheerful blooms—just follow these straightforward steps.
🌱 Step 1: Choose the Right Location and Soil Prep
Gladiolus thrives in full sun, so pick a spot that gets at least 6-8 hours of direct sunlight daily. I always test my garden bed first by watching where the shadows fall at midday—gladiolus won’t tolerate even partial shade. Dig up the soil to a depth of 12 inches and mix in 2 inches of compost (from your materials list) to loosen the earth and improve drainage.
Here's the thing—gladiolus roots need room to spread, so space your planting holes 6 inches apart in all directions. If your soil feels heavy or clay-like, add 1 part perlite to every 3 parts soil to prevent waterlogging. The goal is soil that drains well but still holds moisture—think of it like a well-draining sponge.
☀️ Step 2: Plant Corms at the Right Depth and Time
Plant your gladiolus corms (not bulbs!) in early spring, about 2-4 weeks before your last frost date. I like to wait until the soil warms to at least 60°F—you can test this by sticking your finger in the ground; if it feels cool but not freezing, it’s ready. Dig a hole 4-6 inches deep (twice the height of the corm) and place 1 corm per hole, pointy end up.
Don’t skip this: Cover the corm with 2 inches of soil, then add 2 more inches of loose soil or mulch on top. This keeps the corm stable while allowing roots to grow downward. Water gently after planting—just enough to settle the soil around the corm. You’ll see green shoots in 2-3 weeks if conditions are right.
💧 Step 3: Water and Fertilize for Long, Bold Stems
Yellow gladiolus loves consistent moisture but hates soggy roots. Water once a week (or more in hot climates) until the top 2 inches of soil feel damp. I check this by sticking my finger in—if it’s dry, it’s time to water. Once the foliage reaches 6 inches tall, switch to deep watering every 5-7 days to encourage strong stem growth.
Feed your gladiolus with a balanced 10-10-10 fertilizer (from your materials) when the shoots are 6 inches tall, then again when the flower buds form. Scatter ½ teaspoon of fertilizer around each plant, then water it in. This boosts blooms without overloading the plant. Watch for tall, sturdy stems—that’s your sign you’re on the right track!
✂️ Step 4: Deadhead and Support for Maximum Impact
Once your yellow gladiolus blooms open, deadhead (remove spent flowers) immediately to redirect energy into new blooms. I use clean, sharp scissors to snip stems just above the next bud—this keeps the plant producing flowers instead of going to seed. Also, install flower stakes or cages (from your materials) as soon as the stems reach 12 inches tall to prevent them from flopping in wind or rain.
Here’s a pro tip: If you live in a zone with hard frosts, dig up the corms after the first frost and store them in a cool, dry place until next spring. This protects them from winter damage and ensures you get another round of stunning blooms. With proper care, your gladiolus will reward you with bold, vibrant stems that last for weeks!
Tips & tricks for perfect yellow gladiolus blooms
Here's what nobody tells you about growing these showstopping flowers—simple secrets that make all the difference.
Sunlight Secret: Those 6-8 hours of sunlight aren't just a recommendation—they're non-negotiable. I've seen gladiolus in partial shade grow tall but leggy with weak stems. Test your spot by marking where shadows fall at midday. If you see even 2 hours of shade, move your planting area. Morning sun with afternoon shade works best in hot climates, but never compromise on morning sunlight.
Soil Prep Strategy: The 12-inch soil depth isn't just about loosening earth—it's about creating a root-friendly zone. I like to think of it as building a "root hotel" where corms can spread comfortably. For heavy clay soil, mix in perlite at a 1:3 ratio (not 1:2 as some suggest) to prevent compaction. The goal is soil that holds moisture like a damp sponge, not a soggy swamp.
Planting Precision: Those 4-6 inch holes might seem like a wide range, but there's a method: measure your corm's height first, then double it. Planting too shallow risks exposure, while going too deep can cause rot. The 2 inches of soil over the corm plus 2 inches of mulch creates a perfect microclimate—like a cozy blanket that keeps roots stable while allowing growth downward.
Fertilizer Timing: The 6-inch shoot stage isn't random—it's when gladiolus are ready to convert sunlight into energy for blooms. That first ½ teaspoon of 10-10-10 fertilizer gives them a growth boost without overwhelming them. I've learned the hard way that fertilizing too early can cause leafy growth at the expense of flowers. The second feeding at bud stage ensures those vibrant yellow blooms you're dreaming of.
Pro Tips for Yellow Gladiolus Flower
- Here's what nobody tells you about growing these showstopping flowers—simple secrets that make all the difference.
- Sunlight Secret: Those 6-8 hours of sunlight aren't just a recommendation—they're non-negotiable. I've seen gladiolus...
- Soil Prep Strategy: The 12-inch soil depth isn't just about loosening earth—it's about creating a root-friendly zone....
Frequently asked questions
Got questions about growing or styling yellow gladiolus flowers?
You’re not alone! Here are answers to the most common queries to help you nail that vibrant, show-stopping look—without the guesswork.
When is the best time to plant yellow gladiolus bulbs?
Plant your yellow gladiolus bulbs in early spring (after the last frost) or late summer (6-8 weeks before the first frost). They thrive in warm soil (at least 60°F/15°C) and need full sun (6+ hours daily). For year-round blooms in warm climates, plant in fall instead!
How do I keep my yellow gladiolus stems straight and sturdy?
Use bamboo stakes or floral wire to support tall stems, especially in windy areas. Pro tip: Plant bulbs in well-draining soil and space them 6 inches apart to reduce competition. Avoid overwatering—soggy roots = floppy flowers!
Why aren’t my yellow gladiolus flowers opening?
Common culprits: too much shade, overcrowded bulbs, or nutrient deficiencies. Try moving pots to sunnier spots, thinning bulbs, or fertilizing with a low-nitrogen, high-phosphorus mix (like 5-10-10). Bonus: Deadhead spent blooms to encourage new growth!
Can I use yellow gladiolus in bouquets, or do they wilt fast?
Cut stems at a 45-degree angle and place in cool water with flower food (change every 2 days). They last 7–10 days in arrangements. Pro move: Remove lower leaves submerged in water to prevent bacterial growth.
What’s a low-maintenance alternative to yellow gladiolus?
Try dahlias (bold colors, long vase life) or canna lilies (tropical vibes, drought-tolerant). For easy-care yellow blooms, black-eyed Susans or coreopsis are perennial favorites with minimal fuss!
Wrapping up and next steps
The yellow gladiolus flower is a stunning addition to any garden, bringing bold color and effortless elegance with just a few simple steps! Whether you’re a seasoned gardener or a beginner, these vibrant blooms thrive with basic care—sunlight, well-draining soil, and patience are all you need. 🌼
Ready to transform your space? Grab your supplies, follow the easy steps, and watch your garden burst into cheerful yellow in no time! For extra flair, experiment with companion plants or share your progress with fellow gardening enthusiasts—your green thumb is about to shine even brighter. 🌱