
Flowers
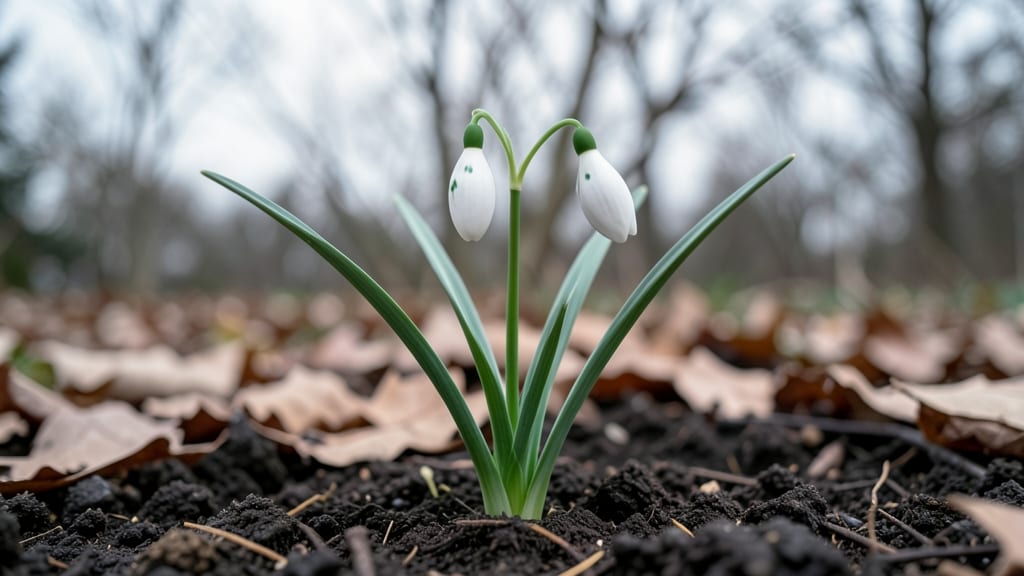
Snowdrop spring flowers punch through frozen soil when most gardens are still asleep. 🌱 Their delicate, nodding blooms signal that winter’s grip is loosening, and with the right timing, you can have them brightening your garden by late February.
These hardy perennials thrive where many spring flowers fail, pushing through snow and cold to reveal their subtle beauty.
Planting snowdrops in fall—between September and November—gives them time to establish roots before winter’s chill. They prefer dappled shade under trees or along woodland edges, where their natural habitat mimics the moisture and shelter they crave.
A well-drained, slightly acidic soil mix ensures they’ll bounce back year after year, rewarding patience with early blooms.
What makes them special isn’t just their fragrant, bell-shaped flowers but their resilience. Unlike tender spring bulbs, snowdrops handle frost, wet soil, and even light foot traffic. By late March, they’ll be surrounded by new foliage, creating a lush carpet that lasts well into spring.
Their presence transforms a dormant garden into a living tapestry of hope.
Ideal for woodland gardens, shady borders, or understory plantings, snowdrops pair beautifully with hellebores, ferns, and early crocuses. Their subtle charm makes them a foolproof way to extend your garden’s season—without the fuss of coddling delicate blooms. Ready to welcome them in?
📚 In This Guide
- What you need
- Instructions
- Tips and common mistakes
- Wrapping up and next steps
What you need
- ● Snowdrop bulbs (Galanthus spp.) – 3–5 bulbs per plant (choose early-blooming varieties like Galanthus nivalis or Galanthus elwesii for best results).
- ● Well-draining potting soil or garden soil – 1–2 bags (5–10 lbs each), amended with compost for nutrients.
- ● Containers or garden bed – For pots: 6–8" diameter containers with drainage holes (terracotta or ceramic preferred).
- ● For garden beds: A partially shaded, moist area with loose, rocky soil (snowdrops thrive in USDA Zones 3–8).
- ● Garden trowel or small hand shovel – For planting bulbs 6–8 inches deep and spacing them 3–4 inches apart.
- ● Watering can or hose with gentle spray – Snowdrops love moisture but hate soggy soil!
- ○ Mulch (optional but recommended) – 2–3 inches of shredded bark or straw to retain moisture and deter weeds.
- ● Decorative stones or pebbles – To mimic a woodland understory look in containers.
- ● Fertilizer (low-nitrogen, 5-10-10) – A light sprinkle in early spring to boost blooms.
- ● Wire mesh or bulb cage – Protects bulbs from hungry squirrels in outdoor beds.
- ● Mini greenhouse or cold frame – For early planting (fall) in colder climates.
- ● Pruning shears – To trim spent foliage after blooming (but leave leaves until they yellow!).
Step-by-step guide to planting snowdrops for early spring blooms
Here’s how to coax those delicate white bells through winter’s last chill.
🌱 Step 1: Choose the Right Bulbs and Planting Location
Snowdrops (Galanthus) thrive in partial shade—think dappled light under deciduous trees or along north-facing foundations. Avoid full sun, which can scorch their delicate foliage, or deep shade, where they’ll fail to bloom. I always plant mine in well-draining soil enriched with a 2-inch layer of compost—this mimics their woodland habitat and encourages vigorous growth.
Select healthy bulbs with firm, papery skins and no signs of mold or soft spots. Planting 4-6 bulbs per cluster ensures a lush display next year. Here’s the thing—snowdrops multiply underground, so planting in groups creates natural drifts over time. Just don’t dig them up to separate offsets; they’ll bloom better left undisturbed.
🪴 Step 2: Plant Bulbs at the Correct Depth and Spacing
Dig holes 3-4 inches deep—about twice the height of the bulb—and space them 3-4 inches apart. Snowdrops have shallow roots, so planting too deep delays blooming. I use a trowel to loosen the soil first, then place each bulb with its nose (pointy end) upward. The flat base should sit at the bottom of the hole.
Cover the bulbs with soil, pressing gently to remove air pockets but avoiding compaction. A light mulch of shredded leaves (about 1 inch thick) insulates them through winter’s cold snaps. Water thoroughly after planting to settle the soil—you’ll know it’s right when moisture reaches 2 inches deep. No need to fertilize now; snowdrops are light feeders and prefer lean soil.
☀️ Step 3: Provide Winter Care and Spring Maintenance
Snowdrops are winter-hardy down to 10°F, but a 3-inch layer of mulch (like straw or pine needles) protects them from extreme cold and thaw cycles. I leave the mulch in place until late winter, when new shoots appear. This prevents soil heaving, which can expose bulbs to frost damage.
Once blooms fade in late February to March, resist the urge to deadhead. Let the foliage yellow naturally—it photosynthesizes to fuel next year’s flowers. You’ll see 3-4 inch tall leaves by early spring; don’t cut them back until they brown completely in late May or June. This ensures the bulb stores enough energy for another show.
✂️ Step 4: Encourage Natural Spread and Long-Term Growth
Snowdrops multiply via offsets, so never dig them up unless you’re relocating. If you must divide clumps, do it after foliage dies back in summer. Gently separate bulbs with a fork, replant immediately, and water well. They’ll take 1-2 years to bloom again after disturbance.
For fragrant displays, interplant snowdrops with heather, hellebores, or winter aconites. These companions thrive in the same conditions and extend the season. Just avoid heavy feeders like tulips—they’ll compete for nutrients and crowd out your snowdrops. A light application of bulb fertilizer in early fall (like 5-10-10) is optional but helps in poor soils.
Tips & tricks for perfect snowdrop planting
Here’s what I’ve learned after years of growing these delicate winter bloomers—tricks that’ll help your snowdrops thrive from planting to next spring.
Bulb Selection: Look for firm, plump snowdrop bulbs with intact papery skins—these are your best bet for strong, healthy growth. I always check for any soft spots or mold, which can signal rot. The size matters too: larger bulbs (about 1.5 inches in diameter) produce more blooms in their first year. If you’re planting in groups, mix bulb sizes for a more natural, varied display.
Soil Preparation: Snowdrops despise soggy soil, so amend heavy clay with a generous amount of compost to improve drainage. I like to work in a 2-inch layer of well-rotted compost before planting—this mimics their woodland habitat while preventing waterlogging. For containers, use a mix of potting soil and perlite to ensure excellent drainage. The key is keeping moisture balanced without creating waterlogged conditions that can rot bulbs.
Winter Protection: While snowdrops are hardy down to 10°F, a 3-inch layer of mulch (like straw or pine needles) acts as an extra shield against temperature swings. I remove the mulch in late winter when shoots appear, but only after the worst cold snaps have passed. This prevents soil heaving, which can expose bulbs to frost damage. For containers, move them to a sheltered spot or wrap pots in bubble wrap for added protection.
Long-Term Care: The secret to repeat blooming is patience—never cut back foliage until it turns completely brown in late May or June. This allows the bulbs to photosynthesize and store energy for next year’s flowers. I’ve seen snowdrops bloom for decades when left undisturbed, creating natural drifts that multiply over time. If you must divide clumps, do it in summer after foliage dies back, and replant immediately to minimize stress.
Pro Tips for Snowdrop Spring Flowers
- Here’s what I’ve learned after years of growing these delicate winter bloomers—tricks that’ll help your snowdrops thrive from planting to next spring.
- Bulb Selection: Look for firm, plump snowdrop bulbs with intact papery skins—these are your best bet for strong, healthy growth.
- Soil Preparation: Snowdrops despise soggy soil, so amend heavy clay with a generous amount of compost to improve drainage.
Frequently asked questions
Got questions about growing or caring for snowdrop spring flowers?
Here are some of the most common ones—plus quick, practical answers to help you bring early blooms to your winter garden with ease!
When is the best time to plant snowdrops?
Plant snowdrops in late summer or early fall (August to October) for the best results. This timing mimics their natural growth cycle, allowing roots to establish before winter. If you miss this window, spring planting is still possible—just water them regularly until they’re settled.
How do I keep snowdrops coming back every year?
Snowdrops are low-maintenance but thrive with well-draining soil and partial shade. After blooming, avoid cutting back foliage until it yellows naturally—this feeds the bulbs for next year. Mulch lightly in winter to protect roots, and fertilize lightly in early spring with compost.
Can snowdrops grow in containers or small gardens?
Use shallow containers (6+ inches deep) with drainage holes. Plant bulbs close together (2–3 inches apart) and mix in organic matter like peat or compost. Place containers in bright, indirect light (e.g., under trees or on patios). Just keep soil moist but not soggy!
Why aren’t my snowdrops blooming this year?
Common culprits include too much sun (they prefer shade), overcrowded bulbs (dig and divide every 3–4 years), or poor drainage. Check soil moisture too—bulbs need consistent dampness but hate soggy conditions. If leaves look weak, boost nutrients with a balanced fertilizer in early spring.
What are some snowdrop alternatives for early spring color?
If snowdrops aren’t your style, try these cold-hardy early bloomers:
- Winter aconite (Eranthis hyemalis): Bright yellow flowers, loves shade.
- Crocuses: Dwarf varieties bloom even under snow!
- Hellebores ("Lenten roses"): Shade-tolerant and long-lasting.
- Daffodils: Cheerful and deer-resistant (plant in fall).
Wrapping up and next steps
Embracing the delicate charm of snowdrop spring flowers is like inviting a whisper of spring into your winter garden—simple yet magical! 🌱 These early bloomers bring hope, fragrance, and a touch of nature’s artistry to your space, proving that beauty thrives even in the coldest months.
Whether you’re a seasoned gardener or a curious beginner, their ease of care makes them the perfect project to kickstart your green thumb.
Ready to bloom with confidence? Start small—plant a few snowdrops in a pot or along a garden path—and watch your winter landscape transform into a fragrant, floral masterpiece. Your garden’s spring story begins now! 🌸