
Flowers
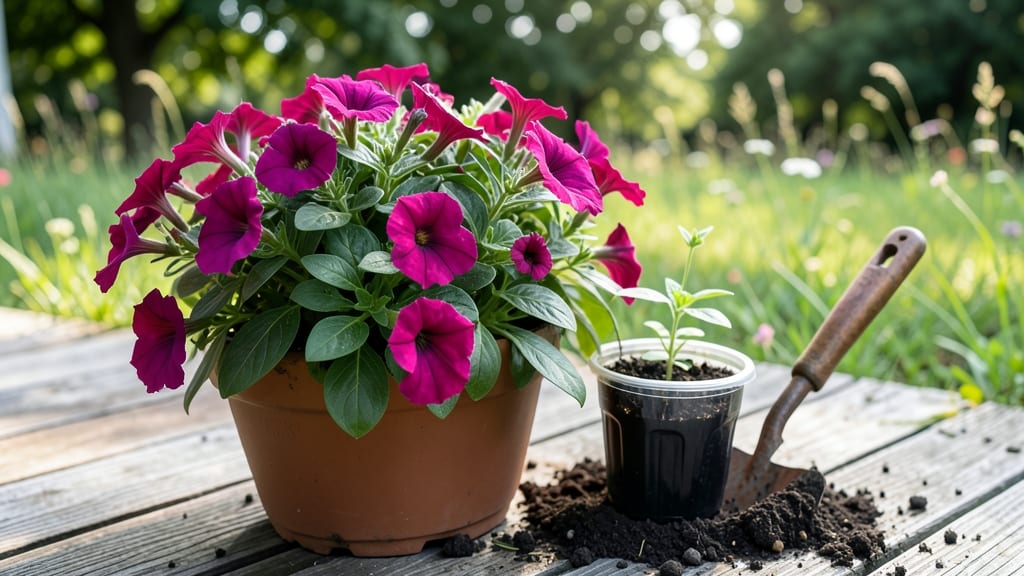
Planting flowers in planters turns even the smallest balcony into a riot of color. 🌸 I’ve filled window boxes, hanging baskets, and patio pots with blooms that outshine store-bought arrangements—and the secret isn’t expensive soil or rare plants.
It’s about matching the right flowers to the right containers, giving them proper drainage, and a watering routine that keeps roots happy without drowning them.
The best part? You can grow everything from sun-loving geraniums to shade-tolerant impatiens in containers, and they’ll thrive with just three simple tricks: the right pot size, a well-draining soil mix, and consistent moisture.
My 10-gallon ceramic pots produce more blooms than my in-ground garden because they get perfect care—no weeds, no pests, just focused attention. Even beginners can nail this with the right setup.
By summer’s end, you’ll have planters bursting with blooms that attract butterflies and fill your space with fragrance. The key is choosing flowers that match your light conditions—petunias for full sun, ferns for shade—and keeping an eye on soil moisture without letting it dry out completely.
Once you master these basics, your containers will look like they belong in a botanical garden.
This works for apartments, patios, or even rooftops—no yard required. Let’s get those planters prepped and blooming all season long.
📚 In This Guide
- What you need
- Instructions
- Tips and common mistakes
- Wrapping up and next steps
What you need
- ● Planters: 1–3 containers (size depends on plant type; 6–12 inches deep for most flowers). Ensure they have drainage holes!
- ● Potting soil: 1–2 bags of high-quality, well-draining container mix (avoid garden soil—it compacts!). Look for blends labeled for flowers or containers.
- ● Flowers: 1–3 plants per container (check plant tags for spacing needs). Opt for compact varieties like petunias, geraniums, or marigolds.
- ● Slow-release fertilizer: 1 packet or granules to mix into the soil for 2–3 months of nutrients.
- ● Watering can or hose with a gentle spray nozzle: For even moisture distribution without over-saturating.
- ● Trowel or small shovel: For easy soil scooping and planting.
- ● Gloves: To keep your hands clean and protected.
- ○ Mulch or pebbles: Optional for retaining moisture and adding aesthetics.
- ● Plant labels: To track varieties and care needs.
- ● Saucer or tray: To catch runoff and protect surfaces.
Step-by-Step instructions for planting flowers in containers
Here's how to create vibrant container displays that bloom all season long.
🪴 Step 1: Choose the Right Planters and Drainage
Start with containers that have drainage holes—this is non-negotiable. Without them, roots will suffocate in soggy soil and your flowers will wilt within weeks. I prefer terra cotta pots for annuals because they breathe, but plastic containers work well for seasonal displays if you drill extra holes yourself.
Size matters too: aim for at least 12 inches deep for most flowering plants. Shallow pots dry out faster, forcing you to water constantly. For 4 planters, you'll need containers that can hold 1-2 gallons of soil each, depending on the flower type. Check the back of seed packets for mature plant size—this tells you how much space each variety needs to thrive.
🌱 Step 2: Layer Soil and Essential Amendments
Fill each planter one-third full with a lightweight potting mix—never garden soil. I like to blend mine with perlite or vermiculite (about 1 part amendment to 4 parts soil) to improve drainage. This prevents the classic container problem of compacted soil that strangles roots.
At the bottom, add a 1-inch layer of gravel or broken pottery—this creates a reservoir for water while keeping roots above it. Press down lightly so the soil stays in place but doesn't get compressed. The key here is loose, airy soil that lets roots spread easily. Tap the container gently on the table to settle everything evenly before adding plants.
☀️ Step 3: Plant Flowers with Proper Spacing and Light Needs
Dig holes twice as wide as the root ball but only as deep as the plant's container. Gently remove each plant from its nursery pot and tease apart any root-bound roots—this encourages them to spread into the new soil. Place the plant in its hole, then fill around it with soil, pressing lightly to eliminate air pockets.
Here's the trick: group flowers by sunlight needs. Place sun-lovers like petunias and geraniums in the fullest sun spots, while shade-tolerant impatiens or fuchsias go in dappled areas. For 4 planters, I usually mix 3 sun-loving varieties with 1 shade-tolerant filler to create visual interest. Water deeply after planting to help soil settle and remove any air gaps.
💧 Step 4: Water and Mulch for Long-Lasting Blooms
Give each newly planted container a deep watering until water flows freely from the drainage holes. This ensures roots make contact with moisture throughout the soil. After watering, let the pots sit for 10-15 minutes to drain completely—this prevents root rot before it starts.
Top with 1 inch of mulch (like shredded bark) to lock in moisture and keep soil temperatures stable. Mulch also suppresses weeds, which compete with your flowers for nutrients. Here's the thing—water consistently for the first 2 weeks, then adjust based on weather. Containers dry out 3-5 times faster than in-ground plantings, so check soil moisture daily during hot spells by sticking your finger 1 inch deep. If it feels dry, water thoroughly.
✂️ Step 5: Maintain with Pruning and Seasonal Care
Deadhead spent blooms weekly to encourage continuous flowering. Pinch off faded flowers with your fingers or snip with clean scissors just above a set of leaves. This redirects the plant's energy from seed production back to growing more blooms. For 4 planters, I spend 5 minutes per container every Saturday morning—it makes a huge difference in how long they perform.
Fertilize every 4-6 weeks with a balanced, water-soluble fertilizer (like 10-10-10) mixed at half-strength. Over-fertilizing burns roots in containers, so less is more. In late summer, switch to a low-phosphorus formula to promote fall blooms instead of leafy growth. Watch for pests like aphids or spider mites—neem oil is my go-to organic treatment for container gardens.
Tips & tricks for thriving container blooms
Here's what nobody tells you about keeping container gardens vibrant—these little details make all the difference between wilting disappointment and show-stopping displays.
Drainage is Non-Negotiable: In Step 1, if your containers don't have drainage holes, drill them yourself—even if it seems like overkill. I learned this the hard way after watching roots rot in soggy soil. For terra cotta pots, place them on saucers to catch excess water, but empty saucers after each watering to prevent bacterial growth. The 10-15 minute drainage time after watering isn't just about preventing root rot—it's also about letting soil oxygenate properly for healthier roots.
Soil Science Matters: When you're layering soil in Step 2, resist the urge to pack it down tightly. Instead, tap the container gently on the table to settle the soil naturally—this creates the perfect loose structure that mimics natural soil. For the perlite or vermiculite amendment, I use about 1 part to 4 parts soil, but if you're working with heavy clay-based potting mixes, bump this to 1:3 for better aeration. The gravel layer at the bottom isn't just for drainage—it creates a water reservoir that helps regulate moisture levels between waterings.
Sunlight Strategy: In Step 3, when grouping flowers by sunlight needs, consider the microclimates around your home. A west-facing window might get intense afternoon sun that shade-tolerant plants can't handle, while an east-facing spot could be perfect for them. I always rotate my containers every 2-3 weeks to ensure even sunlight exposure—this prevents lopsided growth and keeps plants thriving. The 5 minutes you spend deadheading weekly in Step 5 isn't just about looks—it's the single most effective way to extend your blooming season by redirecting the plant's energy.
Watering Wisdom: The "water consistently for the first 2 weeks" advice in Step 4 is crucial, but here's the thing: containers dry out fastest in the top inch of soil. Use a moisture meter or your finger to check this depth daily during hot weather—if it's dry, water thoroughly. For the 4 planters, I use a watering can with a long spout to reach all corners, ensuring even moisture distribution. Mulching with 1 inch of shredded bark isn't just decorative—it creates a protective layer that reduces evaporation by up to 40% and keeps soil temperatures stable.
Pro Tips for Planting Flowers In Planters
- Here's what nobody tells you about keeping container gardens vibrant—these little details make all the difference between wilting disappointment and show-stopping displays.
- Drainage is Non-Negotiable: In Step 1, if your containers don't have drainage holes, drill them yourself—even if it seems like overkill.
- Soil Science Matters: When you're layering soil in Step 2, resist the urge to pack it down tightly.
Frequently asked questions
Got questions about making your planters pop with vibrant blooms? You’re not alone! Here are answers to the most common queries to help you garden like a pro.
What’s the best soil mix for planting flowers in planters?
Use a lightweight, well-draining potting mix—avoid garden soil, which compacts and suffocates roots. A blend of 50% potting soil, 30% perlite or vermiculite, and 20% compost works wonders. For succulents or cacti, add extra perlite to prevent rot.
When is the best time to plant flowers in containers?
For annuals, plant after the last frost in spring (check your local frost date!). Perennials can go in early spring or fall. Pro tip: If planting in summer, water deeply daily for the first 2 weeks to help roots establish.
How often should I water flowers in planters?
Containers dry out faster than garden beds—water when the top inch of soil feels dry. Most flowers need 1–1.5 inches of water per week, but adjust for heat (daily checks in summer) or rain. Morning watering prevents fungal issues.
Can I reuse the same planter for different flowers each year?
Just sterilize the container first: scrub with soapy water, rinse, and disinfect with a 1:9 bleach-water mix (or hydrogen peroxide). Replace old soil completely—it may harbor pests or diseases from last season’s plants.
Why are my container flowers wilting or dying?
Common culprits:
- Overwatering (check drainage holes!)
- Underwatering (stick your finger in the soil)
- Poor soil (amend with compost or fertilizer)
- Pests (inspect leaves for aphids or spider mites)
Give them a diagnostic check: Are roots circling? Is soil soggy? Adjust care and monitor closely.
Wrapping up and next steps
Planting flowers in planters is a rewarding way to bring vibrant color and life to any space—whether you’re a seasoned gardener or just starting out! 🌸 The key to success lies in choosing the right containers, soil, and drainage, along with a little TLC.
With these three tricks, you’ll be well on your way to lush, thriving blooms that turn heads and brighten your days.
Now that you’re armed with the know-how, roll up your sleeves and get planting! Start small with a single planter or go all out with a balcony garden—either way, enjoy the process and watch your green thumb grow. Happy gardening! 🌱