
Lawn
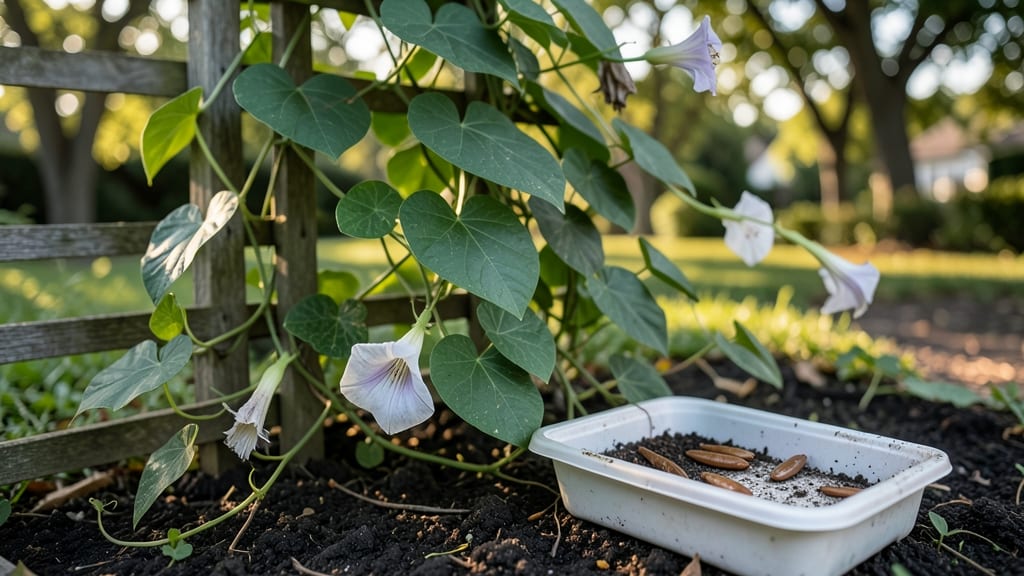
Moonflower bush seed pods contain the secret to growing these dramatic night-blooming climbers from scratch—no nursery trip required. 🌙 I’ve grown moonflowers from seed for years, and the trick to fast germination lies in how you handle those papery pods before they even touch soil.
The pods crack open when ripe, revealing flat, dark seeds that look almost like tiny beans. Collect them in late summer or early fall when the pods turn brown and split naturally—don’t rush it, or the seeds won’t be ready.
You can germinate them right in water (they sprout in 3-7 days) or plant them directly in warm soil, but timing matters: too early, and they’ll rot; too late, and they won’t sprout until next spring.
What you’ll end up with is a tangle of fast-growing vines that climb anything in weeks, their giant white blooms unfurling at dusk like magic. The seedlings are delicate at first, but once they establish, they’re nearly indestructible—just give them a trellis and consistent water until they’re rooted.
The real reward? Moonflowers self-seed aggressively, so you’ll have new volunteers popping up for years.
Works best in zones 7-11, but with a little patience, you can coax them along in cooler climates too. Here’s how to make sure your seeds don’t turn to dust before they sprout—because nobody wants to wait a whole year for those first blooms.
📚 In This Guide
- What you need
- Instructions
- Tips and common mistakes
- Wrapping up and next steps
What you need
- ● Moonflower bush seed pods: 2–5 mature, dried pods (harvested from a healthy plant or purchased from a nursery).
- ● Small containers: 1–2 shallow dishes (for water germination) or 3–4 small pots (4–6 inches deep, for soil planting).
- ● Well-draining potting mix: 1–2 bags of organic, peat-free soil (or a cactus/succulent mix for faster drainage).
- ● Water: Room-temperature, filtered water (if germinating in water).
- ● Spray bottle: 1 (for keeping soil moist without overwatering).
- ○ Plastic wrap or humidity dome: 1 (optional, to retain moisture during germination).
- ● Tweezers or toothpick: 1 (for gently handling small seeds).
- ● Scissors or pruning shears: 1 (to open seed pods carefully).
- ● Grow lights or sunny windowsill: Access to indirect sunlight (6+ hours/day) or a grow light for seedlings.
- ○ Fertilizer (optional): A balanced, water-soluble fertilizer (5-5-5 NPK) for post-germination growth.
- ● Labels & markers: To track planting dates and varieties.
How to germinate moonflower bush seeds quickly in water or soil
Here's the trick I've used to get these tropical beauties sprouting in under a week.
🌱 Step 1: Harvest and Prepare the Seed Pods
Collect mature moonflower seed pods when they turn brown and begin splitting open naturally. The pods should feel dry and papery to the touch. I like to gather them in the morning when humidity is lower—they'll keep better and the seeds inside stay fresher.
Open the pods carefully with your fingers or a small knife, but avoid crushing the seeds inside. You'll find 2-4 large, flat seeds per pod. These seeds germinate fastest when fresh, so use them within a week of harvesting if possible. If storing, keep them in a paper bag in a cool, dry place until ready to plant.
💧 Step 2: Choose Your Germination Method
Moonflowers thrive with either water or soil germination. For water germination, place each seed in a small glass or jar with just enough water to cover the bottom half. The seeds should float slightly—they'll sink as they absorb moisture. Change the water daily to prevent bacterial growth. You'll see tiny roots emerge within 3-5 days.
For soil germination, fill small pots with moistened seed-starting mix (never garden soil—it's too dense). Press each seed ½ inch deep into the soil, spacing them 2 inches apart. Gently water the surface until damp but not soggy. Keep the soil consistently moist—never let it dry out during germination.
☀️ Step 3: Provide Warmth and Indirect Light
Moonflower seeds germinate best in warmth—aim for 75-85°F. Place your jars or pots on a seedling heat mat or in a warm spot like on top of your fridge. If using water germination, keep the jars in bright, indirect light. Direct sunlight can overheat the water and stress the emerging roots.
Once sprouts appear, move them to a location with bright, filtered light for 6-8 hours daily. You'll notice the first leaves (cotyledons) emerge within 7-10 days of planting. These will look heart-shaped and slightly fuzzy. Avoid strong direct sun at this stage—it can scorch tender new growth.
🌿 Step 4: Transplant Seedlings Carefully
When seedlings develop their second set of true leaves (the larger leaves after the initial cotyledons), they're ready for transplanting. For water-germinated seeds, gently transfer them to small pots filled with well-draining potting mix. Submerge the root ball up to the seed's original waterline to prevent shock.
For soil-germinated seedlings, carefully lift them from their starter pots, keeping the root ball intact. Plant them 1 inch deeper than they grew in their original container. This encourages stronger stem development. Water thoroughly after transplanting, and place them in a shaded spot for 3-5 days to recover before introducing more light.
Tips & tricks for fast moonflower seed germination
Here's what I've learned to turn those slow-growing moonflower seeds into thriving plants in record time.
Harvest Timing Matters: The morning harvest I mentioned in Step 1 isn't just about freshness—it's about avoiding dew. Damp pods can harbor mold, especially when you open them. I've found that pods gathered after sunrise but before 10am stay freshest and germinate fastest. If you must store them, place the paper bag with pods in the fridge (not freezer) for up to 2 weeks, but fresh is always better.
Water Germination Secret: For that 3-5 day root emergence in Step 2, here's my pro move: use filtered or distilled water instead of tap water. Tap water often contains chlorine that can inhibit germination. I also add a tiny pinch of cinnamon to the water—it's a natural antifungal that prevents bacterial growth between water changes. Trust me, your roots will thank you.
Light Transition Tip: When moving your sprouts from indirect light to 6-8 hours of filtered light in Step 3, do it gradually. I start with just 2 hours on day one, then increase by an hour daily. This prevents the shock that can cause seedlings to wilt. Think of it like sunbathing—you wouldn't go from zero to full sun either!
Transplanting Hack: In Step 4, when transplanting your water-germinated seeds, I've found that dipping the root ball in a rooting hormone gel before planting boosts survival rates. For soil-germinated plants, gently score the bottom of the pot with a knife before removing to prevent root damage. This small step makes all the difference when your seedlings are most vulnerable.
Pro Tips for Moonflower Bush Seed Pod
- Here's what I've learned to turn those slow-growing moonflower seeds into thriving plants in record time.
- Harvest Timing Matters: The morning harvest I mentioned in Step 1 isn't just about freshness—it's about avoiding dew....
- Water Germination Secret: For that 3-5 day root emergence in Step 2, here's my pro move: use filtered or distilled wa...
Frequently asked questions
Got questions about growing moonflower bush seed pods? You’re not alone! Here are some of the most common queries—and their answers—to help you succeed with your fast-growing moonflower adventure.
How long does it take for moonflower seed pods to germinate?
Moonflower seeds are fast! When planted in moist soil or water, they typically sprout within 5–10 days. Keep the soil consistently damp (not soggy) and in warm conditions (70–80°F) for the best results. If you’re germinating in water, transfer seedlings to soil once roots appear (usually within a week).
Can I grow moonflower seed pods indoors before transplanting?
Start seeds indoors 4–6 weeks before your last frost date for a head start. Use small pots with well-draining soil, place them in a sunny window or under grow lights, and keep the soil moist. Once seedlings have 2–3 true leaves, they’re ready to move outdoors after hardening off (acclimating to outdoor temps for 7–10 days).
What’s the best way to collect moonflower seed pods?
Moonflower seed pods form after the flowers bloom and fade. Wait until the pods turn brown and dry (usually late summer to early fall), then gently twist or cut them off the plant. Open the pods to release the seeds—store them in a cool, dry place until planting. Pro tip: Wear gloves if you’re sensitive to the pods’ slight stickiness!
Why aren’t my moonflower seeds germinating?
Slow or no germination often boils down to three key issues:
- Cold soil: Moonflowers need warmth (60°F+). Use a heat mat if your home is chilly.
- Dry soil: Keep seeds consistently moist—not waterlogged. Mist lightly daily.
- Old seeds: Moonflower seeds lose viability after 1–2 years. Test freshness by soaking a few in water overnight; if they swell, they’re still good!
Are there alternatives to moonflower seed pods for fast-growing vines?
If you love quick-climbing vines but want options, consider these easy-to-grow alternatives:
- Morning Glory: Germinates in 3–7 days; great for trellises.
- Hyacinth Bean: Fast-growing with colorful pods (edible when cooked!).
- Sweet Pea: Fragrant flowers and self-seeding habits.
- Black-Eyed Susan Vine: Drought-tolerant and heat-loving.
Wrapping up and next steps
Growing moonflower bush seed pods is a rewarding journey that brings beauty and tranquility to your garden—and you’ve got all the tools to succeed! Whether you’re nurturing them in water or soil, remember that patience and care yield stunning, fragrant blooms.
Now that you’re equipped with answers to common questions, why not take the next step? Grab those seed pods, follow your preferred method, and watch your garden transform into a magical nighttime haven. Happy growing! 🌙✨
- Next step: Start with just one seed pod to test your technique before expanding.
- Bonus tip: Share your progress with fellow gardeners—inspiration spreads faster together!