
Pruning
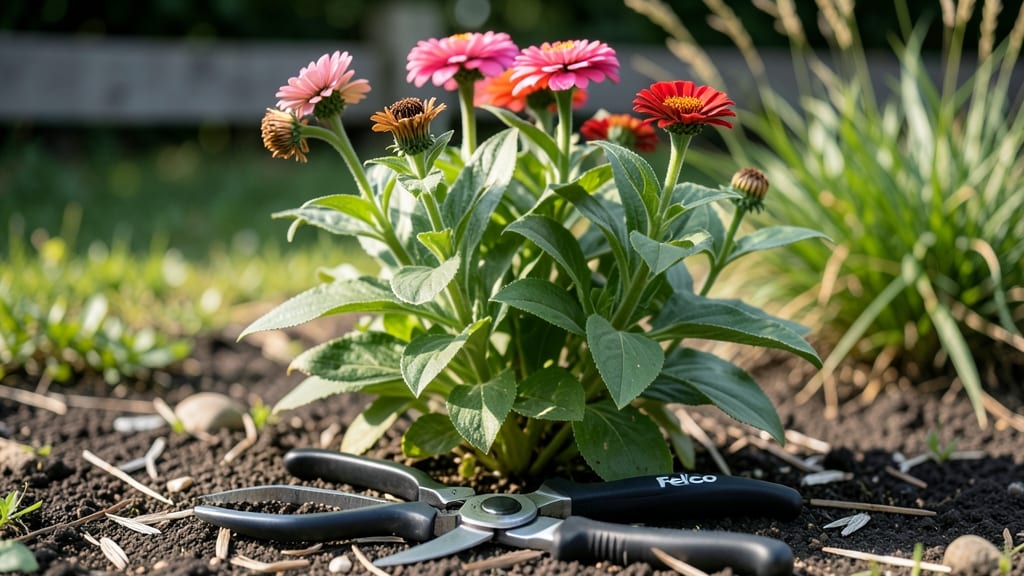
Properly deadheading flowers isn't just about tidying up—it's the secret to longer blooms and healthier plants. 🌸 I learned this the hard way when my zinnia patch faded in weeks instead of months, but mastering these 3 simple cuts transformed my garden into a nonstop floral display.
The key lies in understanding when to trim and where to look for those hidden buds that will become your next wave of blooms.
You only need basic tools: sharp pruners or clean scissors, and a clear morning for the job.
Annuals like petunias and zinnias respond instantly to deadheading, while perennials such as coneflowers and black-eyed Susans benefit from a more strategic approach—cutting back just enough to encourage new growth without sacrificing next year's blooms.
The goal is always the same: redirect the plant's energy from seed production back into vibrant new flowers.
Within days of proper deadheading, you'll notice fresh buds forming at the base of stems, and the plant will bounce back with fuller, more abundant blooms. The difference is dramatic—my once-sparse garden now stays lush and colorful from early summer through fall.
Plus, fewer spent blooms mean fewer pests and diseases lurking in the garden debris.
This method works for every type of flower, from roses to annuals, and adapts easily to different climates. Whether you're a beginner or a seasoned gardener, these techniques will give you the confidence to keep your garden thriving all season long.
Let's get those blooms lasting longer than ever before.
📚 In This Guide
- What you need
- Instructions
- Tips and common mistakes
- Wrapping up and next steps
What you need
- ● Pruning shears or bypass pruners: Choose sharp, clean tools with a 4- to 6-inch blade for precision cuts. (Avoid dull or rusty tools—they can damage plants!)
- ○ Gloves (optional but recommended): Wear gardening gloves (nitrile or leather) to protect your hands from thorns, sap, or dirt.
- ● Bucket or trash bag: A 5-gallon bucket or sturdy bag to collect spent blooms and debris.
- ● Disinfectant (rubbing alcohol or bleach solution): Keep a small spray bottle with 70% isopropyl alcohol or a 1:10 bleach-water mix to sterilize tools between cuts.
- ○ Water spray bottle (optional): A 16-ounce spray bottle with water to mist tools or plants if they look dusty or stressed.
- ● Hand pruners or nail clippers: For delicate flowers or small stems where shears are too bulky.
- ● Knee pad or stool: If you’re working close to the ground or have mobility needs.
- ● Compost bin or pail: To recycle deadheaded blooms into nutrient-rich compost.
- ● Magnifying glass (for tiny blooms): Helps spot the exact spot to cut on petite flowers like pansies or calibrachoa.
- ● Sunhat and sunscreen: Because even flower lovers need to protect themselves from the sun!
Step-by-Step guide to revitalizing your flower beds
Here's how to breathe new life into your plants with precision cuts.
🌿 Step 1: Identify the Right Blooms to Trim
Focus on flowers that have already faded—look for petals that have dropped or turned brown. These are your targets. I always start with the oldest blooms first, working my way toward the newest flowers. This ensures you're not accidentally cutting off potential buds that could still open.
Check the flower head carefully. If the center looks dry or the petals have lost their vibrant color, it's ready for deadheading. You'll know you've picked the right ones when the stem feels slightly woody and the bloom no longer feels plump with moisture.
✂️ Step 2: Make the Perfect Cut at the Right Spot
Grab your clean, sharp pruners and locate the first set of healthy leaves or buds below the faded bloom. This is where you want to cut—never above a leaf node. I like to make my cuts at a 45-degree angle, which prevents water from pooling on the stem and causing rot.
For flowers with multiple stems, cut each one individually at its base. If you're dealing with a large cluster, you can trim the entire stem back to just above a strong set of leaves. The goal is to encourage new growth from those lower nodes, not to leave stubs that will only attract pests.
🌱 Step 3: Encourage New Growth with Strategic Trimming
After removing the dead blooms, take a moment to examine the plant's overall shape. If it looks leggy or sparse, consider giving it a light haircut all over. This isn't just about removing the old—it's about shaping the future. I often trim back about one-third of the plant's height for bushier growth, especially with annuals like petunias or zinnias.
Watch for new buds forming within 7-10 days after deadheading. These will tell you your efforts are paying off. If you don't see any new growth after two weeks, you might be cutting too aggressively—scale back next time and focus on just the faded blooms.
☀️ Step 4: Maintain Momentum with Regular Check-Ins
Deadheading isn't a one-time job—it's an ongoing conversation with your plants. I make it a habit to check my flower beds every 3-5 days during peak bloom season. This keeps the garden looking tidy and encourages continuous flowering.
Pay attention to how your plants respond. Some, like roses or hydrangeas, need more aggressive pruning, while others, like impatiens, prefer just the removal of spent blooms. Adjust your approach based on what you observe—your garden will thank you with longer, more abundant blooms.
Tips & tricks for perfect flower deadheading
Common pitfalls—and how to sidestep every one—when giving your plants a fresh start.
Timing Secret: In Step 4, when you're checking your flower beds every 3-5 days, focus on morning hours for deadheading. Plants are fully hydrated after a night's watering, making stems easier to cut cleanly. I've found that morning sessions also reveal more clearly which blooms have truly faded overnight, rather than waiting until afternoon when heat can make them look fresher than they are.
Tool Technique: For Step 2, your pruners don't need to be expensive, but they do need to be sharp. Dull blades crush stems instead of making clean cuts, which can damage plant tissue and attract disease. I keep a small file in my gardening toolkit to maintain sharpness—just a few strokes every few uses makes all the difference. And always clean your pruners with rubbing alcohol between plants to prevent cross-contamination.
Plant-Specific Strategy: The one-third height reduction in Step 3 works beautifully for annuals, but perennials like peonies and daylilies often respond better to more conservative cuts. For these, I recommend only removing the spent blooms and leaving the foliage intact—it's their energy factory for next year's growth. Always check your plant's specific care requirements before making aggressive cuts.
Visual Cues: When you're watching for new buds in Step 3, look for tiny swellings along the stems—these are where new growth will emerge. I've trained myself to spot these within 7-10 days, and it's incredibly satisfying to see those little signs of life. If you're not seeing them, try a more gentle approach next time—sometimes less aggressive trimming yields better results with some plant varieties.
Pro Tips for Properly Deadhead Flowers
- Common pitfalls—and how to sidestep every one—when giving your plants a fresh start.
- Timing Secret: In Step 4, when you're checking your flower beds every 3-5 days, focus on morning hours for deadheadin...
- Tool Technique: For Step 2, your pruners don't need to be expensive, but they do need to be sharp. Dull blades crush ...
Frequently asked questions
Got questions about deadheading? You’re not alone!
Whether you’re a gardening newbie or just want to refine your technique, here are answers to the most common concerns—so you can keep your flowers thriving with confidence.
When is the best time of day to deadhead flowers?
Morning is ideal—before the heat of the day sets in. This reduces stress on plants and gives them time to recover. Avoid deadheading in the evening, as damp conditions can encourage fungal growth. If you must do it later, wait until the flowers are completely dry.
How often should I deadhead my flowers?
Frequency depends on the plant! Fast growers like zinnias or marigolds may need deadheading every few days, while slower bloomers (e.g., roses) can handle weekly checks. Rule of thumb: Pinch off spent blooms as soon as they fade to encourage continuous flowering.
What if I accidentally cut into a leaf instead of the stem?
Don’t panic! A small nick won’t harm most plants, but avoid severing more than 10% of the leaf. For delicate stems (like snapdragons), use sharp pruners to minimize damage. If you’re unsure, stop and reassess—better safe than sorry!
Can I deadhead flowers without pruning shears?
Use your fingers for small blooms (like petunias) or clean nail scissors for precision. For larger stems (e.g., dahlias), snip just above a leaf node. Pro tip: Wear gloves if your plants have thorns—safety first!
What should I do if it rains right after deadheading?
Rain isn’t a dealbreaker, but wet cuts can invite disease. If possible, avoid deadheading 24 hours before rain. If you’ve already pruned, let the plant dry out naturally. For heavy downpours, trim smaller blooms first—they recover faster.
Still stumped? Drop your question in the comments—we’re happy to help your garden flourish!
Wrapping up and next steps
Deadheading your flowers isn’t just a gardening task—it’s a love letter to your plants! By removing spent blooms with the right cuts, you’ll encourage longer blooming seasons, healthier growth, and even more vibrant flowers.
Whether you’re a seasoned gardener or just starting, these simple steps make it easy to keep your garden thriving.
Ready to see the magic? Grab your pruners and get started today—your garden will thank you with a burst of new life! 🌸 For extra tips, check out our flower care guide next.