
Flowers
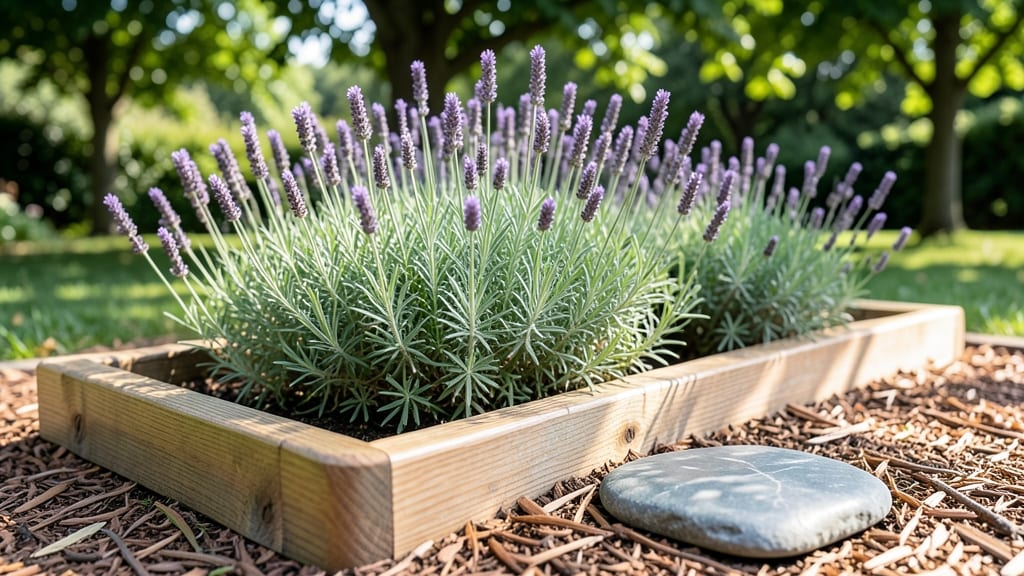
Layered flower bed arrangements turn a flat garden into a living painting that changes with the seasons. 🌸 I used to dread spring planting because my beds always looked messy—until I learned how to stack plants by height, color, and bloom time.
The trick isn’t just throwing flowers together; it’s creating depth so every season has something to offer, from early spring bulbs to late-fall berries.
Start with a backbone of perennials—they’re the workhorses that return year after year—then add annuals for pops of color and shrubs for structure.
My go-to formula is tall plants at the back (like coneflowers or ornamental grasses), mid-height blooms in the middle (black-eyed Susans or daylilies), and spillers at the front (like creeping thyme or ajuga). This keeps everything visible and prevents a jungle effect.
By mid-summer, your bed will burst with continuous blooms—no bare spots, no color clashes. The key is mixing plants that flower at different times, so when one fades, another takes over.
Think of it like a rolling wave of color: daffodils in spring, roses in summer, asters in fall. Even winter has interest with seed heads and evergreens.
This approach works for any style, from cottage gardens to modern minimalism. Whether you’re working with a small border or a large landscape, the same principles apply. Let’s turn your flower bed into a year-round showstopper—one layer at a time.
📚 In This Guide
- What you need
- Instructions
- Tips and common mistakes
- Wrapping up and next steps
What you need
- ● Plants: 3–5 tall plants (e.g., delphiniums, hollyhocks, or ornamental grasses) – 1–2 per square foot
- ● 5–7 medium-height plants (e.g., black-eyed Susans, coneflowers, or salvia) – 2–3 per square foot
- ● 7–10 short/ground-cover plants (e.g., ajuga, creeping thyme, or impatiens) – 3–4 per square foot
- ● Soil: High-quality garden soil or potting mix (1–2 bags, depending on bed size)
- ● Mulch: Organic mulch (e.g., shredded bark or pine straw) – 2–3 inches
- ● Fertilizer: Slow-release balanced fertilizer (10-10-10 or similar)
- ● Digging: Garden trowel, hand fork, or small shovel
- ● Measuring: Tape measure, stakes, and string or spray paint (for layout)
- ● Watering: Garden hose with spray nozzle or watering can
- ○ Optional (but helpful!): Knee pads or garden stool for comfort
- ● Pruners (for trimming)
- ● Gloves (to protect your hands)
- ● 🌡️ Climate Check: Pick plants suited to your USDA hardiness zone and sunlight conditions (full sun, partial shade, etc.).
- ● ✨ Color Planning: Use a color wheel to mix complementary hues for a cohesive look!
- ● 📊 Spacing Guide: Always check plant tags for mature size—crowding kills dreams (and plants).
Step-by-Step guide to designing layered flower bed arrangements
Creating a dynamic flower bed starts with understanding how to stack plants vertically.
🌿 Step 1: Plan Your Height Layers
Begin by sketching your bed layout and dividing it into three distinct height zones: back (tallest), middle, and front (shortest). This creates a natural tiered effect. I like to use tall perennials like delphiniums or hollyhocks in the back row, where they’ll reach 4-6 feet by summer. These anchor the design and prevent smaller plants from being lost.
For the middle layer, choose mid-height plants like black-eyed Susans or coneflowers, which typically grow 2-3 feet tall. These bridge the gap between the towering back row and low ground covers. I always select varieties with bold foliage—this adds texture even when flowers fade.
Finally, fill the front with low-growing annuals like pansies or ajuga, which stay under 12 inches. These spill over the edges and frame the bed. Pro tip: Place the most vibrant colors in the front layer—they’ll draw the eye immediately when viewed from the lawn.
⏰ Step 2: Select Plants for Seasonal Interest
Layering isn’t just about height—it’s about continuous color. Start with spring bloomers like tulips or daffodils in the front, then add summer performers like daylilies in the middle, and finish with fall/winter interest like ornamental grasses or seed heads in the back. I always include at least one evergreen (like heuchera or boxwood) to provide structure when everything else goes dormant.
For a true season-long display, mix early bloomers with late-season varieties. For example, pair spring crocus with fall mums in the same bed. This ensures your design never looks bare. I also incorporate foliage plants like hostas or ferns—their lush leaves fill gaps between bloom cycles.
Here’s the thing—plant placement matters. Place taller plants toward the center-back of the bed so they don’t block sunlight from shorter varieties in front. A good rule of thumb: No plant should cast a permanent shadow on another during peak sunlight hours.
🪴 Step 3: Prepare the Soil and Plant Strategically
Before planting, amend the soil with 2-3 inches of compost mixed into the top 6 inches of soil. This improves drainage and nutrient availability—critical for layered beds where roots compete for space. I like to test soil pH first; most perennials prefer 6.0-7.0, while acid-loving plants (like hydrangeas) need 5.0-6.0. Adjust with lime or sulfur if needed.
When planting, space taller plants 18-24 inches apart to allow airflow and prevent disease. Shorter plants can go 12-18 inches apart, but don’t crowd them—roots need room to expand. I dig holes twice as wide as the root ball but only as deep as the container’s base. This encourages roots to spread horizontally rather than circling.
After planting, water deeply to settle the soil and remove air pockets. Mulch with 2-3 inches of shredded bark to retain moisture and suppress weeds. Keep mulch 2 inches away from plant stems to prevent rot. This step is non-negotiable—skipping it leads to dry soil and stressed plants in the first hot weeks.
☀️ Step 4: Maintain Layers Through the Seasons
Layered beds require ongoing care to keep their structure intact. Start by deadheading spent blooms regularly—this encourages more flowers and prevents seed heads from overwhelming the design. I use clean, sharp pruners and cut back to the first set of healthy leaves to promote bushier growth.
In late summer, assess the bed’s height balance. If back-row plants have faded, add temporary height with tall annuals like snapdragons or salvia. These bridge gaps until perennials rebound in spring. I also fertilize lightly with a balanced 10-10-10 in early fall to support root growth before winter.
Winter is the time to prune and plan. Cut back dead or woody stems but leave seed heads or dried foliage for winter interest. I sketch notes on what worked (and what didn’t) for next year’s arrangement. This ensures each season’s design builds on the last.
Tips & tricks for perfect flower bed arrangements
Here's what nobody tells you about creating layered flower beds that stay stunning all year.
Design with the Sun in Mind: In Step 1, when planning your height layers, consider sunlight exposure. Tall back-row plants like delphiniums need full sun (6+ hours daily), while middle-layer coneflowers can tolerate partial shade. Front-row plants like ajuga thrive in shade but may struggle if buried in the back. I always sketch my bed with sun patterns marked—this prevents leggy growth or faded blooms. The key is positioning taller sun-lovers toward the center where they won't shade shorter varieties at their base.
Seasonal Color Planning: For Step 2's continuous color strategy, I create a "bloom calendar" before shopping. Note which plants flower early (like crocus) and which bloom late (like chrysanthemums), then fill gaps with foliage plants. A trick I learned: Use three shades of one color (light, medium, dark) in each layer for harmony. For example, pair white daisies, lavender, and purple salvia together—they'll complement each other beautifully throughout the season without clashing.
Soil Prep Shortcuts: In Step 3, if you don't have time for full soil testing, focus on these two tests: The "squeeze test" (damp soil should hold shape when squeezed but crumble when poked) and the "sniff test" (healthy soil smells earthy, not sour). For acid-loving plants like hydrangeas, mix in 1 pound of sulfur per 100 square feet—this is enough to lower pH by 1 point over time. I also keep a bucket of compost tea (steep compost in water for 24 hours) ready to water plants after transplanting—it jumpstarts root growth.
Maintenance Hack: For Step 4's ongoing care, I've found that deadheading every 7-10 days (not just when blooms fade) keeps plants producing flowers longer. Use a pair of clean pruning shears and cut just above a leaf node at a 45-degree angle—this encourages bushier growth. In late summer, I replace faded back-row plants with tall annuals like snapdragons in matching colors. This creates instant height without waiting for perennials to rebound.
Pro Tips for Flower Bed Arrangements
- Here's what nobody tells you about creating layered flower beds that stay stunning all year.
- Design with the Sun in Mind: In Step 1, when planning your height layers, consider sunlight exposure. Tall back-row p...
- Seasonal Color Planning: For Step 2's continuous color strategy, I create a "bloom calendar" before shopping. Note wh...
Frequently asked questions
Got questions about creating stunning flower bed arrangements? You’re not alone! Here are some of the most common queries—and their expert answers—to help you design a showstopping garden that thrives all season long.
What’s the best time of year to plant a flower bed?
The ideal time depends on your climate, but spring (after the last frost) and early fall are the sweet spots. Cool weather lets roots establish before summer heat. For perennials, plant in spring; for annuals, late spring or early summer works too. Pro tip: Check your local frost dates—planting too early can shock tender plants!
How do I choose plants with compatible heights and colors?
Start with a tall-to-short gradient for drama. Place back-row plants (like delphiniums or hollyhocks) at 3–5 feet, mid-height (e.g., black-eyed Susans or coneflowers) at 1.5–3 feet, and foreground fillers (like pansies or ajuga) under 1 foot. For color harmony, stick to 3–5 hues max—think monochromatic, analogous, or complementary palettes. Sketch your layout first!
How much water do flower beds need, and how often should I water?
Newly planted beds need 1–1.5 inches of water weekly (including rainfall), but established beds thrive with deep watering 2–3 times per week. Water early morning to reduce evaporation and fungal risks. Mulch heavily (2–3 inches) to retain moisture—this cuts watering needs by 30–50%!
What are the most common pests, and how do I prevent them?
Watch for aphids, slugs, and Japanese beetles. Prevent pests with neem oil sprays, diatomaceous earth (for slugs), or beneficial insects like ladybugs. Plant marigolds or lavender as natural repellents. If damage occurs, handpick beetles or remove affected leaves—never use harsh chemicals near pollinators!
Can I use containers or raised beds instead of in-ground flower beds?
Containers and raised beds are great alternatives, especially for small spaces or poor soil. Just ensure they have drainage holes and use well-draining potting mix. For raised beds, 12–18 inches deep is ideal. Move containers to follow the sun—rotate them weekly for even growth!
Wrapping up and next steps
Creating a stunning, season-long flower bed is all about balance—layering plants by height, color, and bloom time while keeping your space thriving. Whether you’re a gardening pro or just starting, the key is patience and creativity—let your garden evolve naturally, and don’t be afraid to experiment! 🌸
Ready to transform your outdoor space? Start small with one bed or section, gather your tools, and dive in! Before you know it, you’ll have a vibrant, low-maintenance oasis that blooms from spring to frost. Happy gardening! 🌿✨