
Flowers
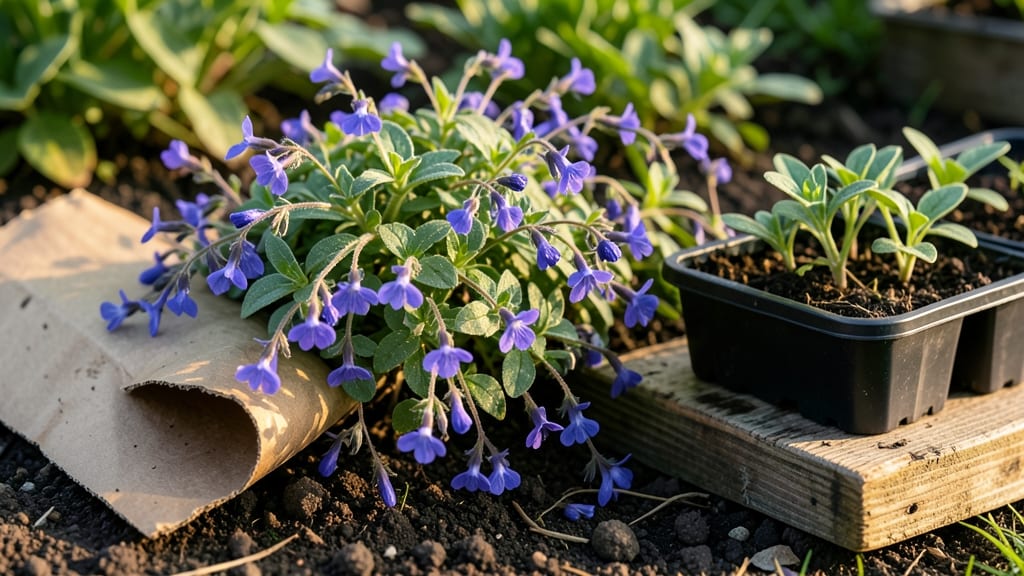
Using cardboard in flower beds isn’t just a hack—it’s a game-changer for weed control and soil health that’s free, easy, and eco-friendly. I’ve transformed my own flower beds from battlegrounds to blooming havens using nothing but flattened boxes and a little patience.
The key is layering it right under mulch, where it breaks down slowly while smothering weeds before they sprout.
You’ll need plain, untreated cardboard (no glossy ink or staples) cut to fit your bed dimensions. Spread it flat, overlapping edges by 2 inches, and water it thoroughly to keep it from blowing away.
Top with 2–3 inches of mulch—this combo blocks light, retains moisture, and feeds your soil as it decomposes. Best part? No digging, no chemicals, and zero guilt about waste.
Within weeks, you’ll notice fewer weeds popping up and healthier roots reaching deeper into the enriched soil. The cardboard acts like a slow-release fertilizer, adding organic matter as it breaks down.
Just avoid treated or glossy cardboard (the ink can leach) and keep it away from direct sunlight for too long—it dries out faster than you’d think.
This method works for perennial beds, annuals, or even under shrubs—just adjust the mulch thickness based on your climate. My roses and daylilies have never thrived like they do now, and I’ve cut my weeding time by 80%.
Ready to try it? Here’s how to do it right the first time.
📚 In This Guide
- What you need
- Instructions
- Tips and common mistakes
- Wrapping up and next steps
What you need
- ● Cardboard: 2-3 sheets per flower bed (minimum 1/8-inch thickness). Use unbleached, recycled cardboard (no glossy prints or tape—these can contain chemicals).
- ● Mulch: 2-3 inches of organic mulch (e.g., straw, wood chips, or shredded leaves).
- ● Compost or soil: Enough to cover the cardboard (aim for 2-4 inches of fresh soil).
- ● Scissors or box cutter: For trimming cardboard to fit tight spaces.
- ● Garden gloves: To protect your hands from rough edges.
- ● Rake or hoe: To smooth out the cardboard and mulch.
- ○ Watering can or hose: To dampen the cardboard before covering (optional but highly recommended).
- ● Biodegradable landscape fabric: Cut to size and layer under cardboard for extra weed suppression.
- ● Plant markers: If you’re labeling new plantings, use eco-friendly sticks or stones.
- ● Kneeling pad: For comfort during setup (trust us, your knees will thank you!).
How to use cardboard as a natural weed barrier in flower beds
Here's my go-to method for smothering weeds without chemicals or backbreaking work.
Choose the Right Cardboard
Grab clean, plain cardboard—no glossy finishes or tape that might leach into the soil. I prefer flattened boxes from shipping or moving supplies, cut into 2-foot by 3-foot sheets for easy handling. Avoid cardboard with food labels or wax coatings, as these can introduce contaminants.
Tear off any plastic wrap or tape first. The goal is a single, thick layer that blocks light but still allows water to penetrate. If using multiple layers, overlap edges by 2-3 inches to prevent weeds from growing through gaps.
Clear and Prepare the Flower Bed
Remove existing weeds and debris from the bed, then loosen the top 4-6 inches of soil with a garden fork. This helps roots establish through the cardboard later. I like to work on a dry day so the soil holds its shape better when I lay down the barrier.
Smooth out any large rocks or clumps, but leave the soil uneven—cardboard conforms better to natural contours. If your bed has sharp edges, fold the cardboard slightly upward along the border to prevent tearing when you water or mulch later.
Lay Down the Cardboard Barrier
Place the cardboard directly onto the prepared soil, overlapping sheets by at least 6 inches to seal out weeds completely. Press edges firmly into the soil to eliminate air pockets, which weeds exploit to sprout through. A garden rake works well for this—drag it lightly over the surface to secure the cardboard without tearing it.
For flower beds with existing plants, cut X-shaped slits in the cardboard where stems emerge. This lets roots grow through while still blocking weeds. Water the bed thoroughly after laying the cardboard to help it settle and begin breaking down.
Add Mulch and Plant
Cover the cardboard with a 2-3 inch layer of organic mulch, like straw or wood chips. This keeps the cardboard moist (so it decomposes faster) and protects it from wind or erosion. I use the mulch to "paint" a gentle slope toward the center of the bed to help water drain properly.
Plant your flowers directly through the mulch and cardboard, using the slits you created. Water deeply right after planting to encourage root growth through the barrier. Over time, the cardboard will decompose, adding nutrients to the soil while the mulch keeps weeds at bay.
Maintain and Refresh as Needed
Check the cardboard every few months—if weeds poke through, simply tear them out and cover the gaps with more mulch. The barrier lasts 6-12 months, depending on your climate and mulch thickness. In hot, dry areas, it may break down faster; in cooler regions, it can last nearly a year.
When the cardboard fully decomposes, you’ll notice the soil feels richer and weeds are nearly nonexistent. This is the moment to add fresh mulch or replace the barrier if needed. The key is consistency—once established, this method saves hours of weeding each season.
Tips & tricks for perfect weed-blocking barriers in flower beds
Here's what nobody tells you about making this method work flawlessly the first time.
Material Selection Tip: Look for corrugated cardboard rather than smooth shipping boxes—the ridges create tiny air pockets that help water penetrate while still blocking light. I always check for any staples or staples remnants, which can introduce metals into the soil. If you're using multiple layers, stagger the seams to create an even thicker barrier that weeds can't penetrate.
Preparation Secret: In Step 2, when loosening the soil, focus on breaking up any compacted layers—this helps roots establish more easily through the cardboard later. I like to add a thin layer of compost to the loosened soil before placing the cardboard. This gives your plants a nutrient boost as the cardboard decomposes while still maintaining the weed barrier.
Plant Protection Technique: For existing plants, make the X-shaped slits slightly larger than your plant stems—about 1/4 inch wider on each side. This gives the roots room to grow without constricting the plant. I've found that gently lifting the cardboard after planting helps settle it around the roots, creating a snug fit that prevents weeds from sneaking through.
Maintenance Hack: When checking your barrier every few months, use a stiff garden fork to gently probe the mulch and cardboard. If you feel any soft spots where weeds might be growing, add an extra layer of mulch immediately. This prevents weeds from establishing roots before you notice them.
Pro Tips for Cardboard In Flower Beds
- Here's what nobody tells you about making this method work flawlessly the first time.
- Material Selection Tip: Look for corrugated cardboard rather than smooth shipping boxes—the ridges create tiny air pockets that help water penetrate while still blocking light.
- Preparation Secret: In Step 2, when loosening the soil, focus on breaking up any compacted layers—this helps roots establish more easily through the cardboard later.
Frequently asked questions
Got questions about using cardboard in flower beds?
You’re not alone! Here are some of the most common concerns—and straightforward answers—to help you get the most out of this eco-friendly weed barrier.
Why does cardboard break down so quickly in flower beds?
Cardboard decomposes faster in soil because it’s made of plant fibers (like wood pulp) that microbes love to munch on. To slow it down, bury it at least 2–3 inches deep or layer it with mulch. For long-term use, opt for thicker, unbleached cardboard or pair it with landscape fabric.
How long should I wait before planting after adding cardboard?
Give it 4–6 weeks for the cardboard to settle and start breaking down. This allows time for weeds to die (thanks to the smothering effect) and for the soil to reabsorb moisture. If you’re impatient, plant directly into the cardboard—just poke holes for roots and water well to help decomposition.
Can I use any type of cardboard, or are some better than others?
Not all cardboard is created equal! Avoid waxy, glossy, or bleached varieties (like cereal boxes or fast-food containers), as they may contain chemicals or coatings that harm plants. Instead, choose plain, unbleached corrugated cardboard (like from moving boxes or shipping boxes) for the best results.
Will cardboard attract pests like ants or rodents?
While cardboard itself isn’t a magnet for pests, it can provide a cozy hiding spot if left exposed. To deter critters, bury the edges or cover the cardboard with 4–6 inches of mulch or wood chips. If you spot unwanted visitors, a sprinkle of diatomaceous earth (food-grade) around the bed can help keep them away.
What’s a good alternative if I don’t have cardboard handy?
No cardboard? No problem! Try these natural weed-blocking alternatives:
- Newspaper or junk mail: Lay sheets in layers, overlapping edges, and cover with mulch.
- Leaves or grass clippings: Use as a thick mulch layer (6+ inches) to smother weeds.
- Landscape fabric: A reusable option, but ensure it’s breathable to avoid compacting soil.
- Pine needles or straw: Great for acidic-loving plants like blueberries or azaleas.
Wrapping up and next steps
Incorporating cardboard in flower beds is a simple, eco-friendly way to suppress weedsand encourage healthier root growth—without breaking the bank! This method is perfect for gardeners looking to save time, reduce waste, and boost plant vitality while keeping their garden looking neat. 🌱
Ready to give it a try? Start small—test a section of your flower bed with cardboard this season and observe the difference. Your plants (and your back!) will thank you. Happy gardening! 🌸