
Planting
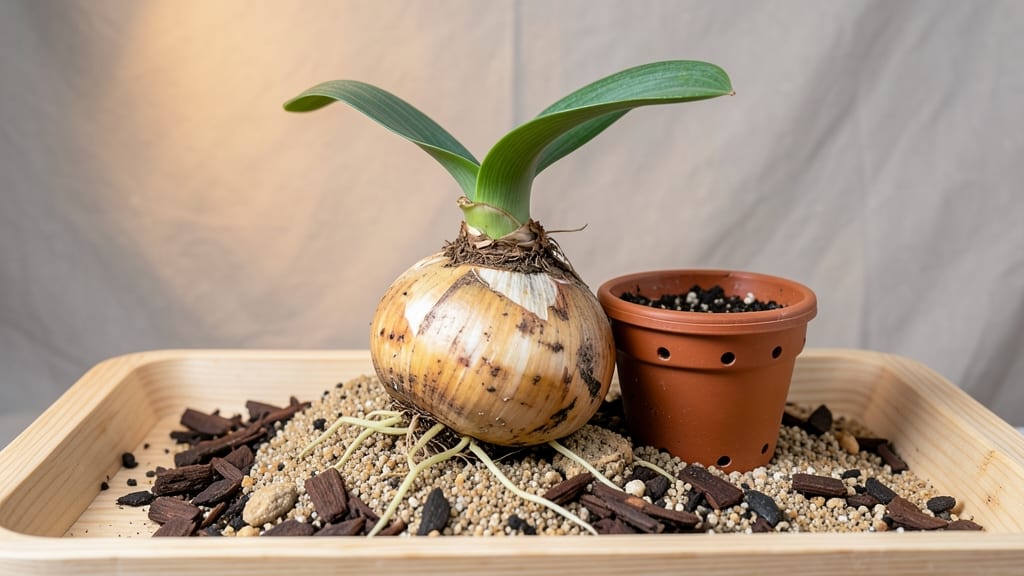
Planting amaryllis flower bulbs in late summer gives you showstopping blooms by Christmas—and I’ve learned the exact timing that makes it happen every year.
The trick isn’t just sticking a bulb in soil; it’s about mimicking their natural dormancy cycle so they burst into color when you want them to. My first attempt left me with sad, skinny stems, but now I get 3-foot-tall stalks with bold red blooms that last weeks indoors.
You’ll need just three things: a bulb, a pot with drainage, and patience. Plant the bulb halfway in well-draining soil, water lightly, and place it in a spot with bright, indirect light.
The key is consistency—too much water wakes them up too soon, while too little keeps them dormant. After 8 weeks, you’ll see that first sprout, and the anticipation is half the fun.
What you end up with is a dramatic centerpiece that smells faintly sweet and brings holiday cheer without needing a greenhouse. The bulbs can be stored after blooming and replanted next season, so you’re not just buying flowers—you’re building a tradition.
Just don’t let them sit in cold drafts or they’ll refuse to bloom.
Works for any indoor space, from sunny windowsills to living room corners. Here’s how to time it perfectly for your climate—whether you want blooms for Christmas, Valentine’s Day, or just because. Let’s get those bulbs growing!
📚 In This Guide
- What you need
- Instructions
- Tips and common mistakes
- Wrapping up and next steps
What you need
- ● 1–3 amaryllis bulbs (choose healthy, firm bulbs, 6–8 inches in diameter).
- ● 1–2 well-draining pots (6–8 inches wide with drainage holes).
- ● Potting mix (use a well-draining blend like cactus/succulent mix or add perlite/pumice to regular soil).
- ● Distilled or rainwater (tap water can cause bulb rot over time).
- ○ Fertilizer (balanced 10-10-10 or bulb-specific fertilizer, optional but recommended).
- ● Gloves (to protect hands from sharp bulb edges).
- ● Trowel or spoon (for planting).
- ● Spray bottle (for gentle watering).
- ○ Decorative pebbles or moss (optional, for aesthetics).
- ● Bright, indirect light source (south-facing window or grow lights).
How to grow stunning amaryllis blooms indoors
Here's how to coax those bold, trumpet-shaped blooms from dormant bulbs—no greenhouse needed.
🪴 Step 1: Select and Prepare Your Bulbs
Choose healthy bulbs that are firm and free of soft spots or mold. The larger the bulb—typically 6-8 inches in diameter—the more dramatic your blooms will be. I like to soak my bulbs in lukewarm water for about 1 hour before planting. This jumpstarts hydration and helps the roots establish faster once planted.
Use a well-draining 6-8 inch pot with drainage holes—terracotta works best because it breathes and prevents root rot. Fill the bottom 2 inches with potting mix that’s lightweight and airy, like a cactus or succulent blend. The goal is to mimic the bulb’s natural dry, sandy environment.
🌱 Step 2: Plant the Bulb Correctly for Strong Growth
Place the bulb in the pot so that half of it sits above the soil line—this is critical. The top half should remain exposed to light, while the bottom half gets buried. Press the soil gently around the bulb but don’t pack it down too firmly. You want the roots to have room to spread without resistance.
Water lightly after planting, just enough to moisten the soil around the bulb. Avoid soaking it, as amaryllis bulbs rot easily when overwatered. Place the pot in a warm spot—around 65-75°F—where it gets bright, indirect light. A south-facing window is ideal, but avoid direct midday sun, which can scorch the leaves.
☀️ Step 3: Encourage Blooming with Light and Patience
Keep the soil slightly moist but never soggy—stick your finger in the soil to check. If the top inch feels dry, water gently until it drains through the bottom. You’ll notice sprouts emerging in 4-6 weeks, followed by long, strap-like leaves. This is your signal that the bulb is waking up and storing energy for blooms.
Once the leaves reach about 6 inches tall, start fertilizing lightly with a balanced liquid fertilizer (like 10-10-10) diluted to half strength. Feed every 4-6 weeks to support strong growth. The key here is consistency—too much fertilizer can burn the roots, while too little slows down blooming.
⏰ Step 4: Trigger Flowering with Strategic Light Changes
After 8-10 weeks of growth, your amaryllis will be ready for its blooming trigger. Move the pot to a cooler spot—around 55-60°F—for 2-4 weeks. This mimics the natural seasonal shift that prompts flower buds to form. You’ll see a flower stalk emerge from the center of the bulb, followed by a bud that unfurls into 2-6 dramatic blooms within a week.
Once the blooms open, return the plant to its warm, bright spot and enjoy the show. Deadhead spent flowers by snipping the stalk at the base, but leave the leaves intact—they continue feeding the bulb for next year’s blooms. Water as usual, but reduce fertilizer to half strength to avoid overstimulating new growth before dormancy.
🌿 Step 5: Care for Post-Bloom and Dormancy
After flowering, let the leaves yellow naturally—this is how the bulb stores energy for next season. Gradually reduce watering over 4-6 weeks until the leaves are fully brown and the pot feels light. At this point, stop watering entirely and place the pot in a dry, dark spot for 8-10 weeks of dormancy.
Here’s the thing—don’t skip dormancy. Skipping this step weakens the bulb and reduces future blooms. After the rest period, repeat the process: soak the bulb, replant, and watch the cycle begin anew. With proper care, a single amaryllis bulb can bloom for years, producing 4-6 stunning flowers per stalk each season.
Tips & tricks for perfect amaryllis blooms
Here's what I learned after watching my first amaryllis bloom—these details make all the difference between a modest show and show-stopping flowers.
Soaking Secret: That 1-hour lukewarm water soak in Step 1 isn't just optional—it's your secret weapon. Think of it as giving your bulb a hydration jumpstart. If you're impatient, you can extend this to 2 hours maximum (but don't overdo it), especially with larger bulbs that need extra moisture to wake up their roots. Just remember to drain them completely before planting.
Light Positioning: In Step 2, when placing your pot in that warm 65-75°F spot, rotate it a quarter turn every few days. This prevents the bulb from leaning toward one light source, which can cause uneven growth. I've seen bulbs grow crooked stems just from sitting too long in one position—trust me, you want that flower stalk to grow straight up.
Fertilizer Timing: The 4-6 week feeding schedule in Step 3 is perfect, but here's the thing about that first feeding: wait until those leaves hit exactly 6 inches tall before applying. Anything earlier and you're basically feeding a plant that can't yet use the nutrients effectively. And when you do fertilize, always water first—this prevents root burn from the concentrated fertilizer.
Cooling Strategy: For that crucial 55-60°F cooling period in Step 4, I've found a basement corner works beautifully if your home doesn't have a naturally cool spot. The key is consistency—don't let the temperature fluctuate wildly. If you notice the flower stalk emerging before the 2-4 weeks are up, that's actually a good sign! It means your bulb is ready for blooming and just needs that final cool trigger.
Pro Tips for Amaryllis Flower Bulbs
- Here's what I learned after watching my first amaryllis bloom—these details make all the difference between a modest show and show-stopping flowers.
- Soaking Secret: That 1-hour lukewarm water soak in Step 1 isn't just optional—it's your secret weapon.
- Light Positioning: In Step 2, when placing your pot in that warm 65-75°F spot, rotate it a quarter turn every few days.
Frequently asked questions
Got questions about growing amaryllis flower bulbs?
Here are answers to the most common ones—so you can enjoy those stunning blooms with confidence!
How do I know if my amaryllis bulb is healthy before planting?
A healthy amaryllis bulb should feel firm, not mushy, and have no soft spots or mold. Look for a single, sturdy stem (or dormant bud) at the top and smooth, papery skin. If the bulb smells bad or feels squishy, it’s best to toss it—fungal issues can spread quickly. Pro tip: Gently brush off old soil or debris before planting to avoid pests.
Can I plant my amaryllis bulb in water instead of soil?
Yes! Planting in water is a popular method for beginners. Simply place the bulb in a clear vase or jar with pebbles and enough water to cover the bottom half. Change the water weekly to prevent bacteria. However, soil-grown bulbs often produce larger, longer-lasting blooms. For best results, try both methods—water for quick sprouts, soil for show-stopping flowers!
Why isn’t my amaryllis bulb sprouting after 4–6 weeks?
Patience is key! Amaryllis bulbs need consistent warmth (70–75°F) and indirect light to sprout. If your bulb isn’t waking up, check these fixes:
- Move it to a warmer spot (like near a sunny window or under a grow light).
- Wait longer—some bulbs take up to 8 weeks to sprout.
- Avoid overwatering—soggy soil can rot the bulb.
How do I make my amaryllis rebloom next year?
Reblooming takes care! After flowers fade, stop fertilizing and let the foliage die back naturally. Once leaves yellow (6–8 weeks later), reduce watering and place the bulb in a cool, dark spot (60–65°F) for 8–10 weeks—this mimics winter dormancy. Replant in spring with fresh soil and fertilizer for another stunning show!
What can I do if my amaryllis leaves turn yellow?
Yellow leaves usually mean overwatering or poor drainage. First, check the soil—it should feel slightly dry 1–2 inches down. Repot if needed with well-draining mix (add perlite or sand). If yellowing starts at the bottom, it’s natural aging; trim dead leaves but leave healthy ones to feed the bulb. Warning: Yellowing with mushy stems = rot—act fast by trimming affected areas and adjusting water.
Wrapping up and next steps
Growing amaryllis flower bulbs is a rewarding journey that brings stunning blooms into your home with minimal effort—perfect for both beginners and plant enthusiasts! 🌸 With the right care, you’ll enjoy vibrant, show-stopping flowers in just 8 weeks, proving that patience and a little attention to detail pay off beautifully.
Ready to transform your space? Grab those bulbs, follow the steps, and watch your indoor garden thrive. Next, explore creative ways to display your amaryllis or troubleshoot common challenges—your blooming success story starts now!