
Flowers
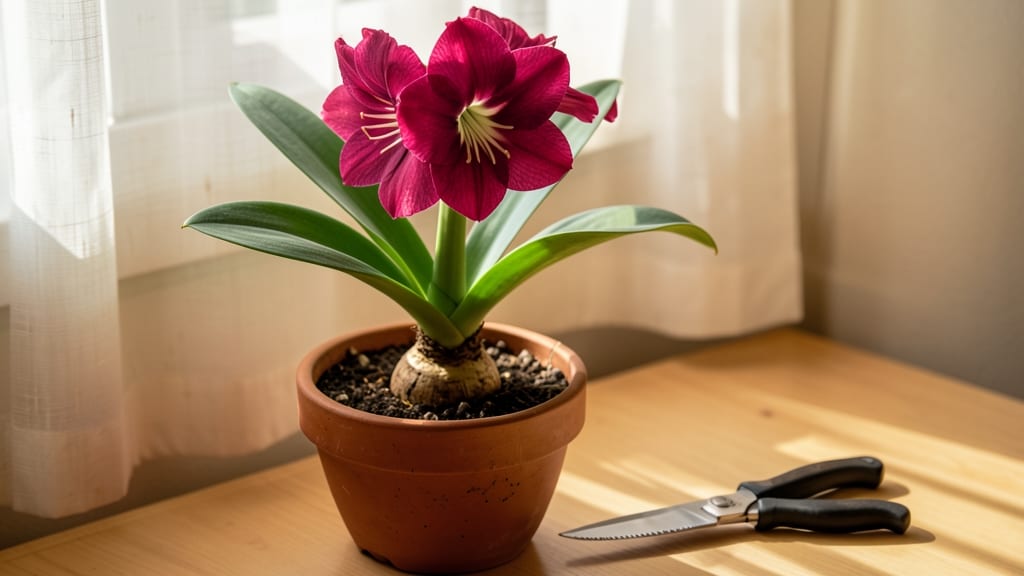
Cutting amaryllis flower stalks at the right time saves your bulb for next year’s showstopping blooms. ✂️ I’ve learned the hard way—skipping this step means weaker growth and fewer flowers.
The key is timing: wait until the blooms fade completely and the stalk turns brown, then trim just above the bulb.
You’ll need only clean, sharp scissors or pruners—no fancy tools. After cutting, leave the bulb in its pot for another 4-6 weeks to recover. Reduce watering slightly during this period, but don’t let the soil dry out completely.
This resting phase is what builds energy for next season’s dramatic 2-foot-tall spikes.
The payoff? A healthy bulb that stores enough energy to produce 3-5 stems next year instead of just one. The secret is patience—rushing the process weakens the bulb, while proper care turns a single-season show into a multi-year display. Ready to keep your amaryllis thriving?
Bonus tip: If you fertilize lightly after blooming, use a balanced 10-10-10 mix to support bulb recovery. Just avoid heavy feeding until new growth appears in spring. That’s when the real magic happens.
📚 In This Guide
- What you need
- Instructions
- Tips and common mistakes
- Wrapping up and next steps
What you need
- ● Sharp pruning shears or clean garden scissors – Choose a pair with stainless steel blades (4–6 inches long) for precision cuts. (Avoid dull tools—they crush stems!)
- ● Rubbing alcohol (70% isopropyl) or bleach solution – 1 part bleach to 9 parts water to sterilize tools before/after cutting. (Prevents bacterial spread!)
- ○ Disposable gloves (optional but recommended) – Protects hands from sap and bacteria. (Latex or nitrile works best.)
- ● Compost bin or paper bag – For disposing of cut flower stalks (or repurposing as mulch).
- ● Hydrogen peroxide (3%) – Spray on cuts to boost healing and deter rot.
- ● Sharpie or marker – Label bulbs if storing for future growth.
- ● Newspaper or cardboard – For a clean workspace (keeps surfaces tidy!).
- ● Pruning saw (for stubborn stalks) – Only needed if stalks are thicker than 1 inch.
Step-by-Step guide for trimming amaryllis flower stalks
Here's how to cut back your amaryllis properly—it's easier than you think.
🌱 Step 1: Wait Until Flowers Fully Fade
Don't trim too soon. Wait until the flower stalk turns completely brown and crispy, about 2-4 weeks after blooming. The stalk will feel dry to the touch and may even crumble slightly. This ensures the plant has redirected all its energy back to the bulb for next season's growth.
If you cut too early, you'll remove nutrients the bulb needs to store for future blooms. I always check by gently tugging on the stalk—if it pulls away easily, it's ready. Patience here pays off with bigger, healthier blooms next year.
✂️ Step 2: Cut at the Base with Clean Tools
Use sharp, sterilized pruners or a clean knife to make your cut. Angle the blade slightly downward about ½ inch above the bulb. This prevents water from pooling on the bulb, which can cause rot. A straight cut at the base risks damaging the emerging leaves.
Wipe your tools with rubbing alcohol between cuts if you have multiple plants. I like to make the cut just outside the bulb's shoulder—this hidden spot keeps the plant looking tidy while protecting the growth point. Never cut into the bulb itself, even if the stalk looks stubborn.
💧 Step 3: Care for the Plant After Trimming
Reduce watering immediately after cutting. Let the soil dry out between waterings for about 2 weeks, then resume normal care. This mimics the plant's natural dormancy period. Overwatering now can cause the bulb to rot before it has a chance to store energy.
Move the pot to a spot with bright, indirect light—a north-facing window works well. You'll notice new leaves emerging from the bulb's top within 3-4 weeks. These leaves are crucial for building up the bulb's energy reserves for next year's spectacular blooms.
☀️ Step 4: Encourage Strong Regrowth
Fertilize lightly with a balanced, water-soluble fertilizer (like 10-10-10) diluted to half strength, starting 4-6 weeks after trimming. Apply it when you see new leaf growth appearing. Too much fertilizer now can burn the tender new shoots.
Keep the plant in 60-75°F temperatures and maintain bright light. You'll know you're doing it right when the leaves grow 4-6 inches tall and develop a deep green color. This is when the bulb is actively storing energy for next season's flower stalk.
⏰ Step 5: Prepare for Next Year's Blooms
About 8-10 weeks after trimming, when the leaves start yellowing naturally, you can reduce watering again to signal dormancy. This prepares the bulb for its resting period. Stop fertilizing completely during this time—you're letting the bulb focus on storing energy.
In late summer or early fall, you can repot the bulb if needed, using fresh potting mix. This gives the bulb a fresh start before its next growth cycle. The key is consistency—treating your amaryllis this way year after year guarantees those stunning, show-stopping blooms every season.
Tips & tricks for perfect amaryllis trimming
Here's what nobody tells you about keeping your amaryllis thriving after the bloom fades.
Timing is Everything: The 2-4 week window in Step 1 is non-negotiable for healthy regrowth. I learned this the hard way after cutting too soon and getting weak stems the next season. Look for the stalk to feel brittle—if it snaps cleanly when bent, it's ready. This dryness signals the bulb has fully absorbed nutrients back into itself.
Tool Technique: In Step 2, that slight downward angle when cutting isn't just about aesthetics—it's about bulb health. The angled cut prevents water from sitting on the bulb's shoulder, which would trap moisture and lead to rot. For stubborn stalks, gently twist while cutting to avoid tearing the emerging leaves. I keep a small spray bottle of rubbing alcohol handy to sterilize tools between cuts.
Post-Trimming Care: The 2-week watering break in Step 3 mimics the plant's natural dormancy cycle. Too many gardeners skip this and wonder why their bulbs don't rebloom. During this time, I place a humidity tray nearby to prevent the soil from drying out completely—just enough moisture to keep the bulb alive without encouraging rot. The new leaves that appear in 3-4 weeks are your reward for patience.
Fertilizer Timing: That 4-6 week window for fertilizing in Step 4 is crucial because it aligns with the bulb's energy storage phase. I always use a weak solution—half-strength fertilizer—to avoid burning the tender new shoots. The deep green color you should see in those leaves is your confirmation that the bulb is actively storing carbohydrates for next year's bloom.
Pro Tips for Cut Amaryllis Flower Stalks
- Here's what nobody tells you about keeping your amaryllis thriving after the bloom fades.
- Timing is Everything: The 2-4 week window in Step 1 is non-negotiable for healthy regrowth. I learned this the hard w...
- Tool Technique: In Step 2, that slight downward angle when cutting isn't just about aesthetics—it's about bulb health...
Frequently asked questions
Got questions about cutting amaryllis flower stalks? You’re not alone! Here are some of the most common queries—plus clear, no-fuss answers to keep your plant thriving.
When is the best time to cut amaryllis flower stalks?
Trim the flower stalk after the blooms fade but before it turns yellow or brown. This usually happens 4–6 weeks after flowering. Cutting too early can stress the bulb, while waiting too long may drain its energy. Aim for a clean cut just above the bulb to encourage next season’s growth.
Should I cut the entire stalk or just the dead flowers?
Remove only the dead or wilted blooms at first—this prevents energy loss. Once the entire stalk turns yellow and dries up (about 6–8 weeks post-bloom), cut it all the way off at the base. Leaving a dried stalk can attract pests or rot. Think of it like pruning a spent rose: tidy up, but don’t rush!
What if my amaryllis stalk is still green when I want to cut it?
If the stalk is still green but the flowers are done, wait! A green stalk means the bulb is still storing energy. Only cut it when it’s fully yellow and crispy. If you’re impatient, you can snip it at the base—but be prepared for a longer dormancy period before next year’s blooms.
Can I save the cut flower stalk for arrangements?
Amaryllis blooms make stunning cut flowers. Place them in water immediately after cutting (use clean, room-temperature water) and change it every 2–3 days. Add a flower food preservative to extend their vase life. Just avoid cutting too close to the bulb—leave at least 1–2 inches of stalk attached to the bulb.
What do I do if the stalk rots after cutting?
Rotting usually happens from overwatering or cutting too close to the bulb. If you notice mushy, dark spots or a foul smell, trim the rotted section above the healthy tissue and let the bulb dry out for a few days. Reduce watering until new growth appears. Prevention tip: Always use sterile scissors and avoid wet foliage around the bulb!
Wrapping up and next steps
Cutting amaryllis flower stalks may seem intimidating, but with the right technique, you’re already setting the stage for next season’s stunning blooms! 🌸 Remember to use clean tools, trim at the right angle, and avoid over-pruning—your plant will thank you with vibrant growth.
Now that you’ve mastered the art, why not expand your gardening skills? Try propagating your amaryllis bulbs or experimenting with other houseplants to keep your green thumb thriving.